

If you’ve been blogging for a while, you’ve probably would have heard of Tailwind.
Perhaps you’ve even read amazing traffic and income reports from fellow bloggers who claimed much of their successes to Tailwind for Pinterest.
I admit I was one of them. Since the registration was free, I signed up for a Tailwind account without a second thought. Tailwind also offers the first 100 scheduled pins for free.
To be honest, I felt a wee bit of overwhelmed. After using all the free 100 pins, I didn’t bother to go back.
But I still continued manually pinning my content to Pinterest every day for about 1 month. It’s intensely time-consuming, to say the least. I almost wanted to stop pinning on Pinterest altogether.
But numbers don’t lie…
Looking at the traffic report, I was surprised! My relatively new Pinterest profile was getting 5x more traffic to my blog than my Instagram account (with >5000 followers).


I know plenty of other people who have managed to grow much quicker and bigger than I have. I’m nowhere near the “you’ve made it” Pinterest gurus or Tailwind experts. By writing this I hope that I can help those who have the opportunity to go down the same path.
In this article, I’m going to show you how to effectively use Tailwind to schedule your Pinterest pins in a few simple steps.
Without further ado, let’s dive in.
Related reading:
- 10 strategic ways to use Pinterest to drive blog traffic
- Pinterest for Business: Step-by-step guide to getting started on Pinterest
- How to Use Tailwind to Boost your Blog Traffic
Note – I am a Tailwind affiliate. If you make a purchase through this or any of the links on this post I’ll earn a small commission at no extra cost to you. But this doesn’t influence my recommendation. Thank you all for your support!
How To Use Tailwind to Schedule Your Pinterest Pins
Step 0: Create a Tailwind account
First and foremost, you need to have a Tailwind account.
- Click here to get started. ( this special link includes free 100 scheduled pins + $15 credit)
Tailwind is the most popular Pinterest scheduler in the market that lets you manage and auto-publish images with your blog post links to Pinterest, with one single click. Specialized in visual web, they also released an amazing scheduler for Instagram.
The process of setting up a Tailwind account is pretty easy and straight forward.
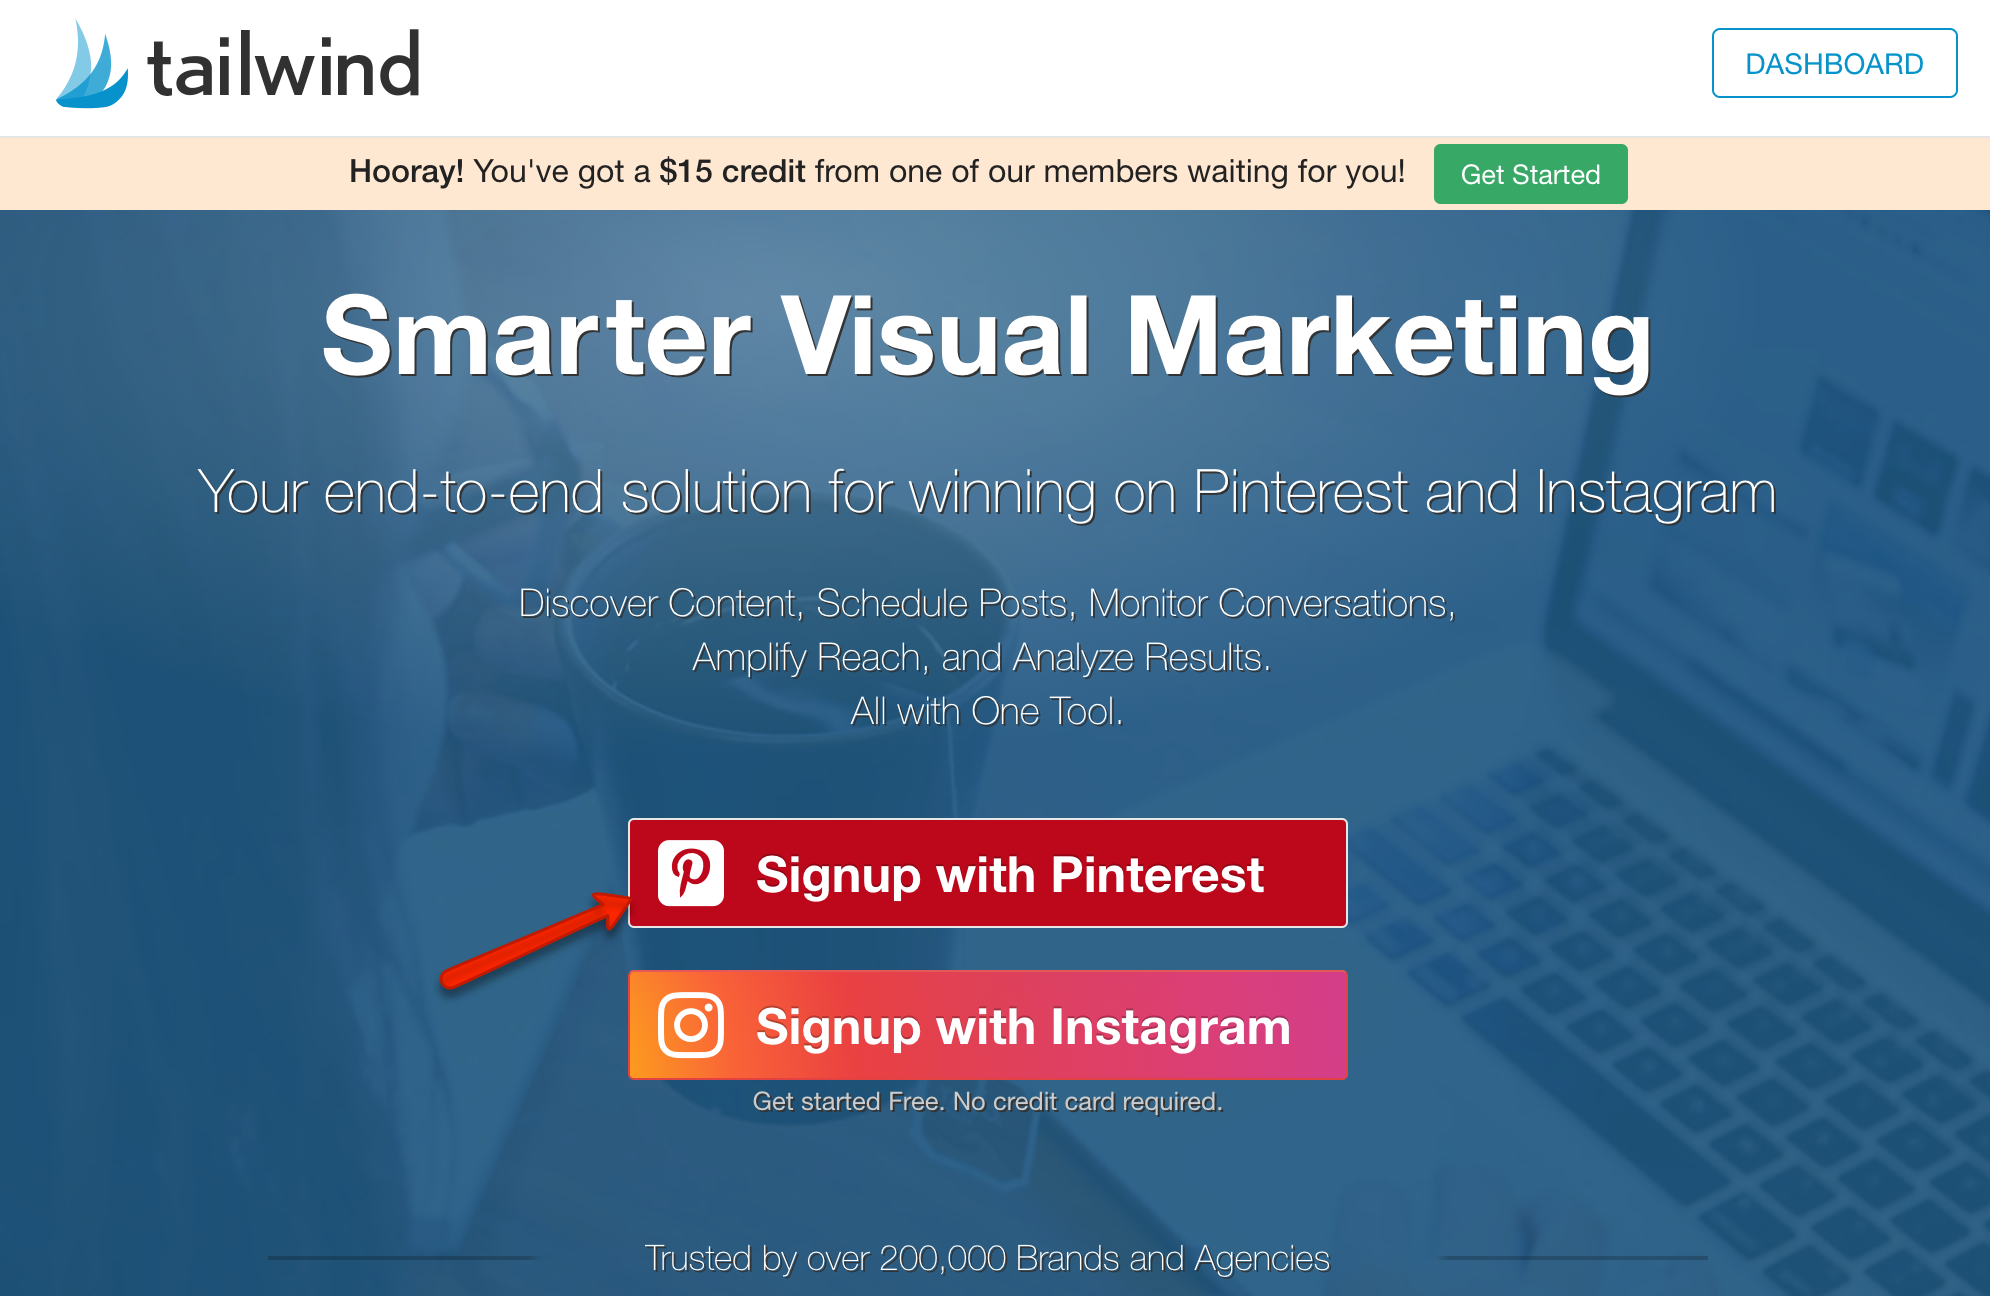

- Click here to get 100 Free Pins + extra $15 credit (Tip: use this $15 credit to get another month for free)
- Click “Signup with Pinterest”.
- Enter email ID and password of the Pinterest account that you want to use.
- To connect your Pinterest account with Tailwind, click “Authorise app”.
- That’s it. You can now use Tailwind to manage your Pinterest account.
Step 1: Get your Pin-Worthy Images ready
Each social network has different ideal image sizes.
Here’s the optimal dimensions for Pinterest pin sizes.
- Short pin: 600×900
- Medium pins: 600x 1260 (minimum)
- Long pins: 600×1560
You’ll need to create a pin-worthy image and save the picture somewhere within your blog post.
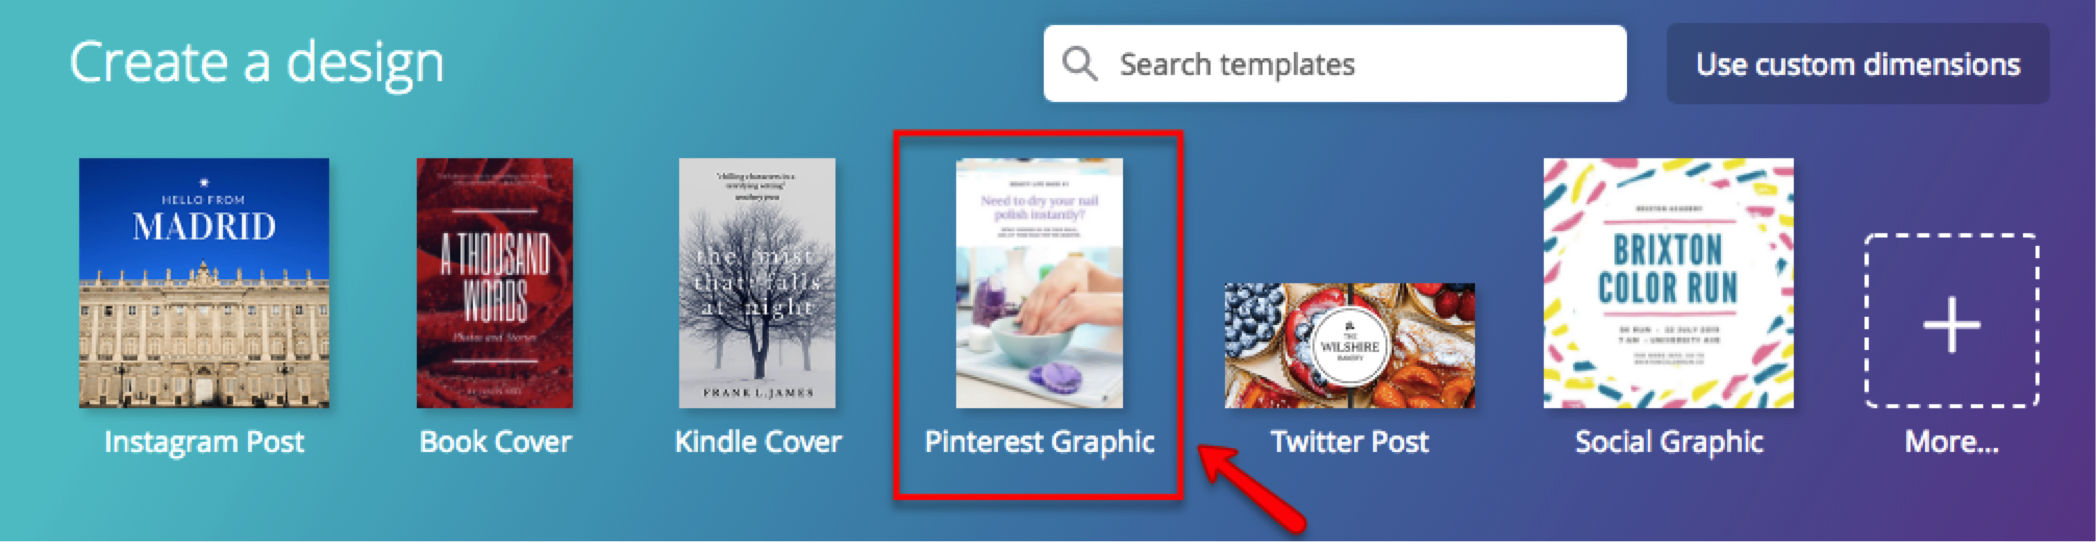
I use Canva to create social media images. It’s free to use and there’s an option to upgrade to unlock more features.
The interface is very user-friendly. There are a plethora of beautiful templates with exact sizes that give you a huge head start.
To design your own pin, go to Canva and select “Pinterest Graphic” on the top bar of your dashboard. For each blog post, I’ll create 3-5 pins and see which works the best.

Quick tips for making a great pin:
- Use high-quality images
- Go for vertical pins
- Don’t overcrowd your images with text. Less is more.
- Don’t forget to add your web URL at the bottom of your image
If you have a budget, you can outsource this design work for cheap.
Step 2: Install a one-click scheduling extension
Once your post is ready and live on your site, it’s time to share it with the world with the help of Tailwind scheduler and Tribes.
To save more time, download the Tailwind app to your browser. It lets you share one or more posts all in one click.
When you first set up a Tailwind account, you’ll see this message popping up on your screen. Click “Install Chrome Extension” button or use this link to download the app at Chrome Store.
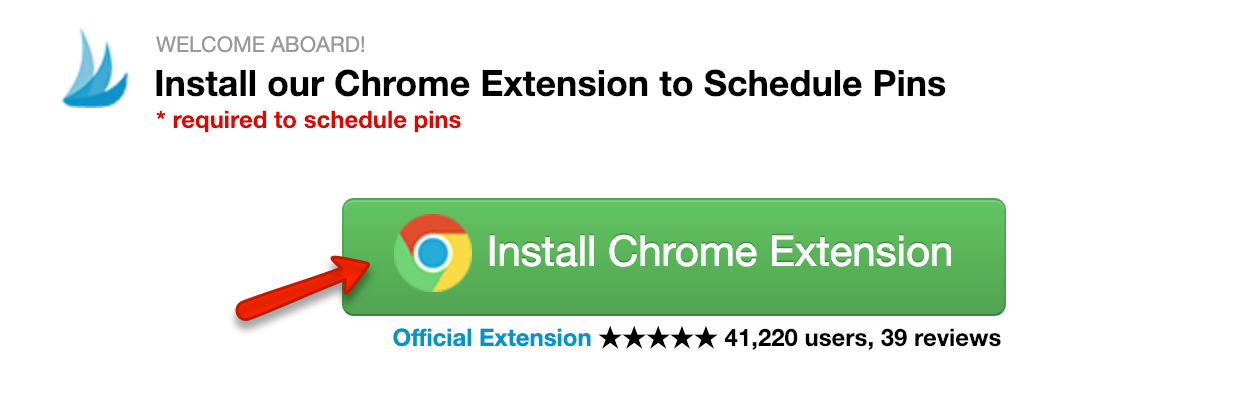

You only need to do this step one time only. It takes a couple of seconds to set it up and will save you loads of time later.
Once it’s completed, you’ll see a tiny Tailwind Publishing icon on the top right corner of your window (as in the picture below).

Step 3: Share the pin to Tailwind
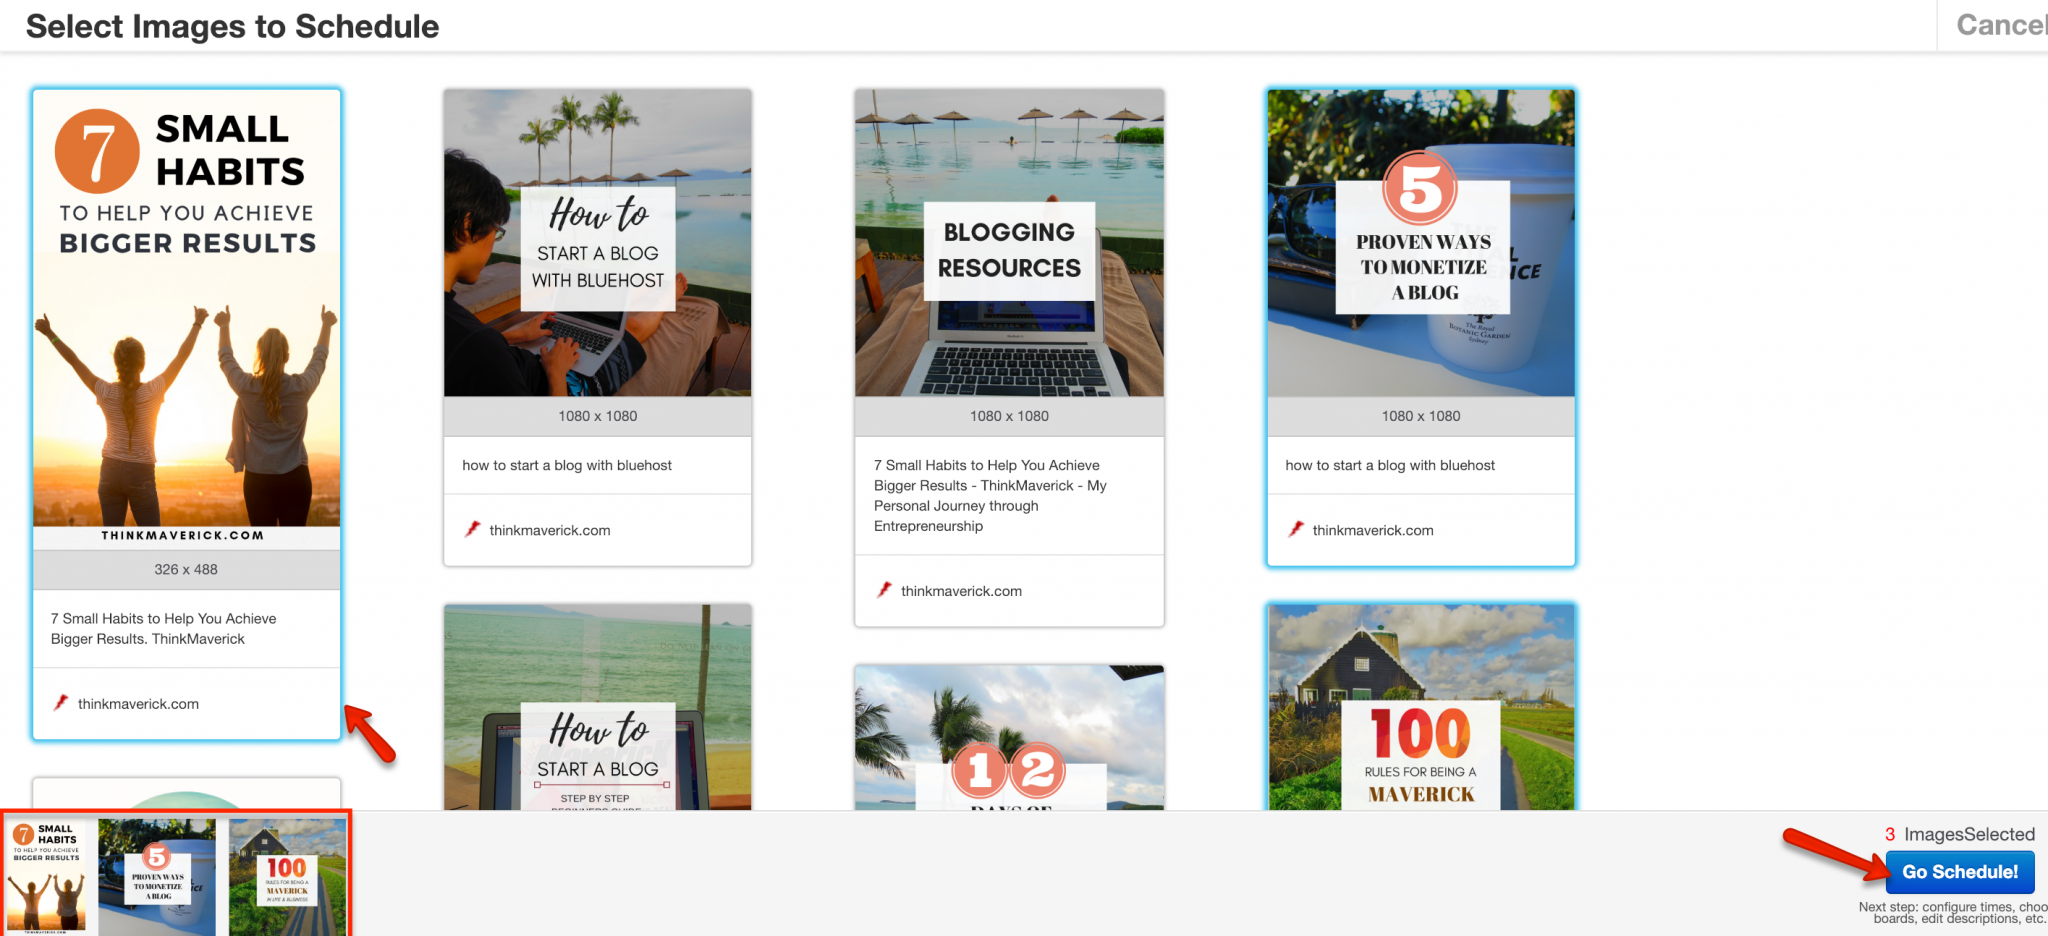

Next, select any images that you’d like to share by clicking on each of them. Once it’s selected, you’ll see a blue line around them.
And you’ll see all the chosen graphics at the bottom of your page. When you’re done, click “Go Schedule!” button at the bottom right corner.
Step 4: Choose Your Pinterest Boards
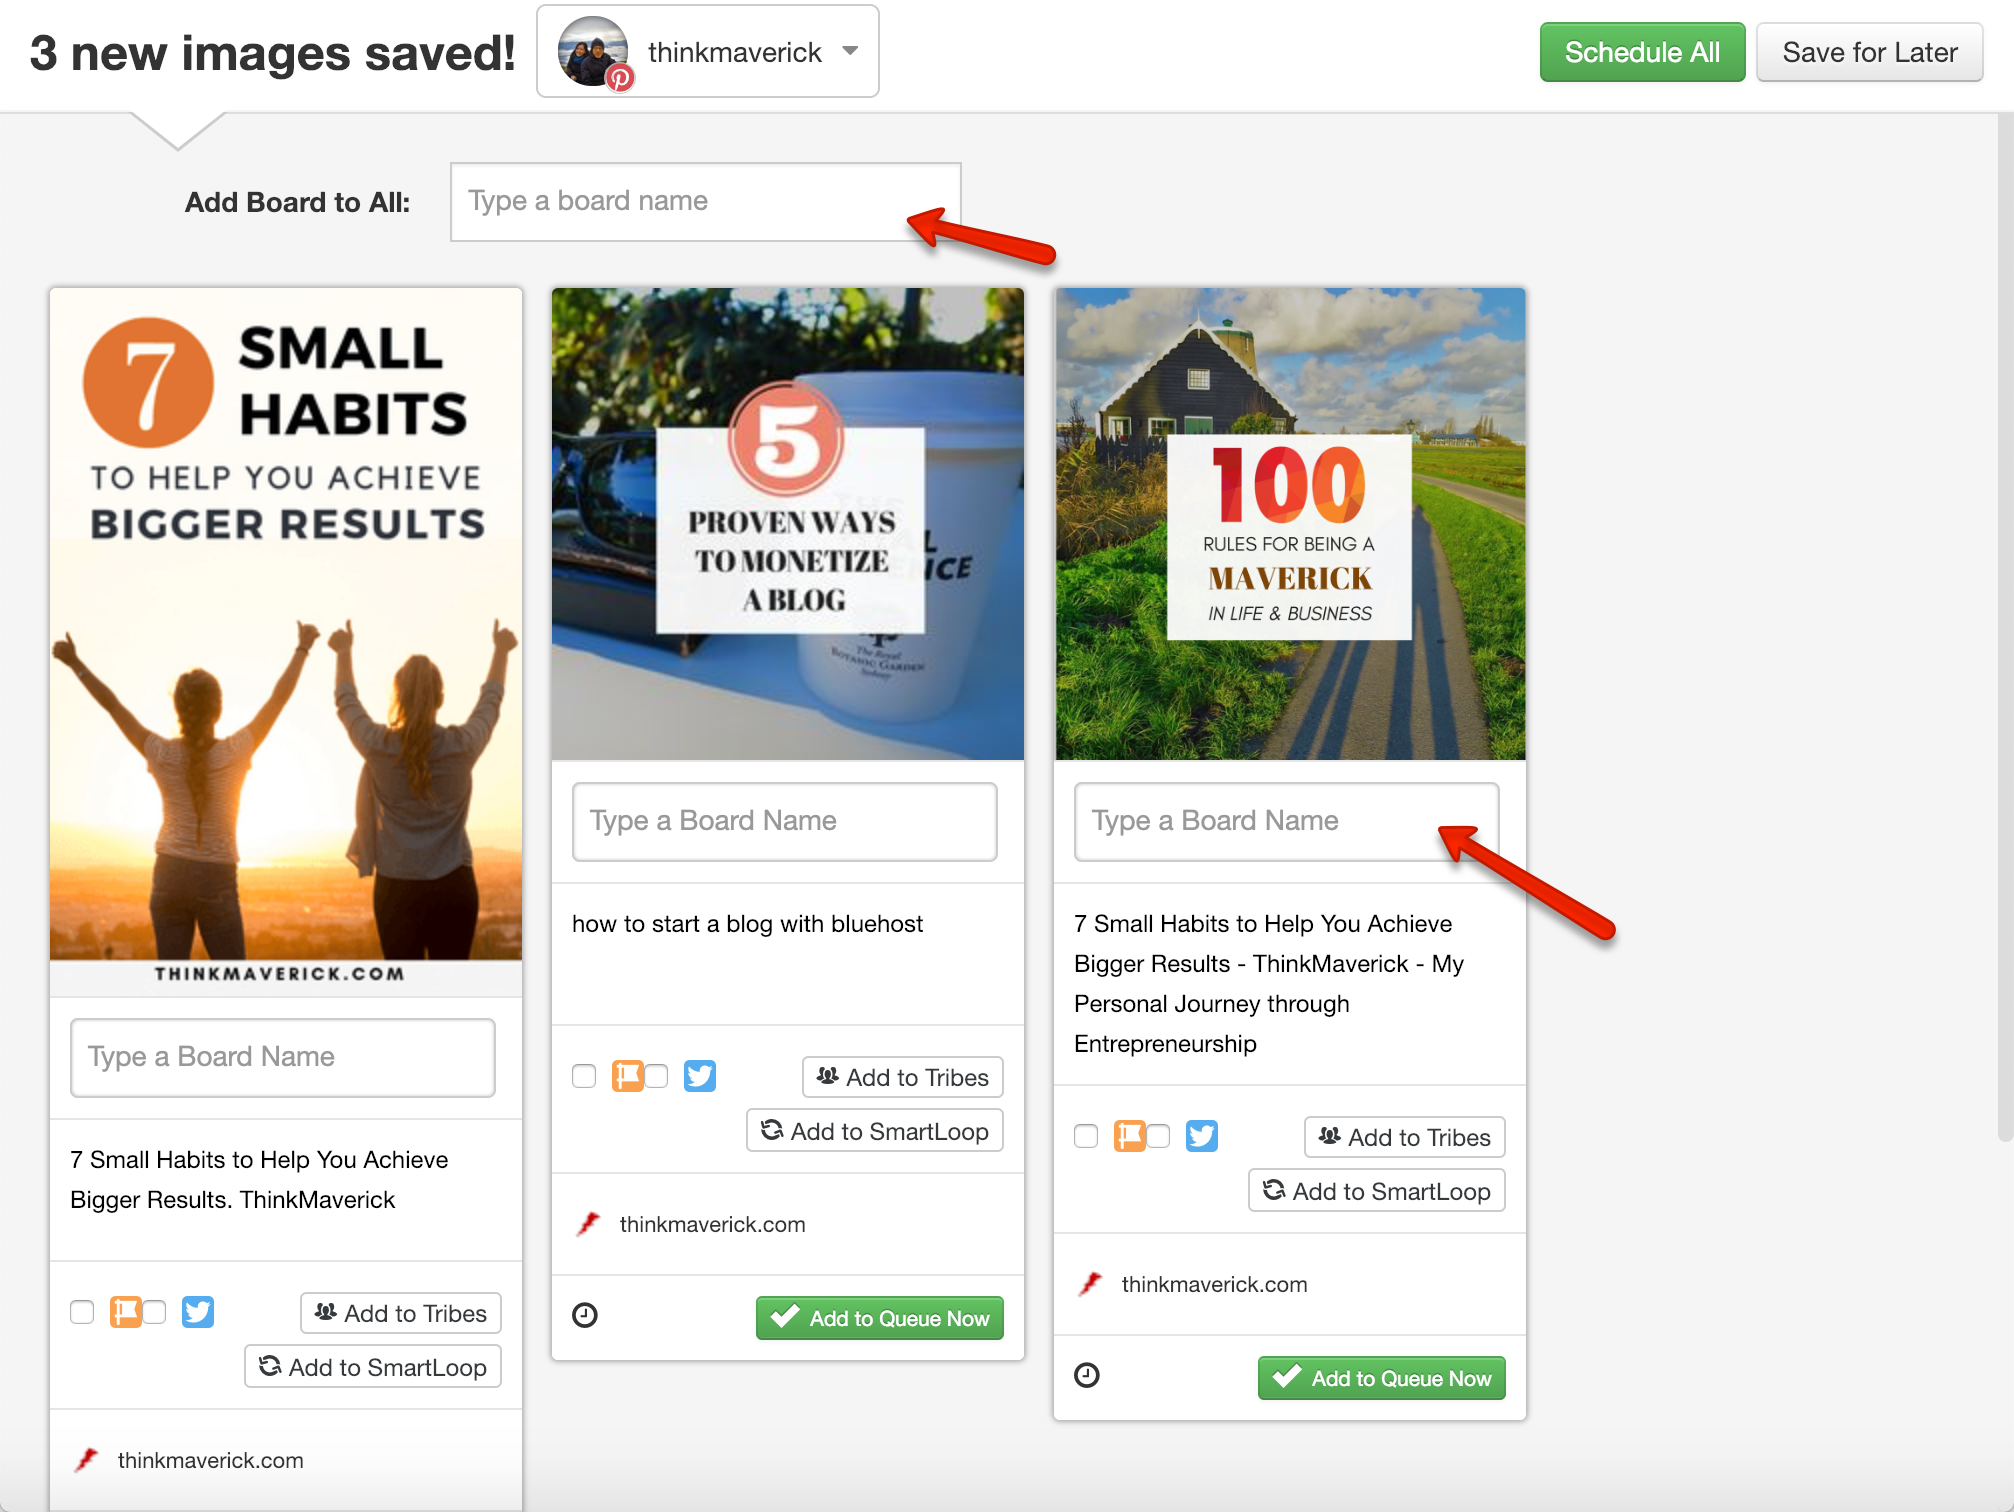

- “Add Board to All” in the top bar – Choose the boards you like to schedule and it will apply to all the selected graphics.
- Add the boards separately at the bottom of each pin
Remember to schedule pins to your own Pinterest business board too.
Step 5: Write a great pin description
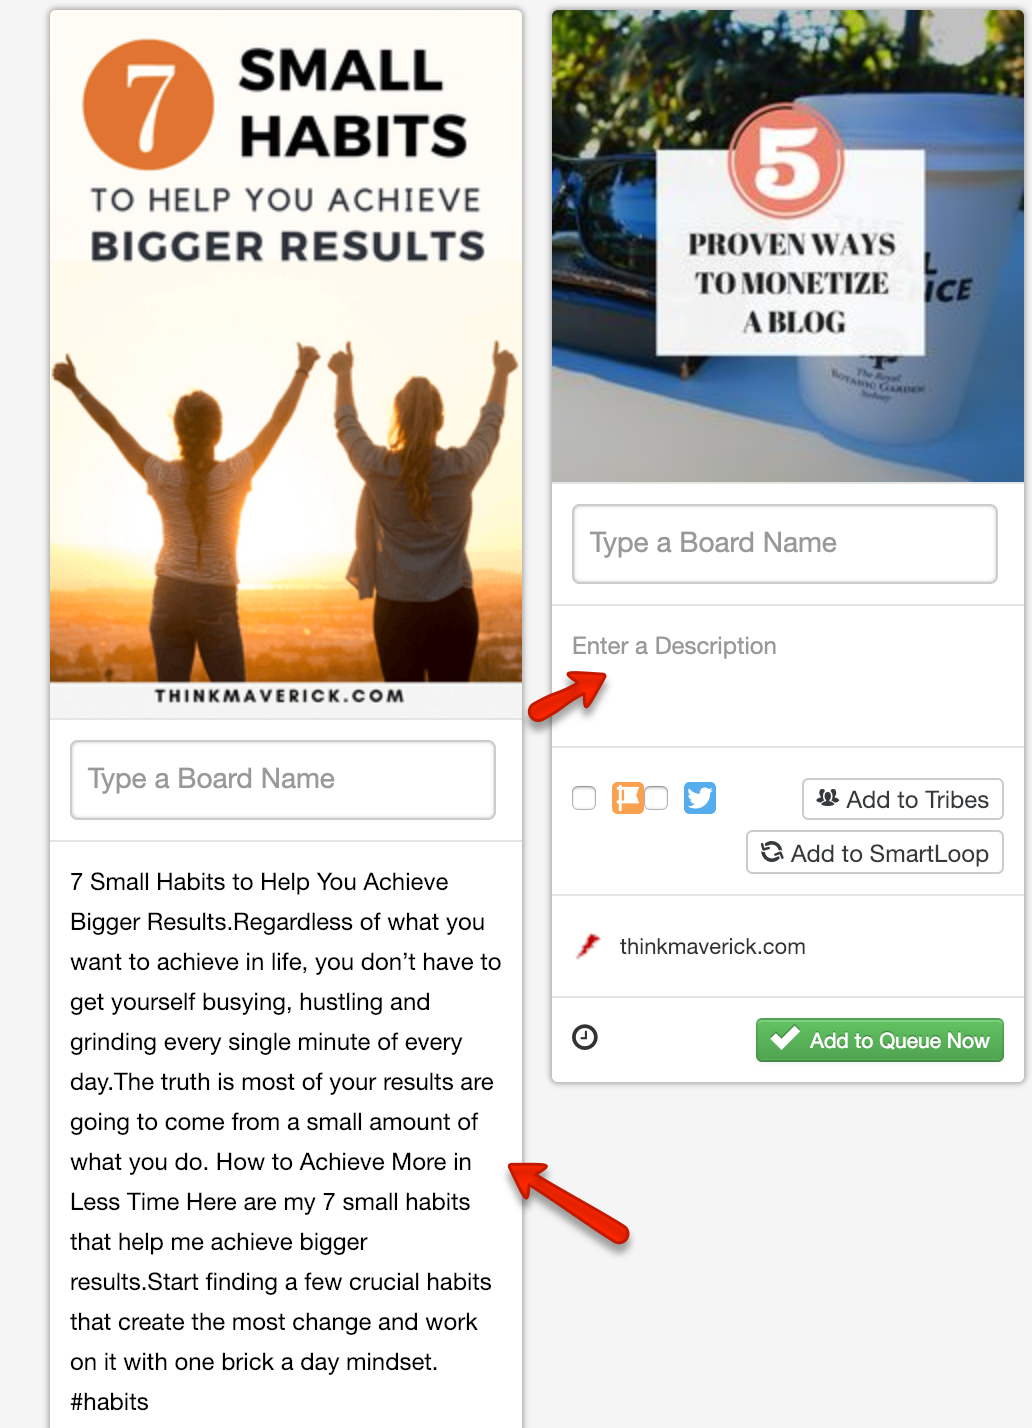

Make sure you spend some time to craft a thoughtful description (up to 500 characters) for your pin- include relevant keywords, phrases, and hashtags.
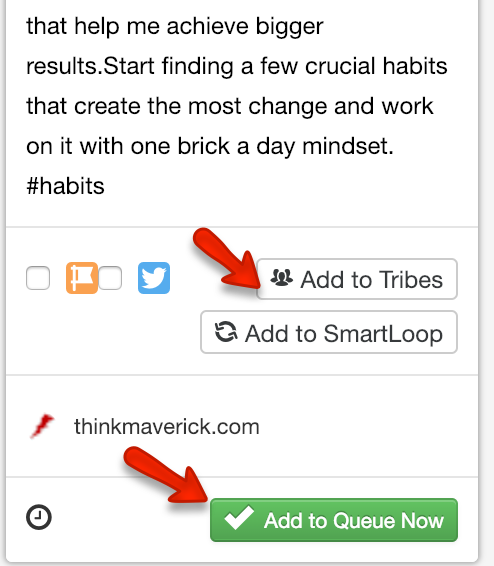
Step 6: Add to Tailwind Tribes
Tailwind Tribes is the key to getting tremendous amount of repins and traffic to your blog. It took me a while to really explore and engage in the Tailwind Tribes. I’d say, it’s a powerful tool that you should use it from day one!
Tribes feature allows you to connect with other bloggers around your niche, make it easy to find high-quality content as well as promote your own pins.
Another great thing about Tailwind Tribes is the weekly analytics report. You’ll receive the performance report directly in your inbox every week, informing you how many repins you get, which Tribe group works the best for you, which pins get the most shares and other useful details.
To add a pin to your tribe, all you need to do is click on “Add to Tribes” icon below the pin. Then select the groups that you’d like to share to and click “Add to Queue”.

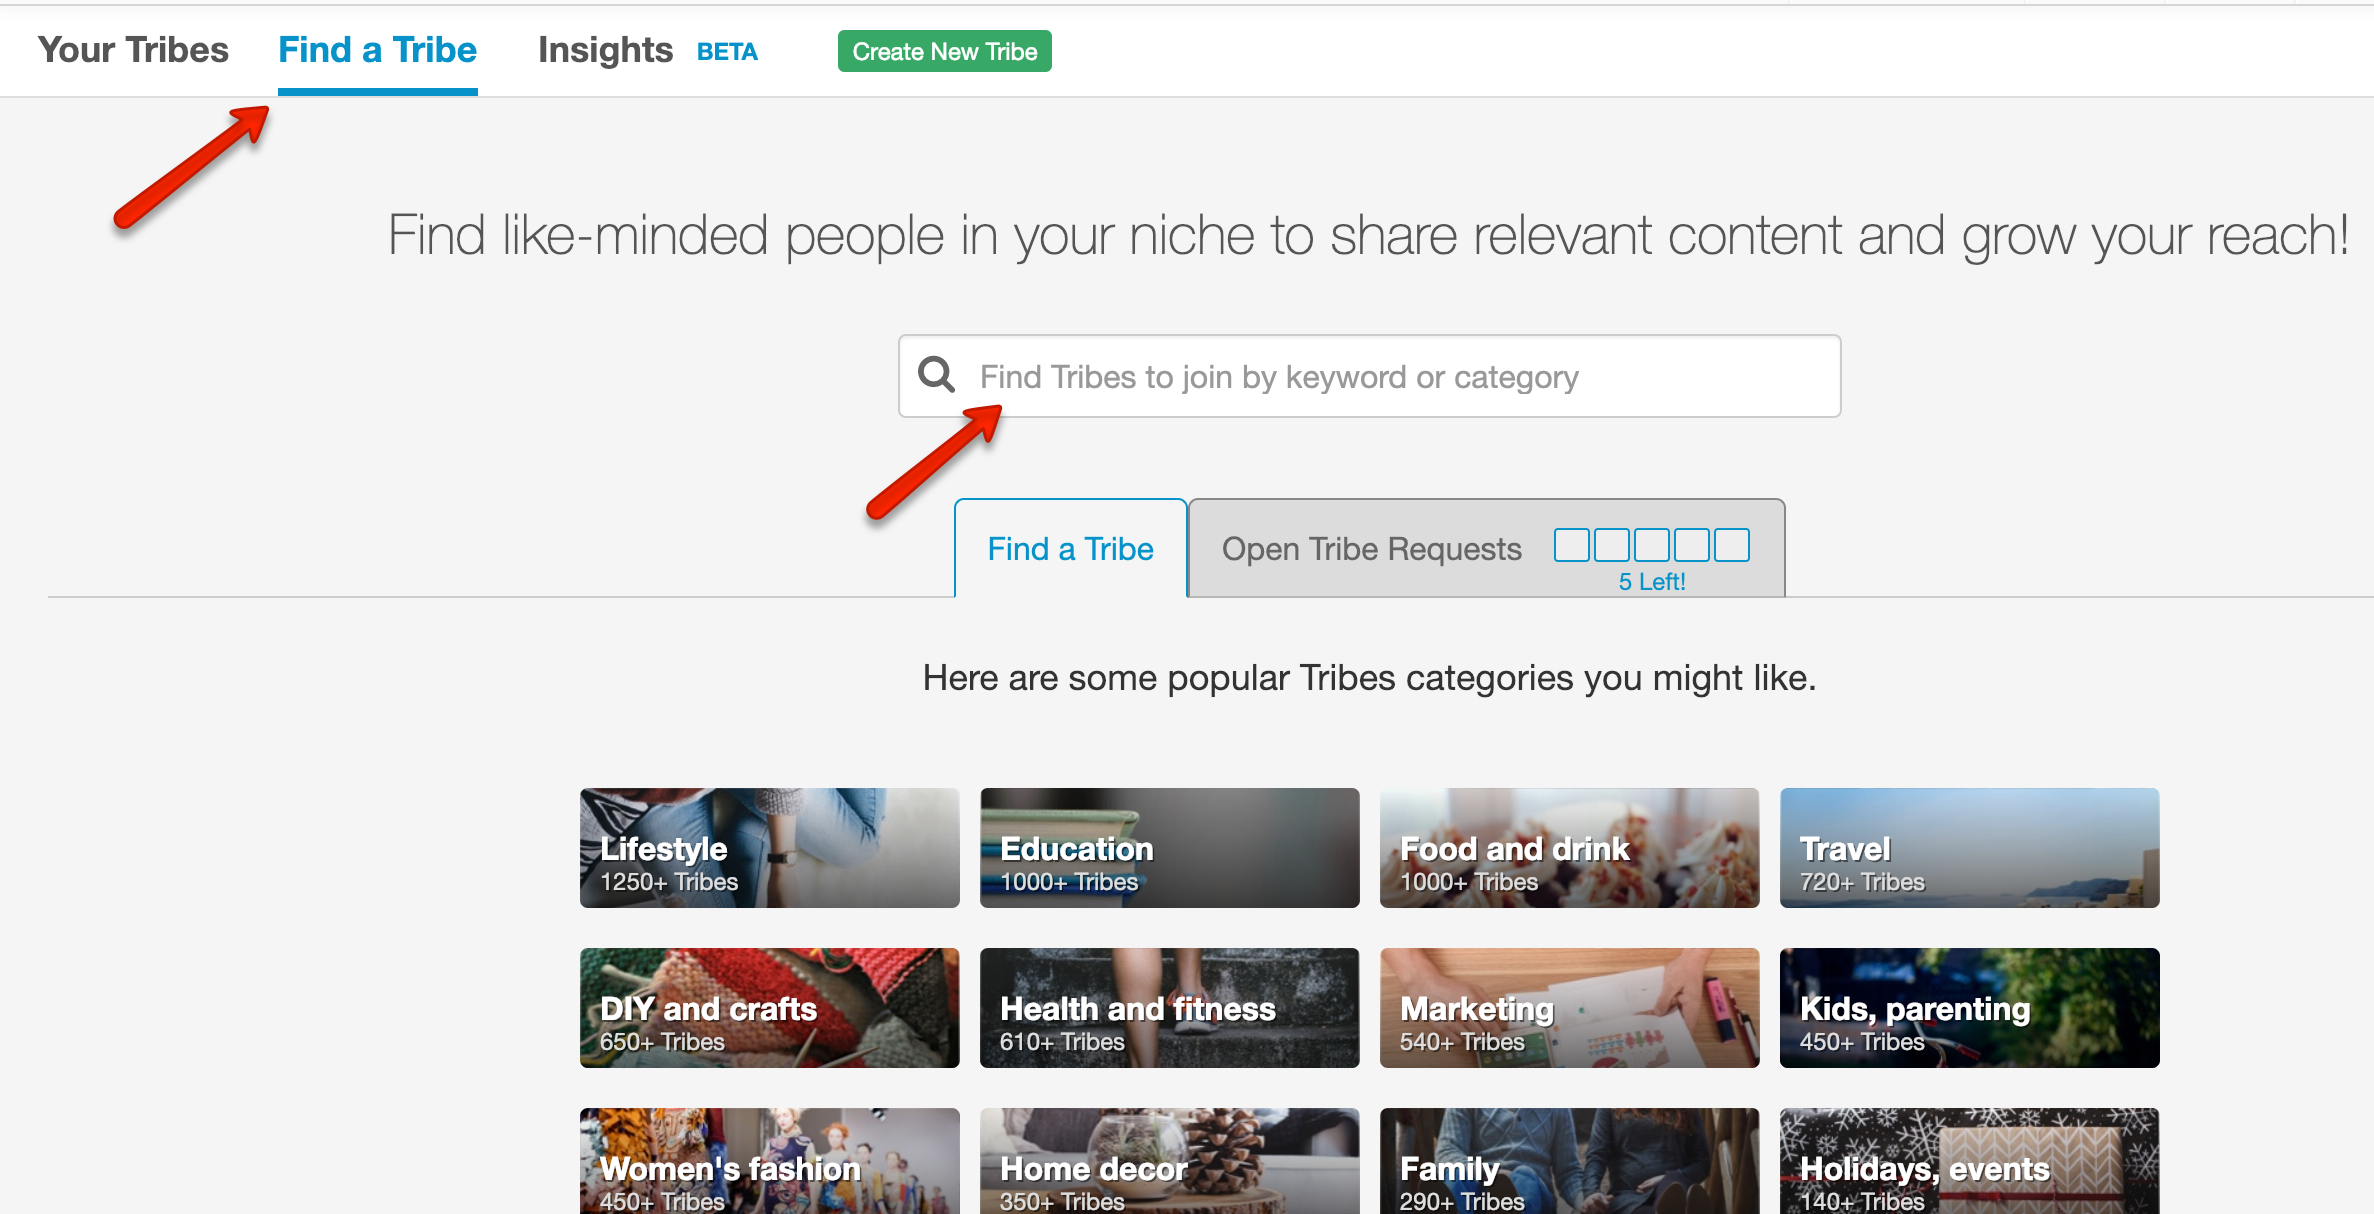
If you’re a blogger, Bloggers and Creative Infopreneurs is a good starting point- it’s one of my best-performing Tribes.
Also, Tailwind has different tribes for almost any niche. Simply do a quick search by clicking “Find a Tribe” and it will generate a list of relevant Tribes that you can join.

Step 7: Use Tailwind to Share to Facebook and Twitter (optional)
You’ll also have the option to share your pin to your Twitter and Facebook page. To enable this feature, you need to sync your Twitter/ Facebook account to your Tailwind.
Even if you’re scheduling your pin to post to multiple boards, Tailwind will only post it once to Facebook. Which is great so that your Facebook profile doesn’t look too spammy with the same content. You can also add text that you’d like to share specifically to your Facebook page in the “Facebook Page Caption” section.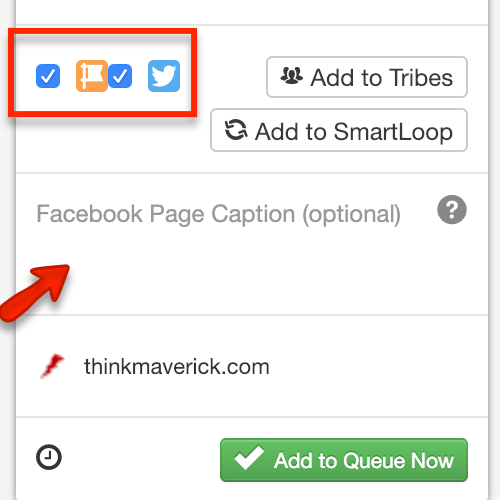

Step 8: Auto-schedule
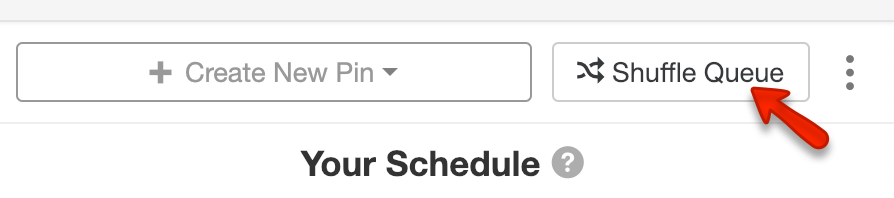
When you’re ready, click “Schedule all” button on the top right corner of your page. Your pins will be automatically added to your schedule. And Tailwind will take care of the rest- of course, including choosing the best time to pin for you!


Bonus: Share other’s people content
One more thing before you go, while you’re still at the Tailwind app you might want to add other’s people content to your schedule. By adding great and relevant content to your own boards will drive even more engagement.
It’s very easy to find good content that you might like to share with Tailwind. After you’ve scheduled your posts, you will be taken to a page that shows you a list of suggested pins for you. Simply click “Add to Queue” below the pin to add each of them to your Tailwind.


If you’re serious about using Pinterest to explode your blog traffic for free, I highly recommend you get this Pinterest eBook! It has everything you need to know about growing blog traffic with Pinterest, all in one place! It’s easy to follow and implement.
Conclusion
There you go. By putting your Pinterest marketing on automation with Tailwind, you can get unlimited supply of quality traffic to your blog without much effort.
Are you using Pinterest scheduler like Tailwind? Why and why not?
Do share with us in the comment below.
Last but not least, if this post was of any help to you, please share it on Facebook, Twitter and Pinterest!
A quick share from you would seriously help the growth of this blog.
Thank you so much!
Pin it!

I’ll be sharing more of ideas and guides soon. Stay tuned.
If you haven’t already, sign up here to receive my emails and a free magazine subscription.