


“If you Think every day, Blog every day. This is Key to building a Highly Popular (Blog) Website that Makes You Money Even while you Sleep.”


I wrote my first blog post 10 years ago. Nobody read it. My friends were reluctant to even spend 5 minutes on it. How bad can it be?
I persisted. After a few months a handful of “Strangers” read it multiple times. Started commenting. Sharing. Applying.
Today, tens of thousands of “Strangers” read my blog each month. Friends and family barely read what I wrote. Took it for granted. Lesson in there.
Want to know what changed for me? Read on to find out…
The goal of ThinkMaverick is to find the signal in the noise and provide important new information about my pursuit of happiness. What is going on in the world? What skills do you need? And step-by-step tutorials on getting those skills. Business opportunities and step-by-step how to execute on them. And fun.
Each month, 409 million people spend hours reading 20 billion WordPress pages, give or take.
Because everyone was ordered to stay at home for the past 3 to 5 months during the pandemic (and many still forced to stay home), the numbers being discussed lately was staggering — maybe up to 1 billion that normally would’ve been halved of that.
I saw an 80% increase in my overall traffic during that time.
What’s alluring is that 77% of internet users today read blogs. Replace your bare website with WordPress! and you will bring in 3X more traffic overnight.
Unfortunately, setting up a blog can be incredibly tricky if you’re a beginner. Many still rely on 3rd party developers with obscene prices.
But I’m itching to show you how easy starting a blog in WordPress can be, as it is exciting and rewarding at the same time.
Best thing is, you only need to do this once!
If you’re serious about getting more traffic, and eventually making money online, you’ll need to take full control of your own content on a WordPress via self-hosting.
Take 60% OFF on ALL Top Hosting Plans:
Why should you Self-host your Blog?
There are many benefits of hosting your own blog:
1. You have full control and authority over your blog. You can decide what you want to do with your blog including design, layout, advertising revenue, searching engine optimization and more.
2. You can start making money online once you’ve established your self-hosted blog. You can choose to monetize your blog by using Affiliate Marketing, Paid reviews, AdSense and more.
3. You gain complete access to your backend files, which means you can make any changes and customize the codes.
4. It’s easy and affordable. It costs only a few dollars per month (as low as $2.75/month).
There are tons of blogging platforms out there, which you can choose to create a blog. Having said that; it would be in your best interest if you choose to blog using your own domain name and hosting.
To do that, you have to buy your own domain name and hosting service to run a self-hosted blog. HostGator is a pioneer in this space. Basically, you’re renting digital storage space from this third-party to make your site live and available to the world.
In this article, I’m going to show you how to start your very own blog using WordPress and self-hosted through HostGator.
Note – I started my first blog on Hostgator and have personally negotiated with them so that all of you can start a blog for cheap. If you make a purchase through this or any of the links on this post I’ll earn a small commission at no extra cost to you. It helps us support the running of this website and continue to publish helpful content. I only promote things I use and love myself and am always transparent about it! Thank you all for your support!
How to start a WordPress blog on HostGator
(in less than 30 minutes)
Step 1: Choose a Plan
Starting your own website may sound like a massive step, however it’s not as hard as you may think. HostGator has made it simple for you to host your own blog and offers excellent 24/7 customer service and support.
The first step in starting a WordPress blog is to choose a hosting package. A web host is where your blog lives, where you’ll store all your content: text, images and videos.
HostGator offers AFFORDABLE web hosting plans. Plans start at $2.75/month.
Go to HostGator official site, click “Get started!”
HostGator has different hosting packages depends on your needs and budget as below.
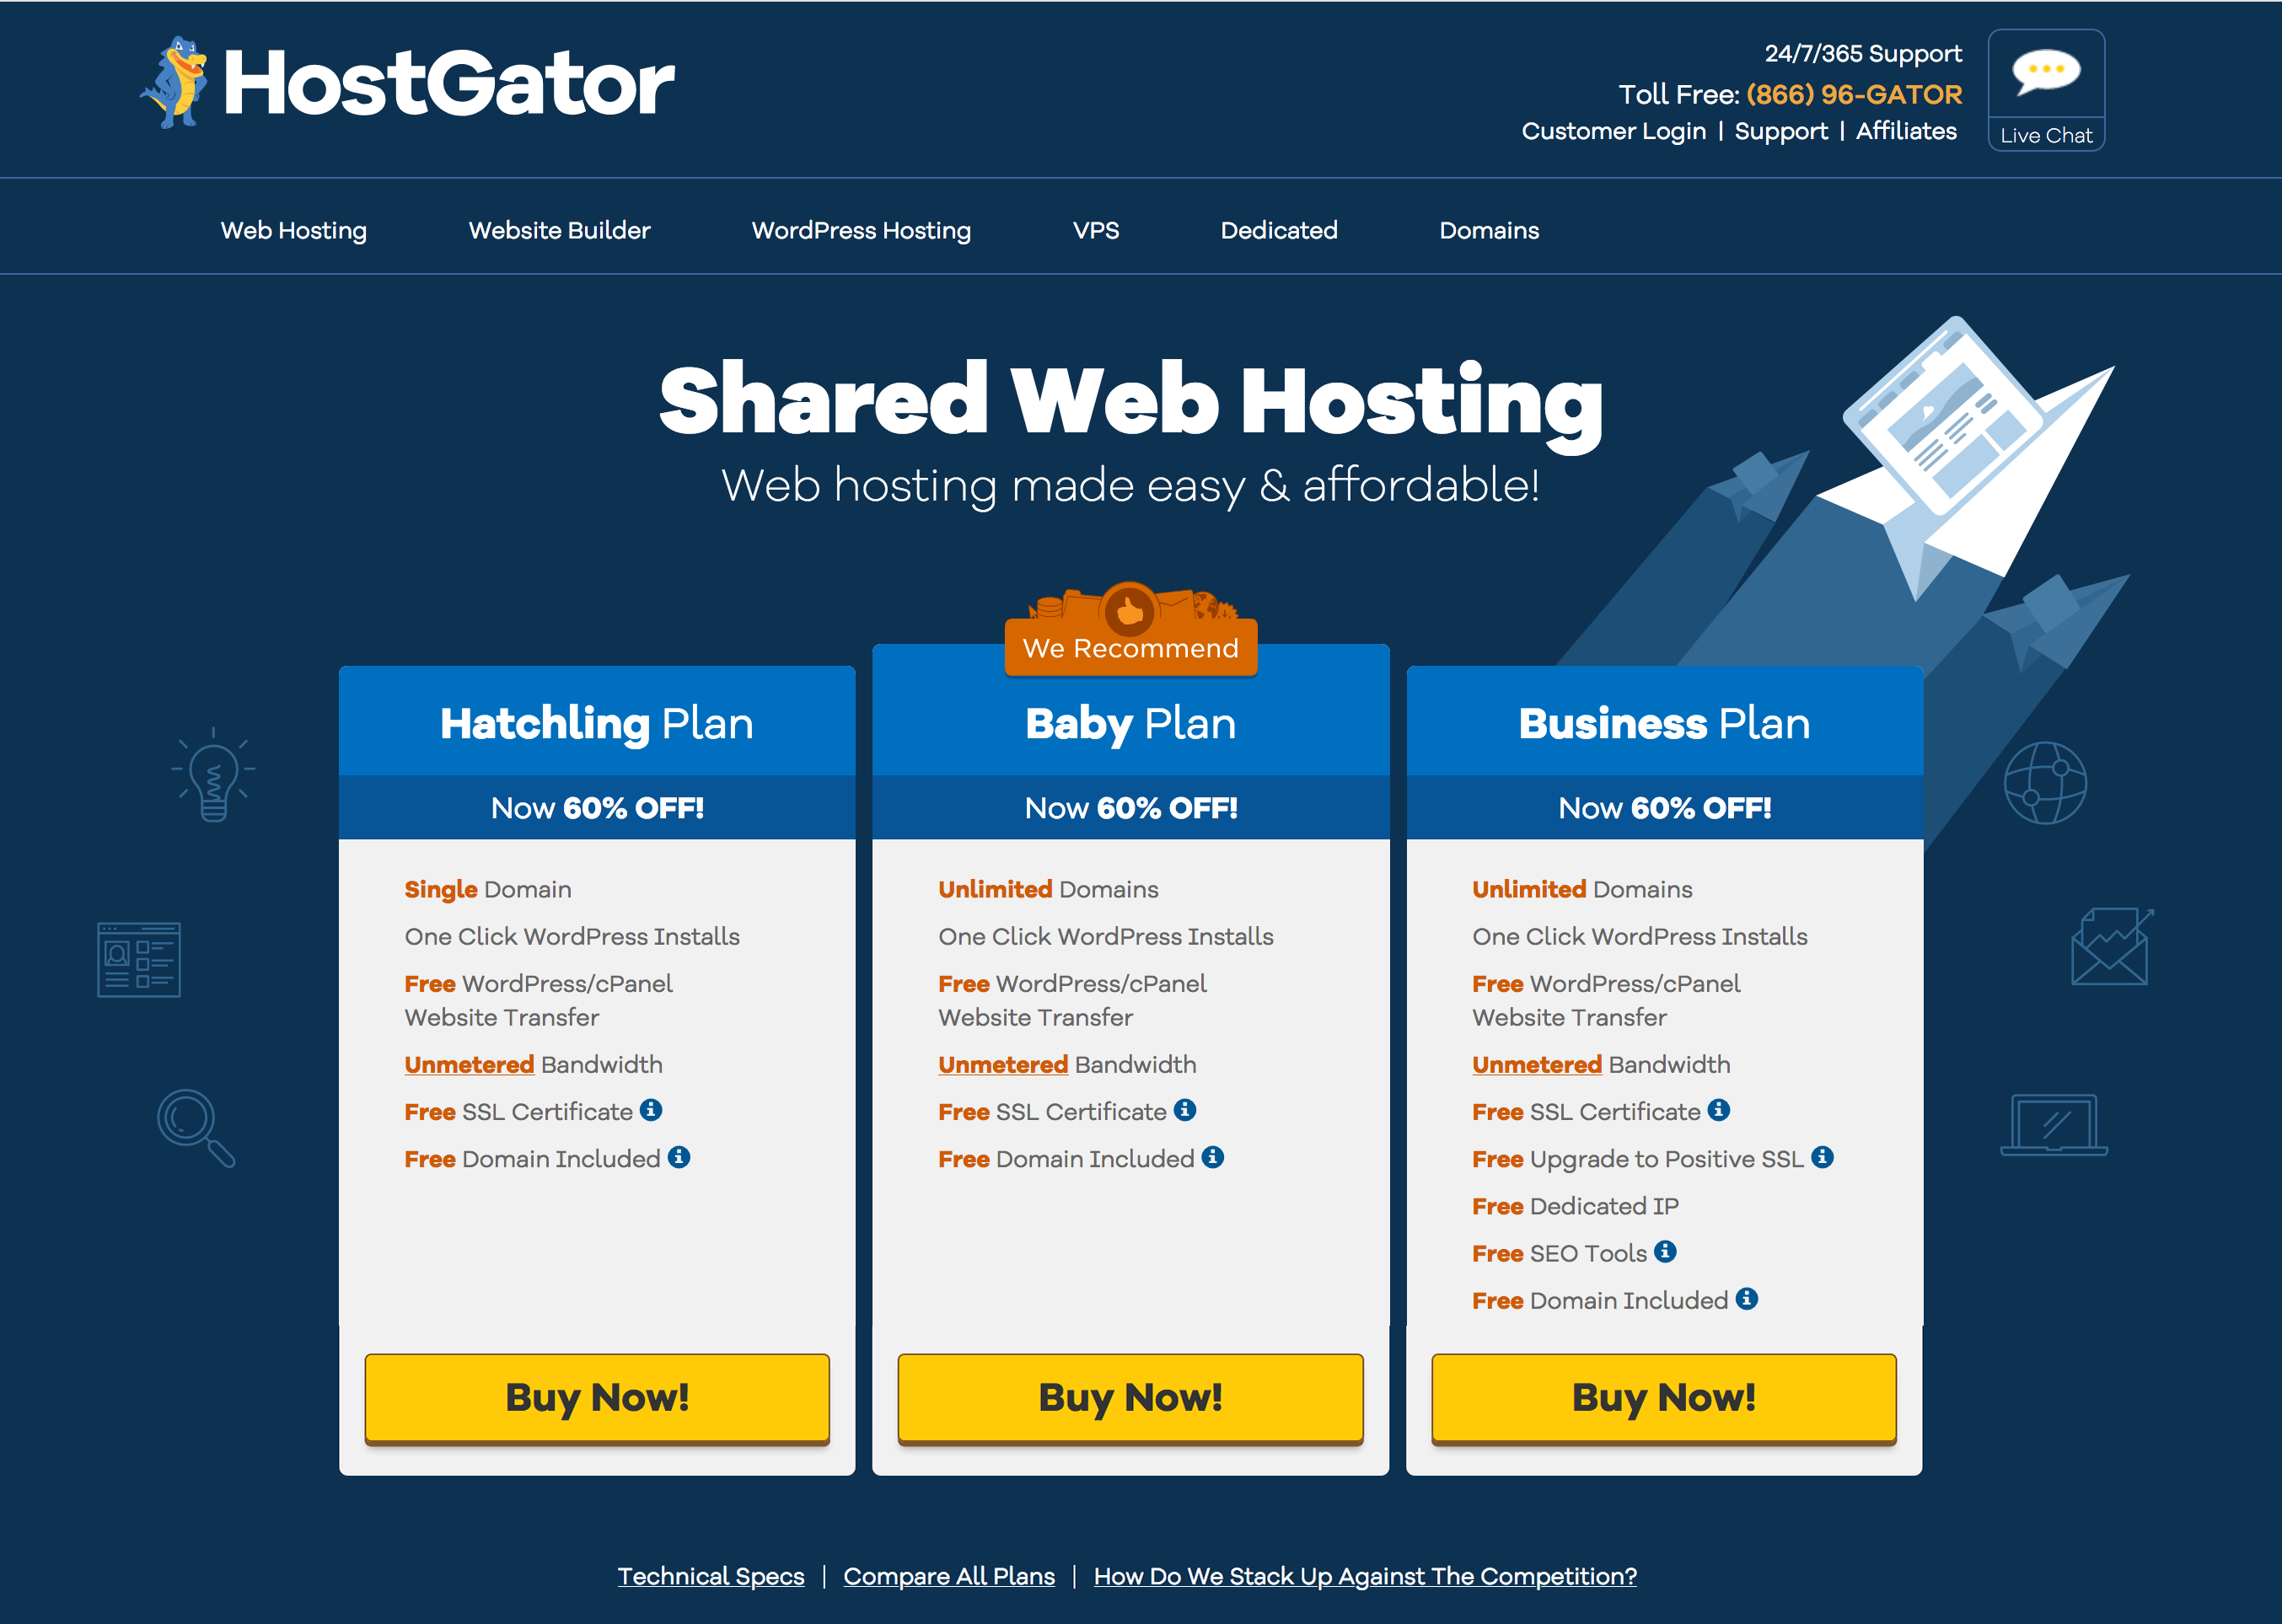

Choosing the best plan could be tricky. I would suggest you start with the least you can afford, you can always upgrade later as your website grows.
The most popular HostGator plan is Baby Plan. This blog is currently on HostGator’s Cloud Hosting Plan which is a wee more expensive, but it can cater for more traffic.
If you are just starting out, I’d recommend the Hatchling plan. With a Baby Plan, you can run multiples blogs. Start with the lowest plan and then gradually scale up like me.
The key difference between the two is that, with Hatchling plan you can only register one domain, which is perfect for beginners. If you’re planning to run multiple websites, then you’ll need the Baby Plan. You should take into consideration that it’ll save you money if you choose a longer plan that goes for one year or longer.
All the hosting plans come with unlimited email addresses and storage. In addition, HostGator has the drag-and-drop website builder option which is very easy to use, you don’t have to know how to code to use it. You’ll get a Google Adwords and Bing/Yahoo credit too so you can advertise your blog.
Once you’ve chosen the right package, click the “Sign Up Now” button and fill in the required information.
Action: Sign up the Hatchling package. You can upgrade the plan later when you want to start another website.
Step 2: Register a domain
A domain name should be a reflection of your business name or what you’re doing. It’s very important because your website name is the first thing your visitors will see. It’s also how people will find you online. You want a good domain name that can make a lasting and positive impression.
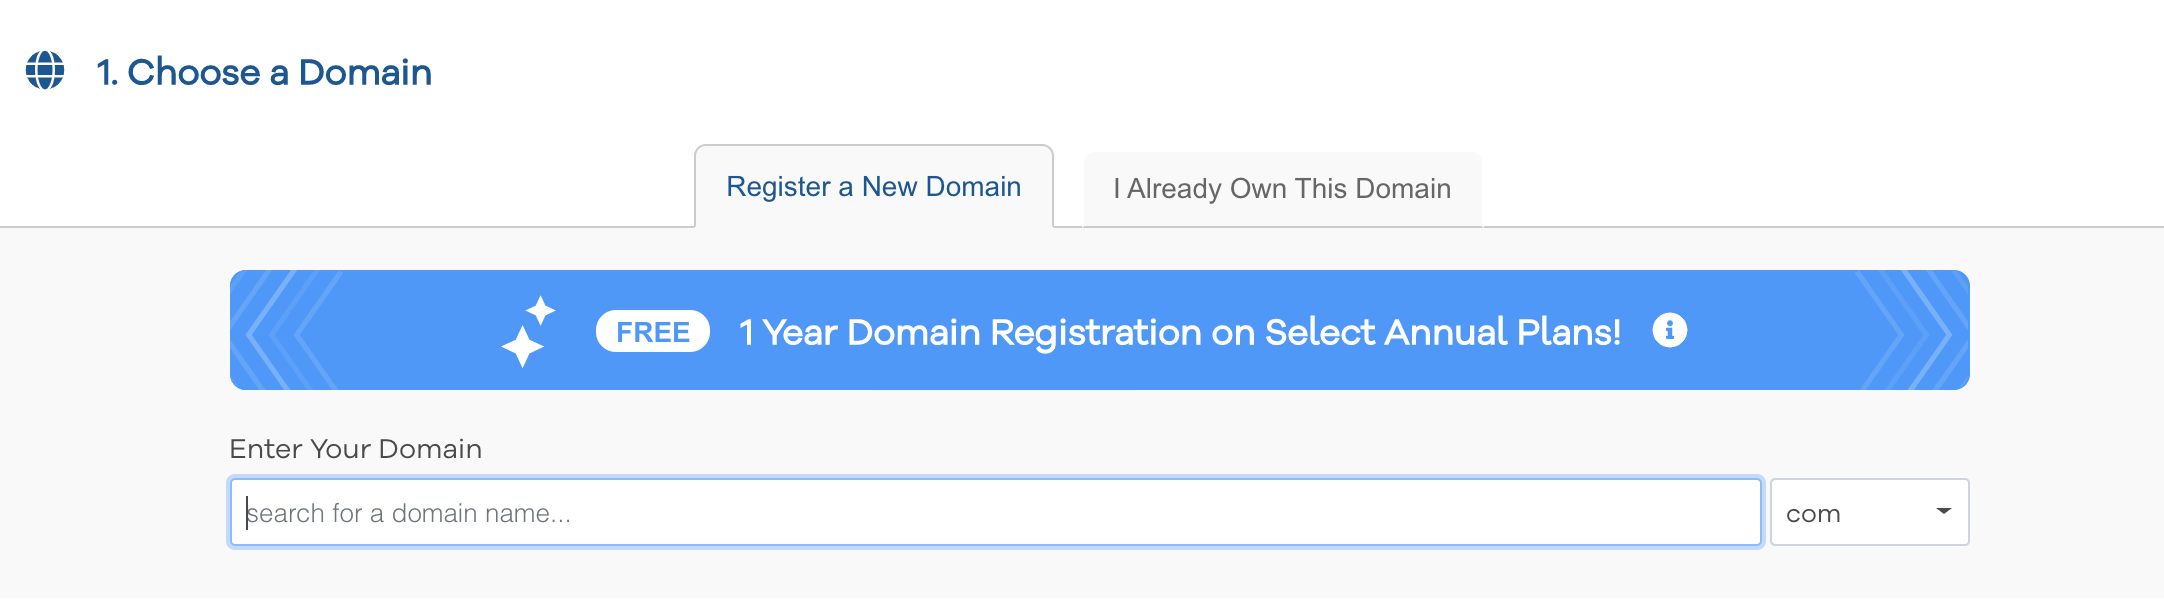
You can check domain availability on HostGator. On the HostGator Order Wizard page, simply type in your selected domain name and click “Search”. It will tell you the availability of that particular domain name. If the domain name is already taken, then you cannot use it. You must use a domain that no one has registered yet.

For example, my domain name is thinkmaverick.com. So your website name would be yourname.com.
New Domain name will cost from $0.95-12.95 per year, which will be added to the total at the end. It’s worth paying for the “.com” extension which usually costs $12.95/year.
Tips for choosing a domain name
1. Keep it short, simple and easy to remember. Unfortunately, most of the short domain names are already taken. You can find one that’s available using the domain search function on Hostgator when you sign up.
2. Make it easy to spell. Avoid using a long and confusing name. You don’t want your visitors to mistype your domain name and end up on a different website.
3. Use .com extension instead of others like .org, .net, .info, .biz. According to Registrar Stats research, over 75%of the domains have “.com”, followed by “.net” and “.org”. “.com “is easier to remember and more familiar.
4. Think long term. Your domain will define your brand and business for years. You don’t to go through the trouble of changing your domain name in the future which will cost you money, SEO rankings and branding.
Read more: How to Choose a Domain name
You can register a domain with another company like NameCheap and host it on HostGator. But you need to do the extra step of connecting your domain to your web hosting account. To do that login to your NameCheap account, and modify your DNS Nameservers.
If you need further help, check out this HostGator support portal on this topic.
If you don’t have a domain name yet, I recommend you register your domain and host it at the same place so that HostGator can take care of everything for you.
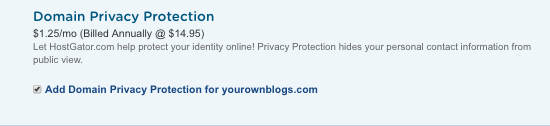
Once you’ve picked your domain name, you can see there’s an option “Domain Privacy Protection”. You can choose to pay an extra $1.25 per month to add privacy to your domain. When people search information about your domain in WHOIS or at ICANN, your personal information (name and contact information) won’t be available.

A note about domain privacy:
Without any domain privacy, all of your contact information (which is required when you register a domain) is available to anyone online.
But there’s an argument that hiding your identity might make your site seem to be less trustworthy. Most of the scammers like to use this service to cover their identity, making it harder to find and report them. You might have your information protected with the domain privacy add-on, but people can easily find out your information online especially through social media.
Ultimately, it’s up to you to decide considering both the pros and cons.
Are you okay with having all your contact information released to the public?
Are you okay with getting spam emails and phone calls?
Step 3: Complete the HostGator Order Form
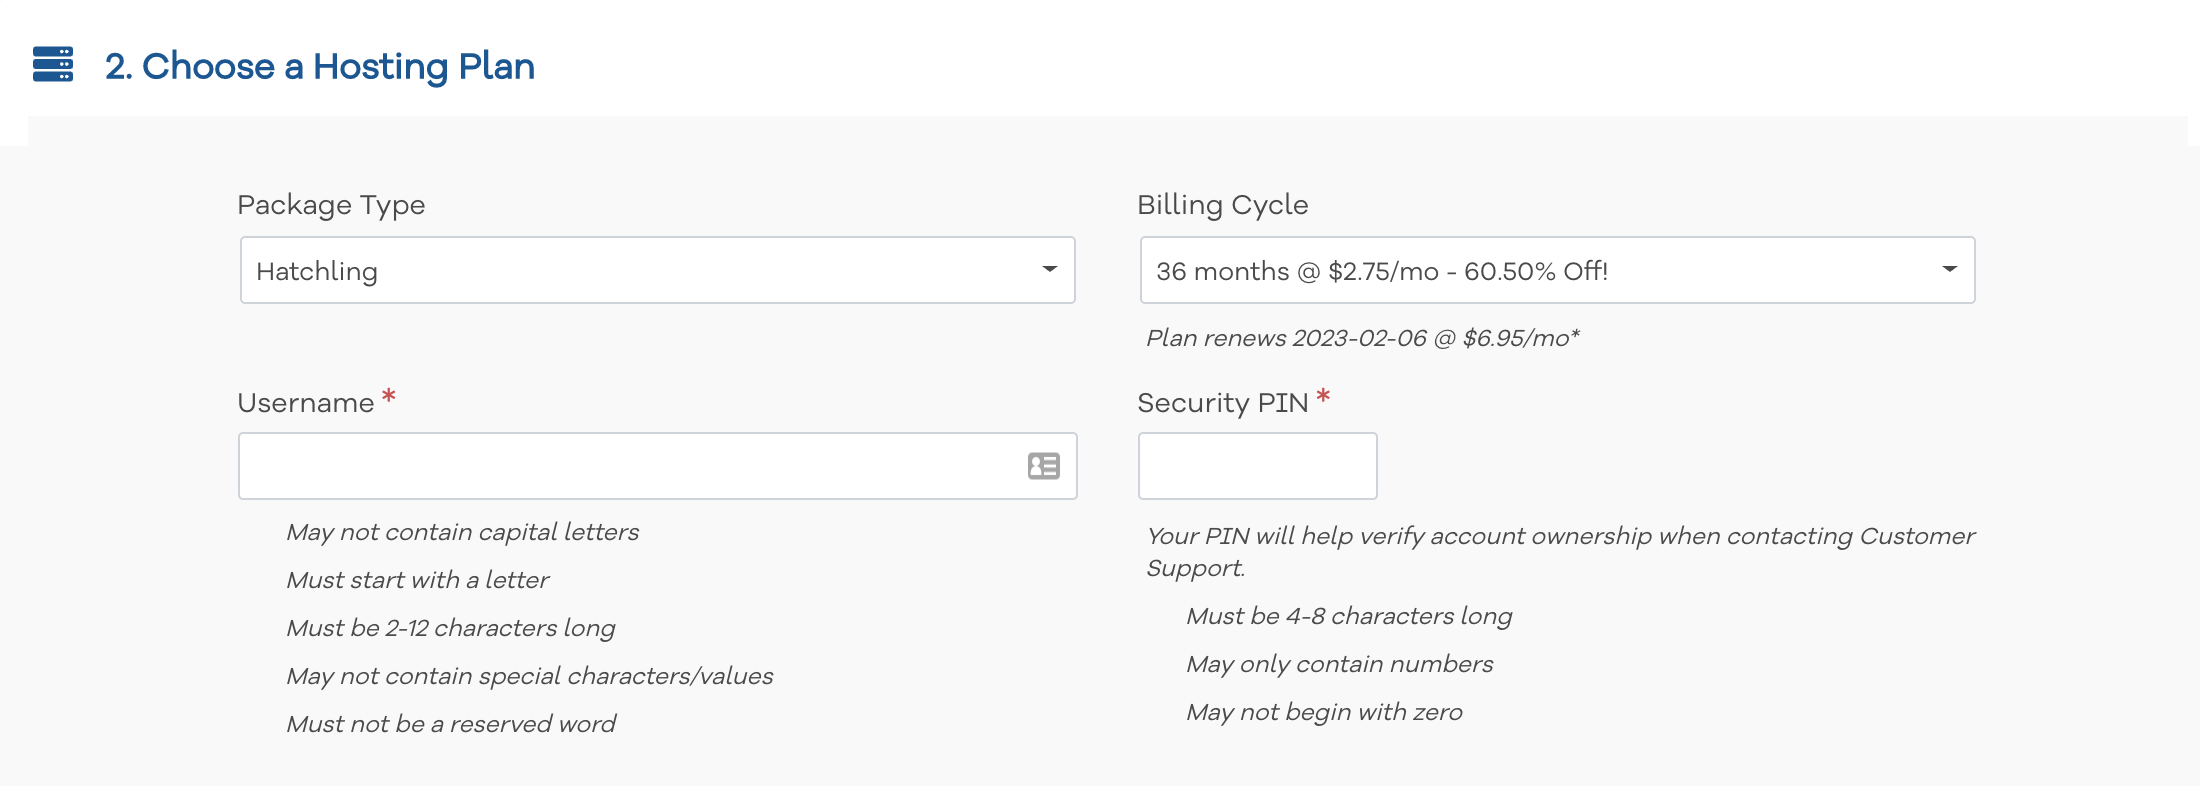

Next, you have to enter your hosting package information. You can save more money by signing up for a longer period in the “Billing Cycle” section. I paid for 36months upfront which is the cheapest option per month. For the Hatching plan, it costs about $75 for 3 years.
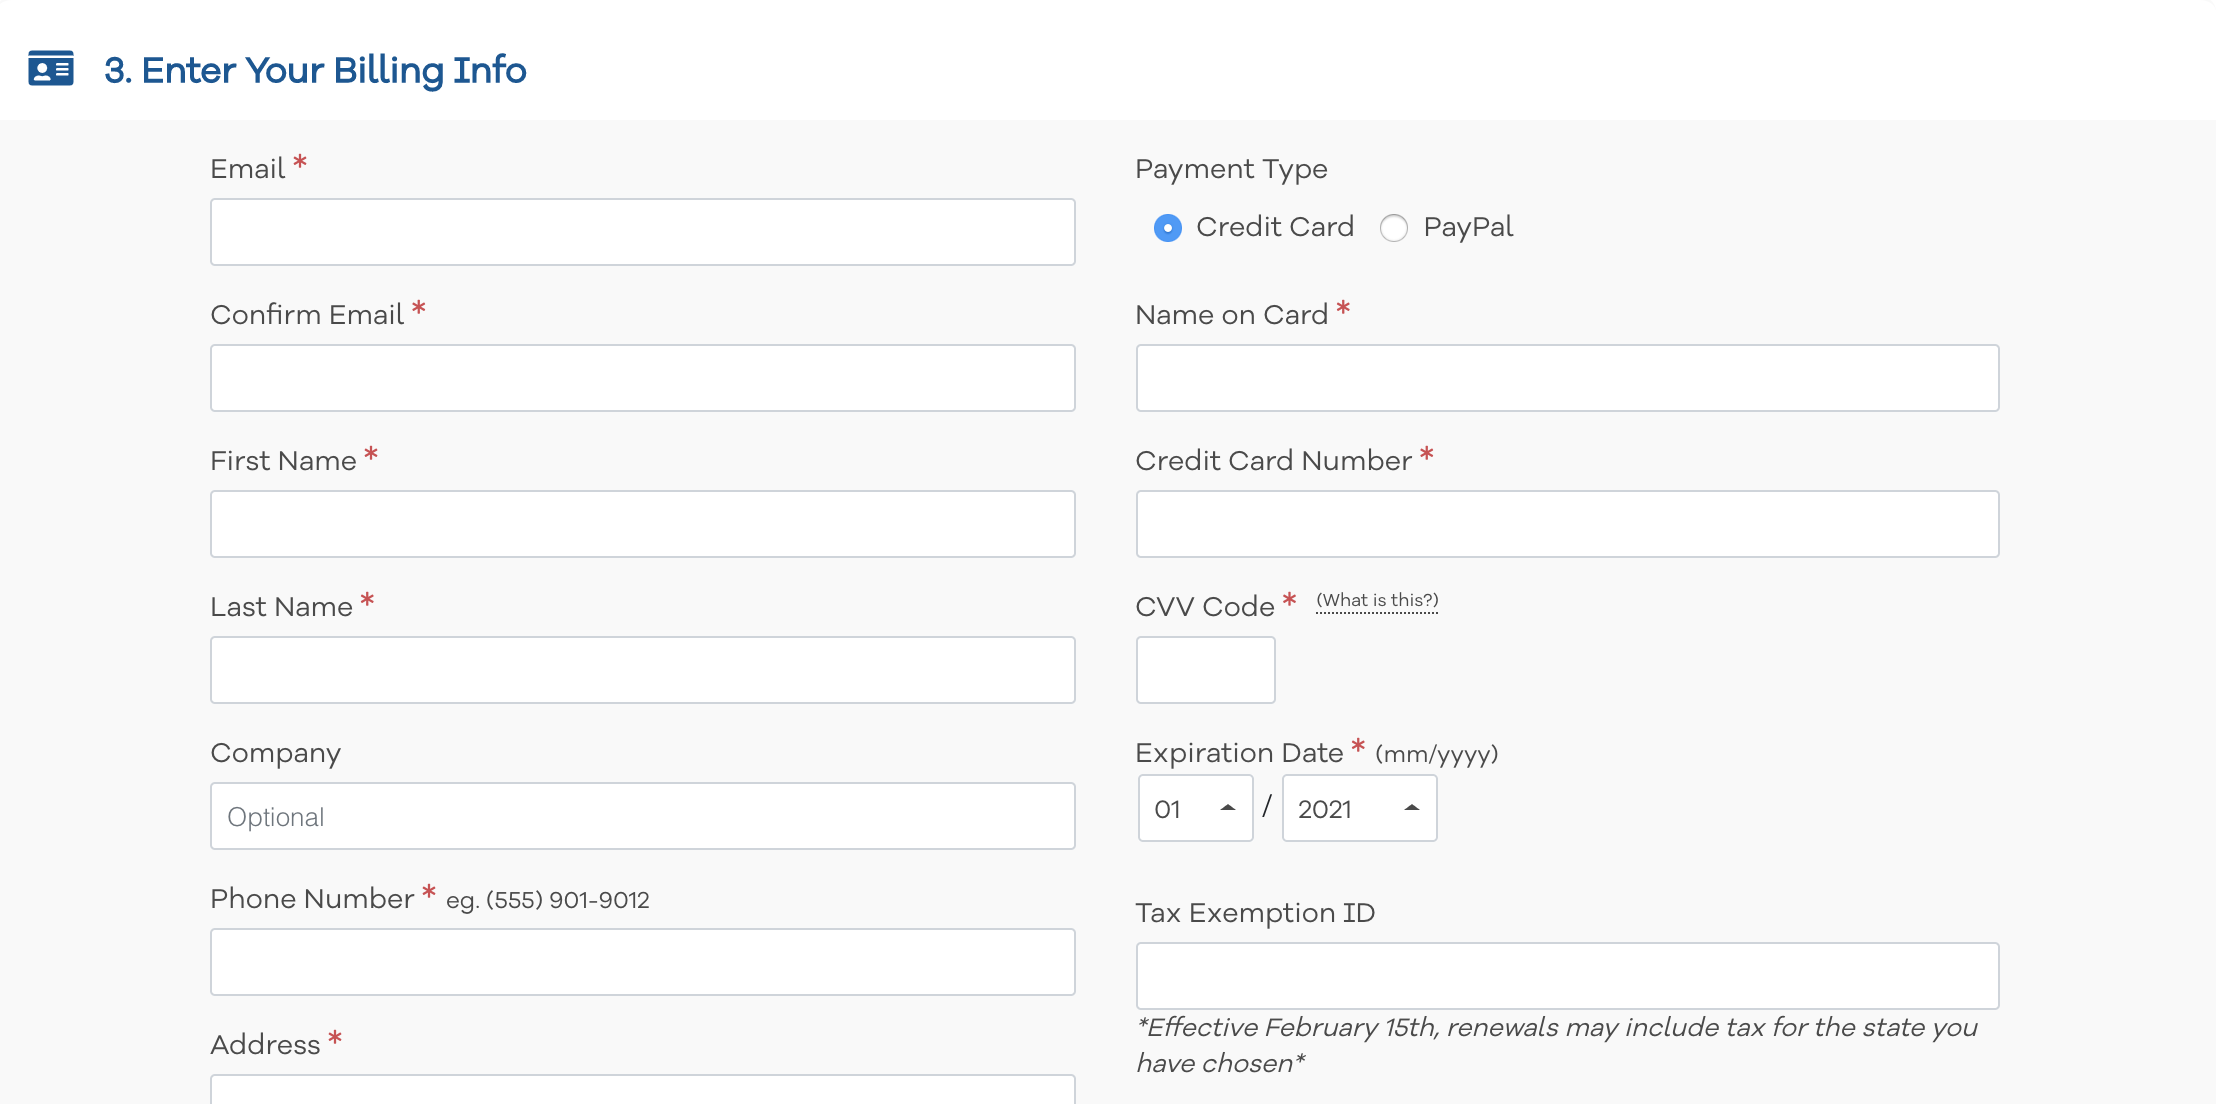

Then, you have to enter your billing information, choosing any add-ons and create a HostGator account.
Step 4: Install WordPress

WordPress is one of the most popular and easy to use blogging options. And it’s free!
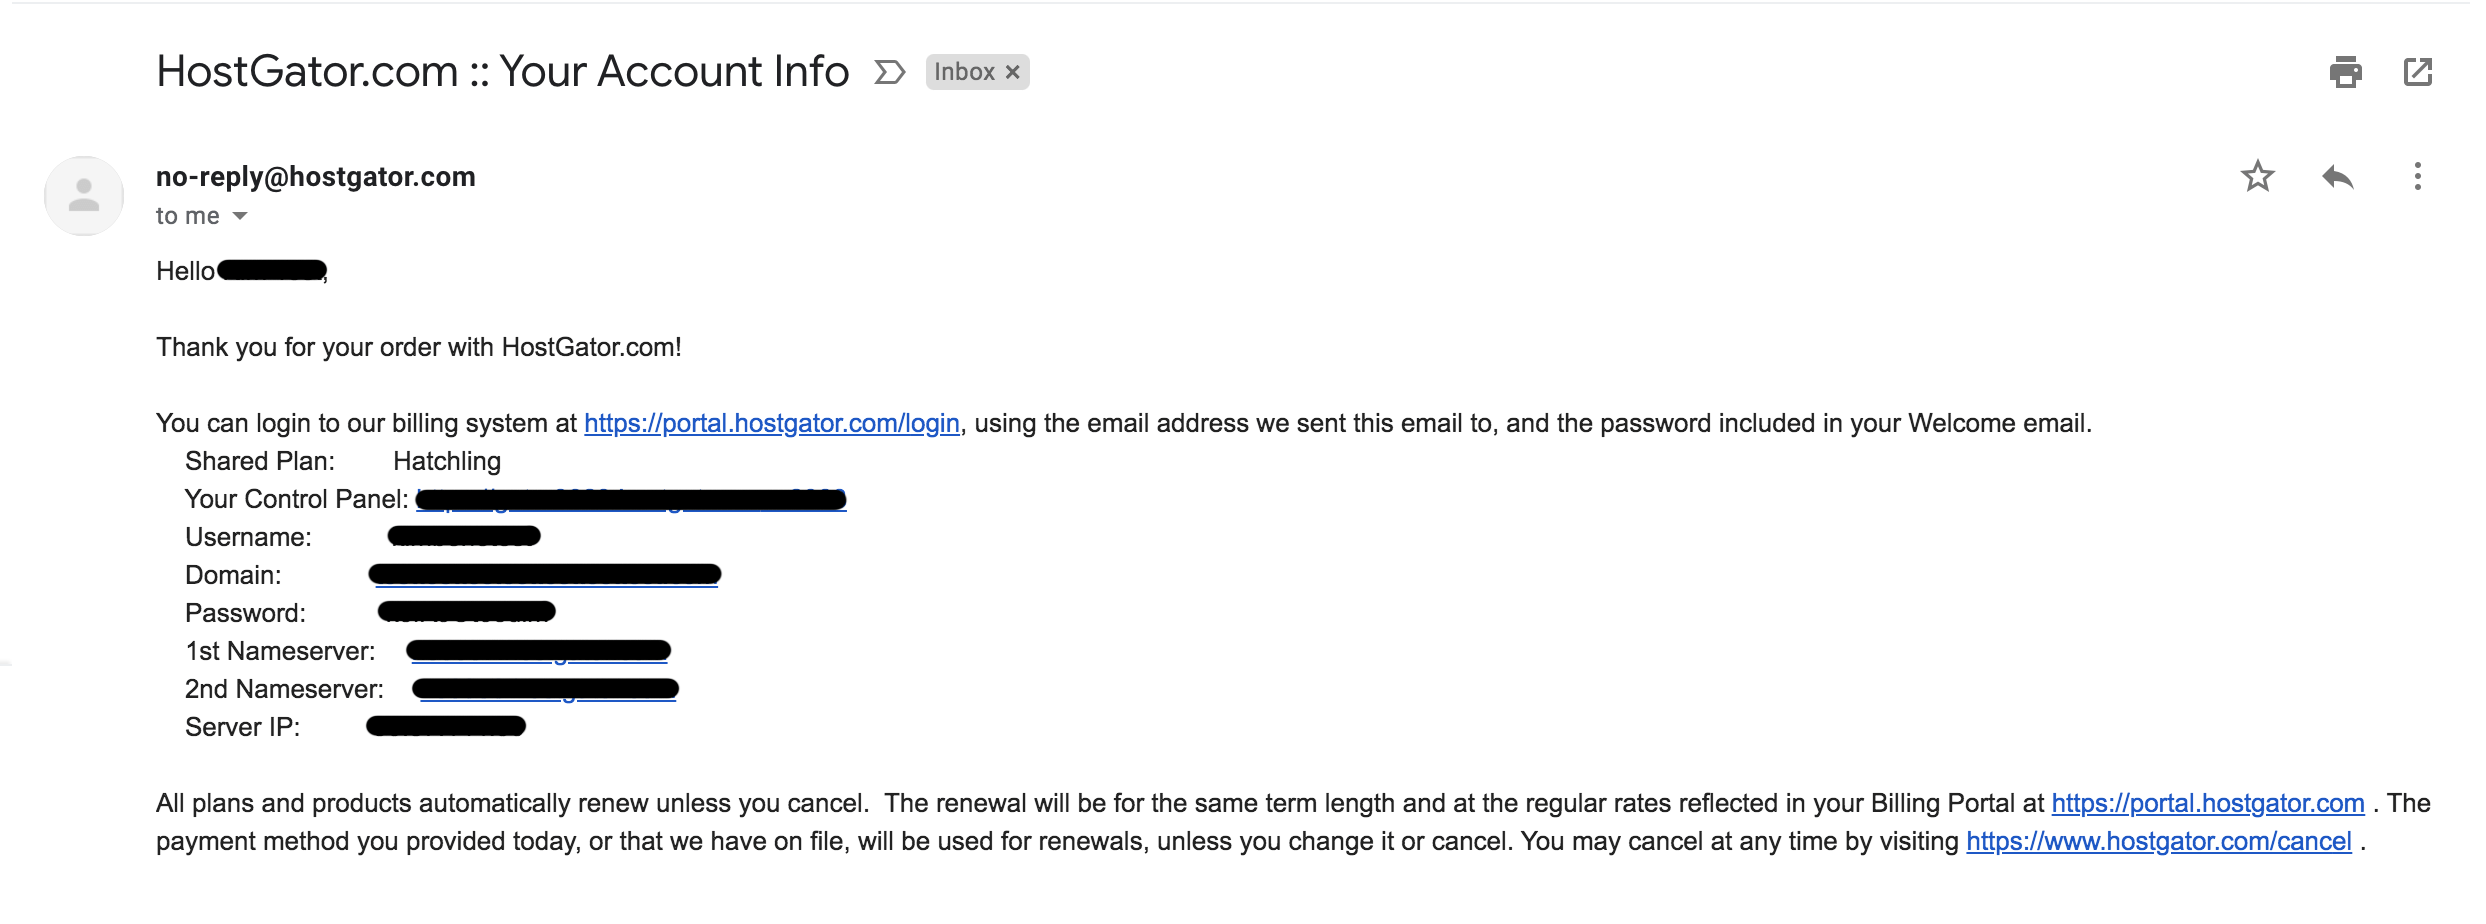
After setting up an account on HostGator, you’ll receive a welcome email from HostGator. Open this email which contains your account information so you can log in.
Click on the Control Panel (cPanel) link that is sent to your email.
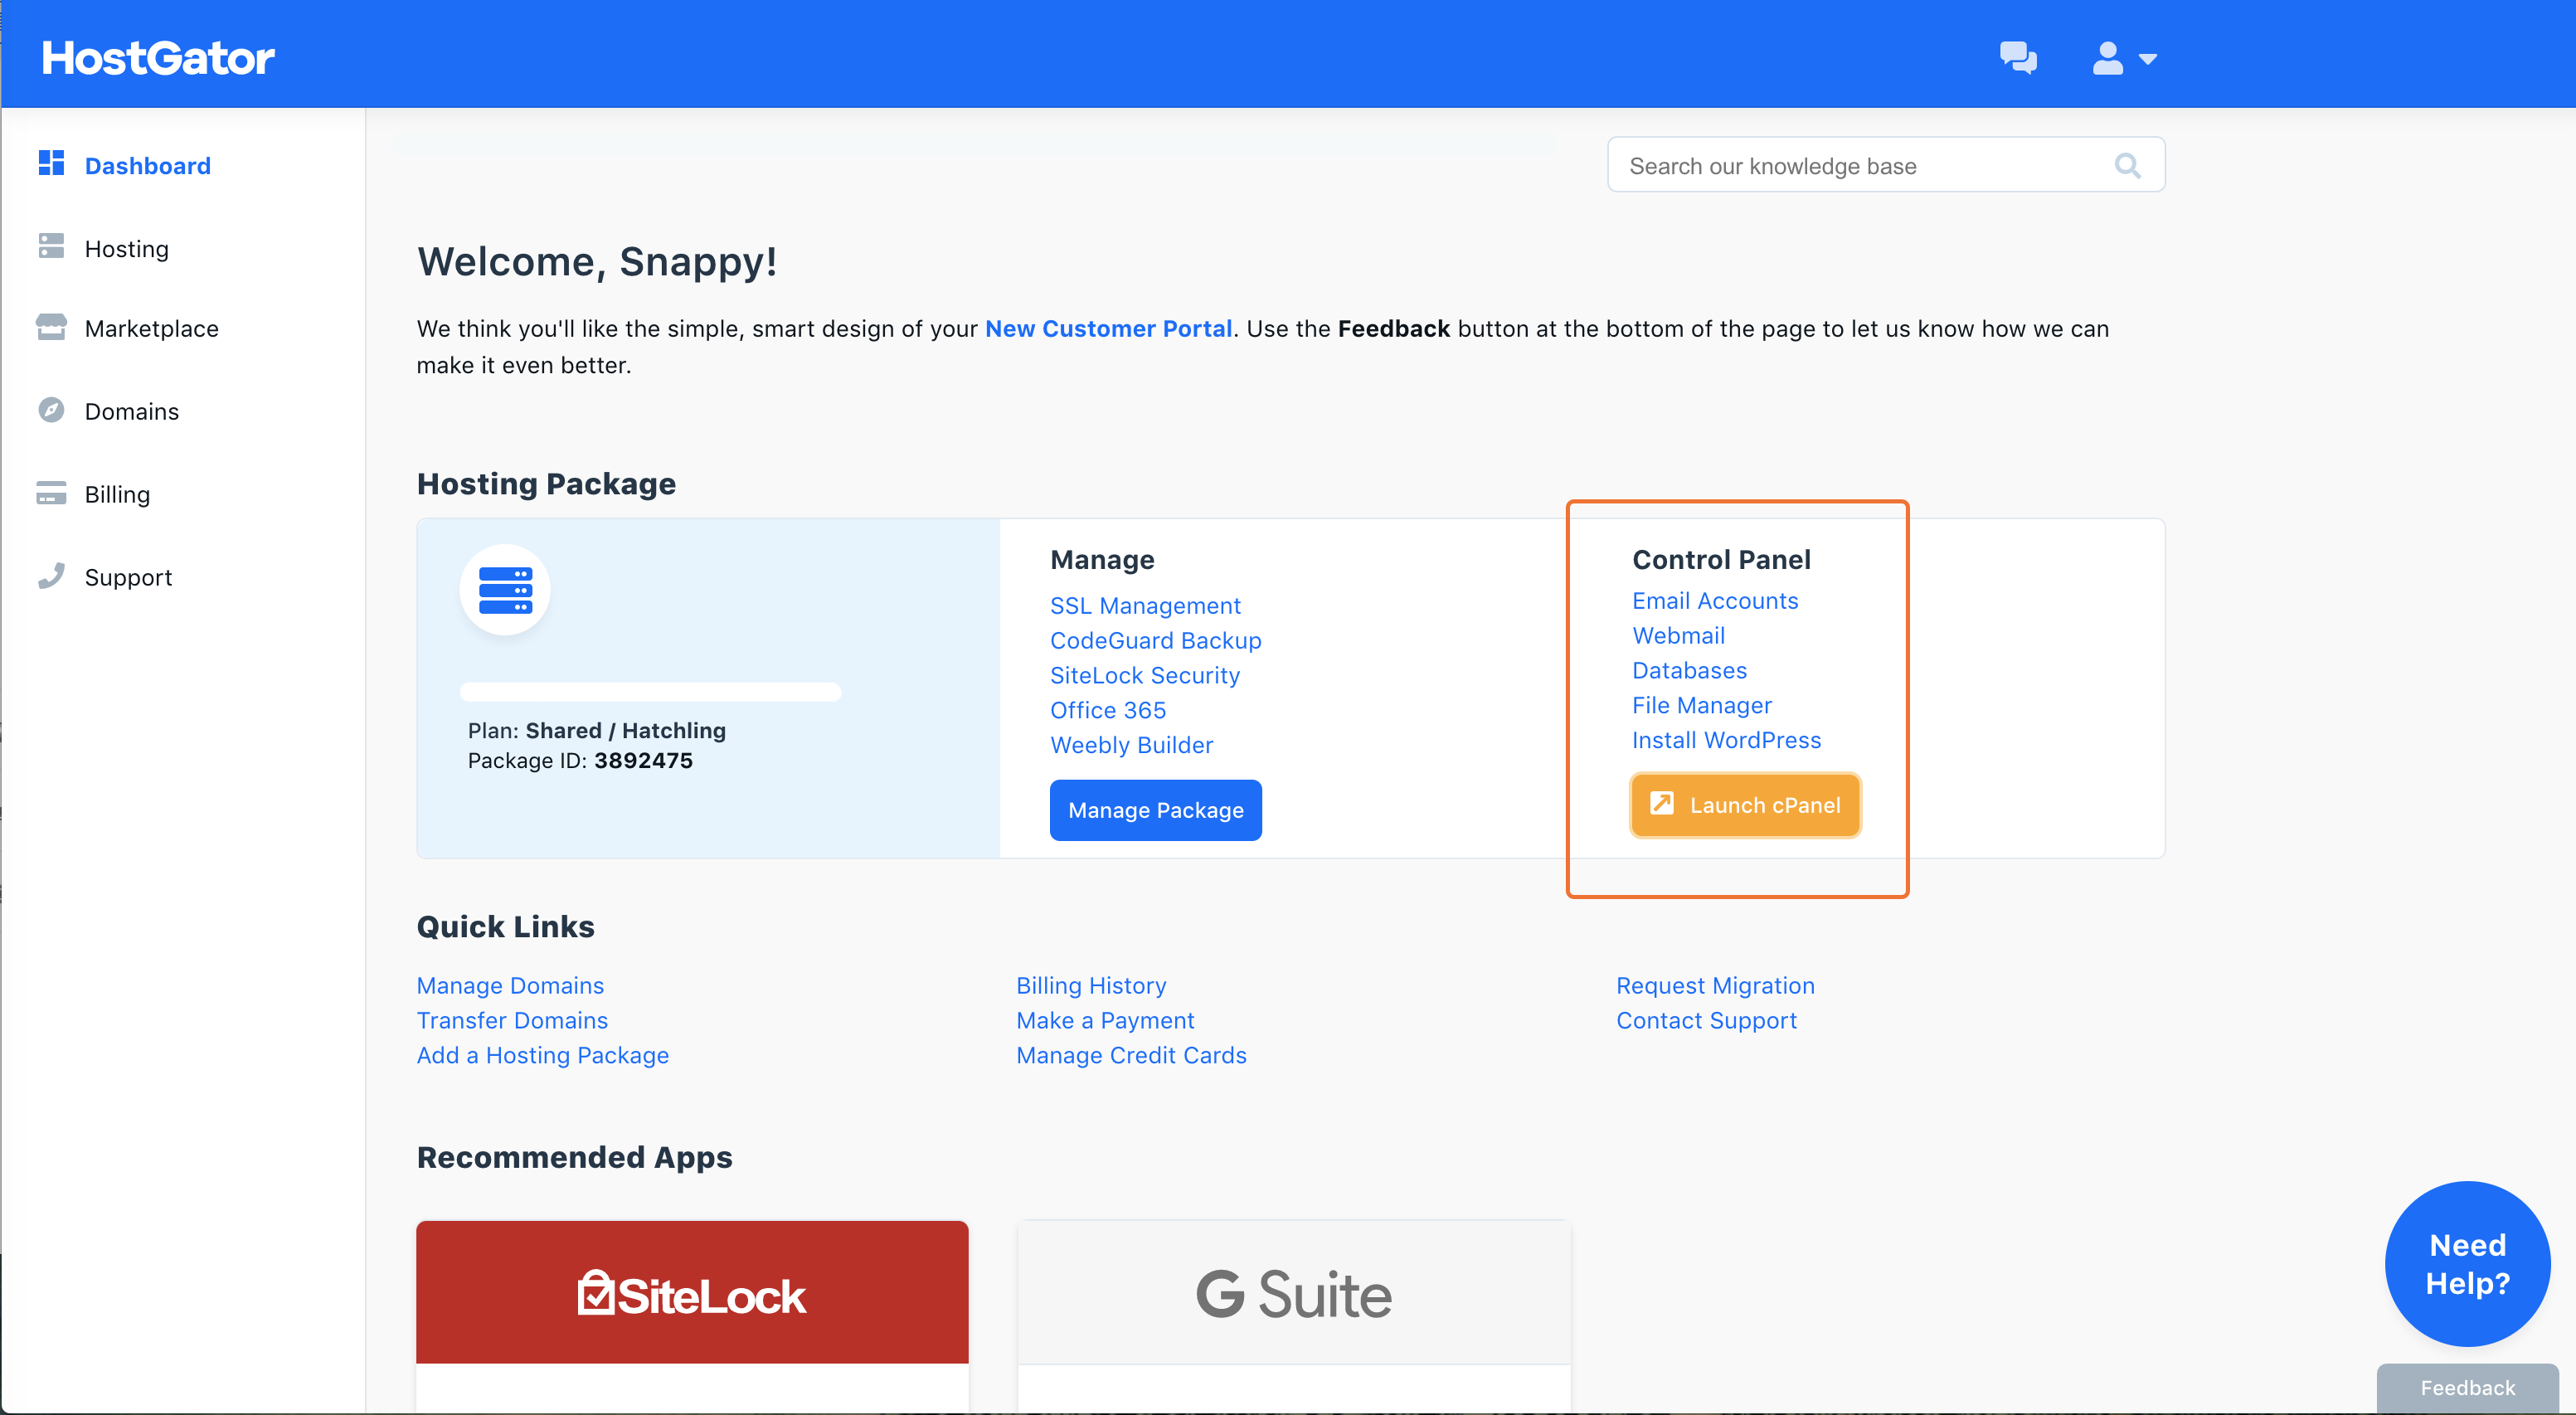

Once you’re on the Control Panel, scroll down to “Software/Services” and click “Quick Install”. From there you’ll be able to install WordPress with just a click.
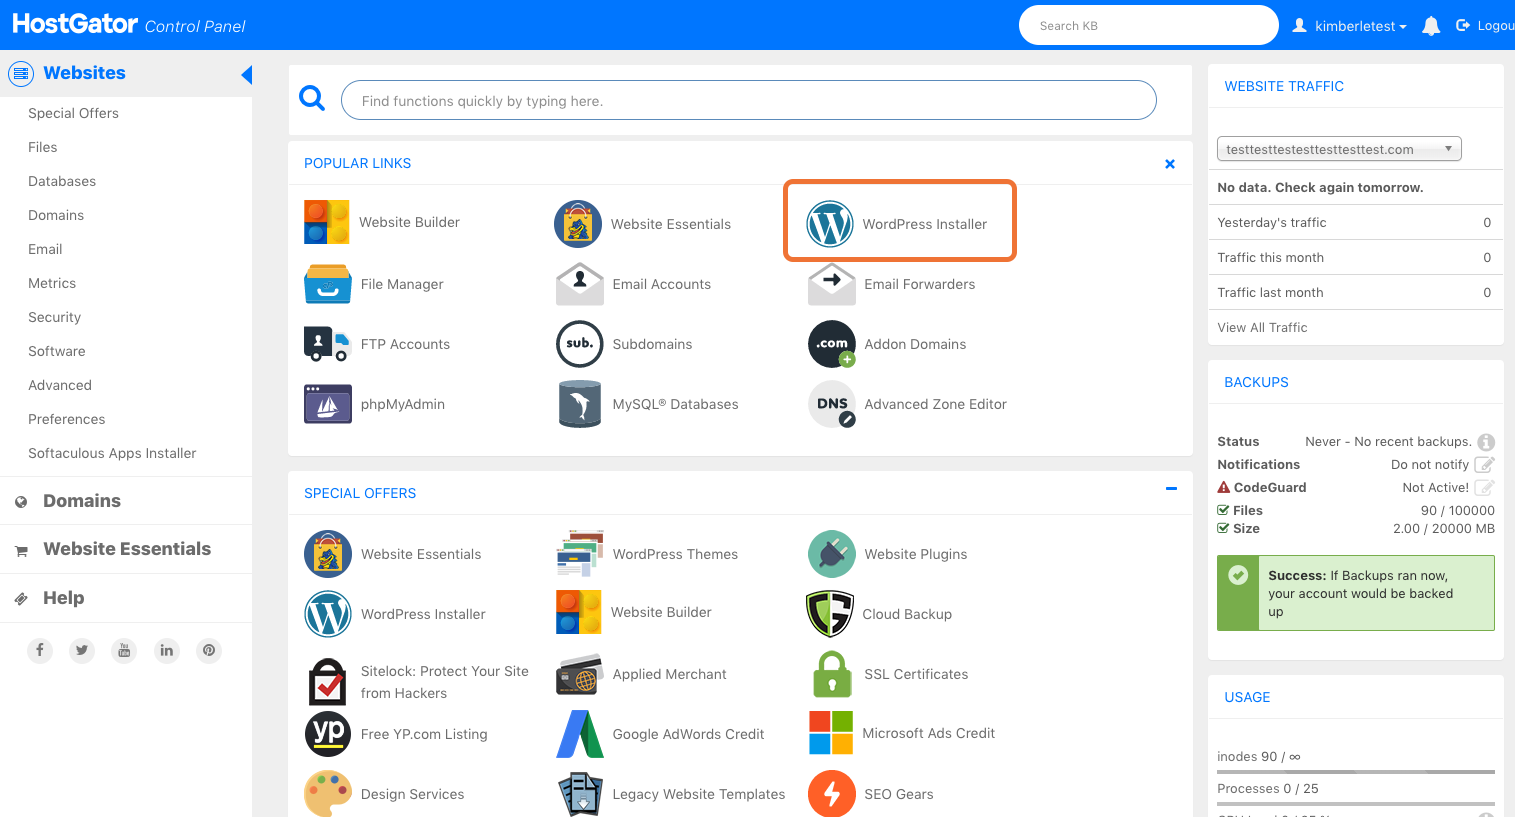

- On the left-hand side, look for “WordPress” and click on it.
- Click “Continue”
- Next, select the domain that you want to install WordPress on and click “Next”.


- Then, enter your admin email, first and last name, admin user, blog title.
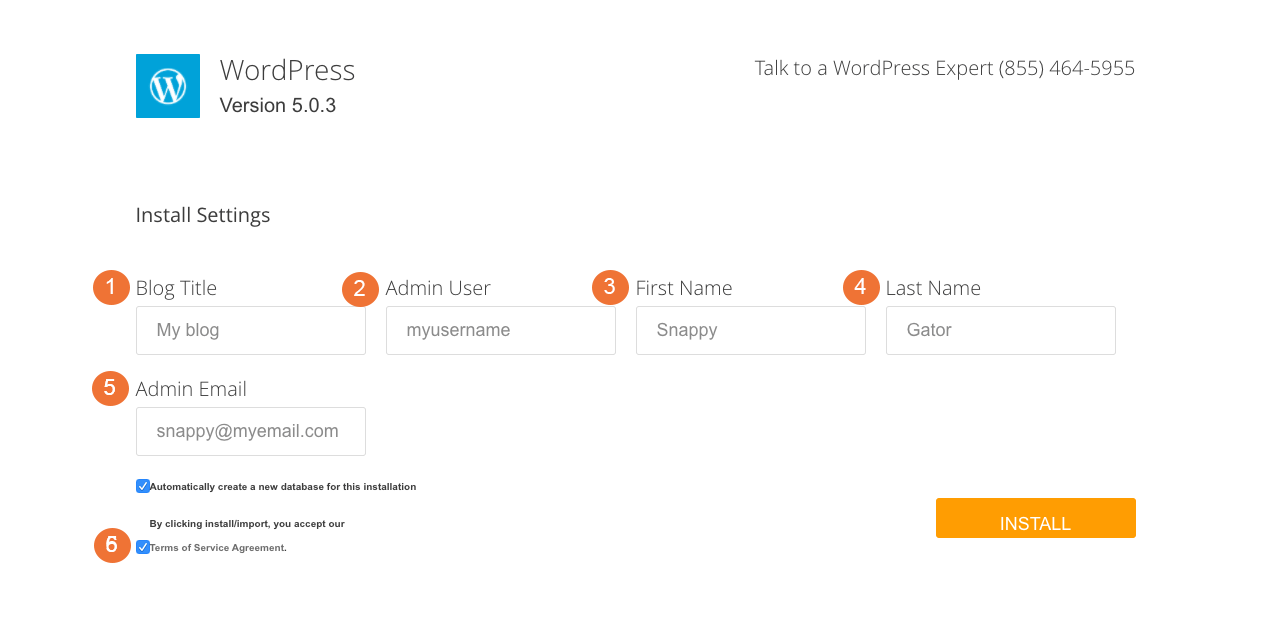
- Click “Install”.
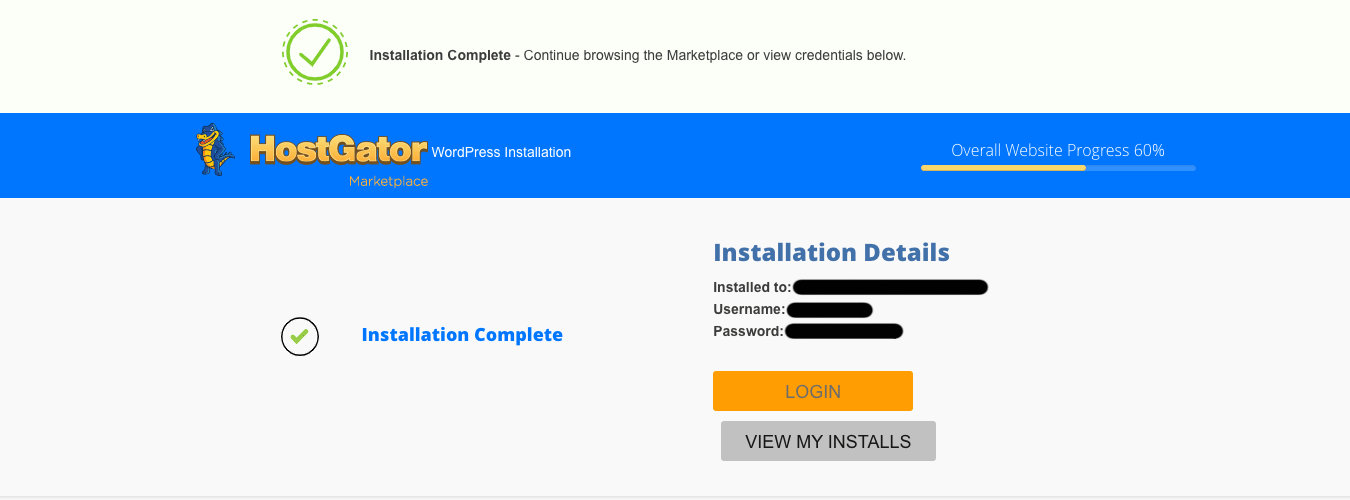
- On the next page, you will receive a message. Be sure to save the link to your admin area, user name and password.


Step 5: Get a Theme

Well done!
Now you have started a WordPress blog on HostGator. Next, you can work on the design by selecting a theme for your blog.
There are a variety of beautiful free themes on WordPress to choose from.
Whether you’re looking for free or premium WordPress themes with advanced functionality, here’s a list of best themes/templates for your blog/website.
Step 6: Start Blogging!
Now your blog is up and running, let’s start creating your first blog post.
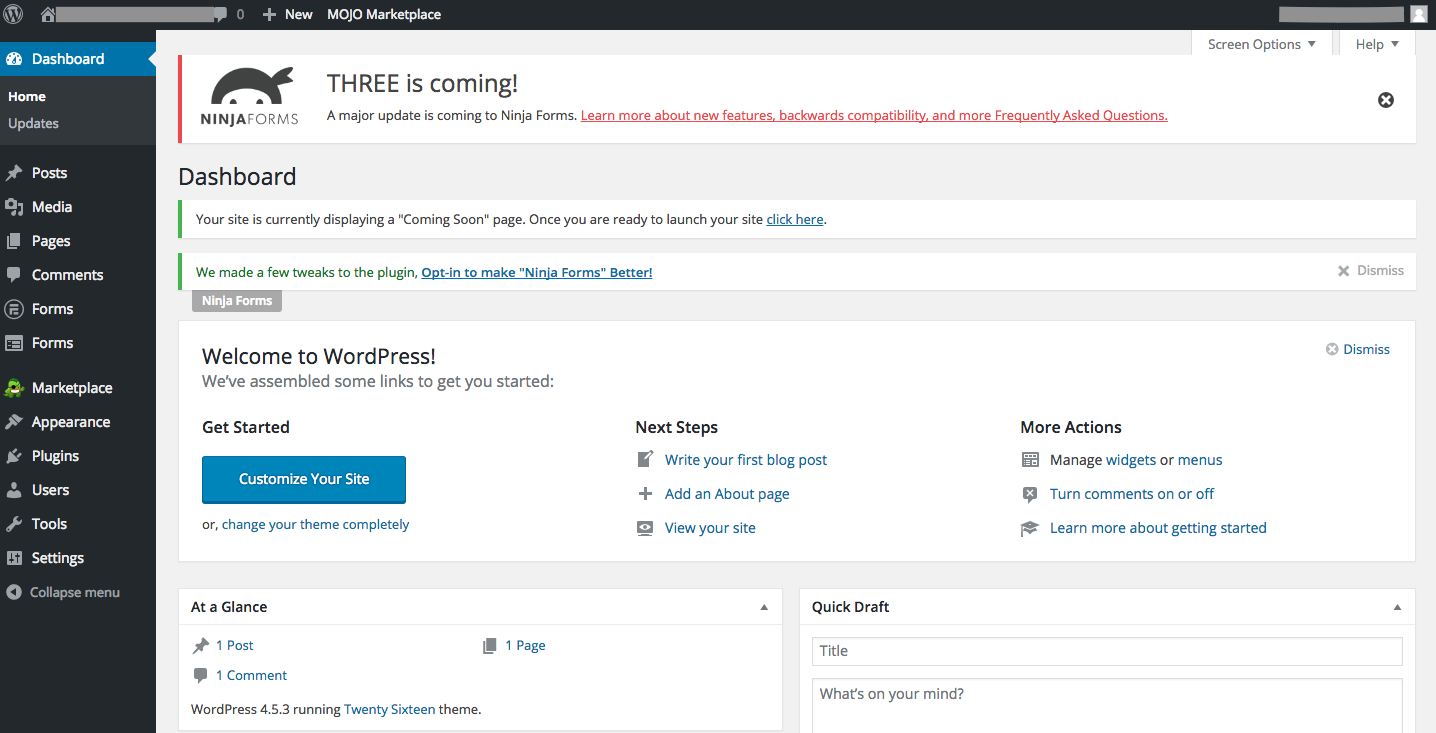
Login to your WordPress dashboard, click “Posts” > “Add New” on the sidebar menu.
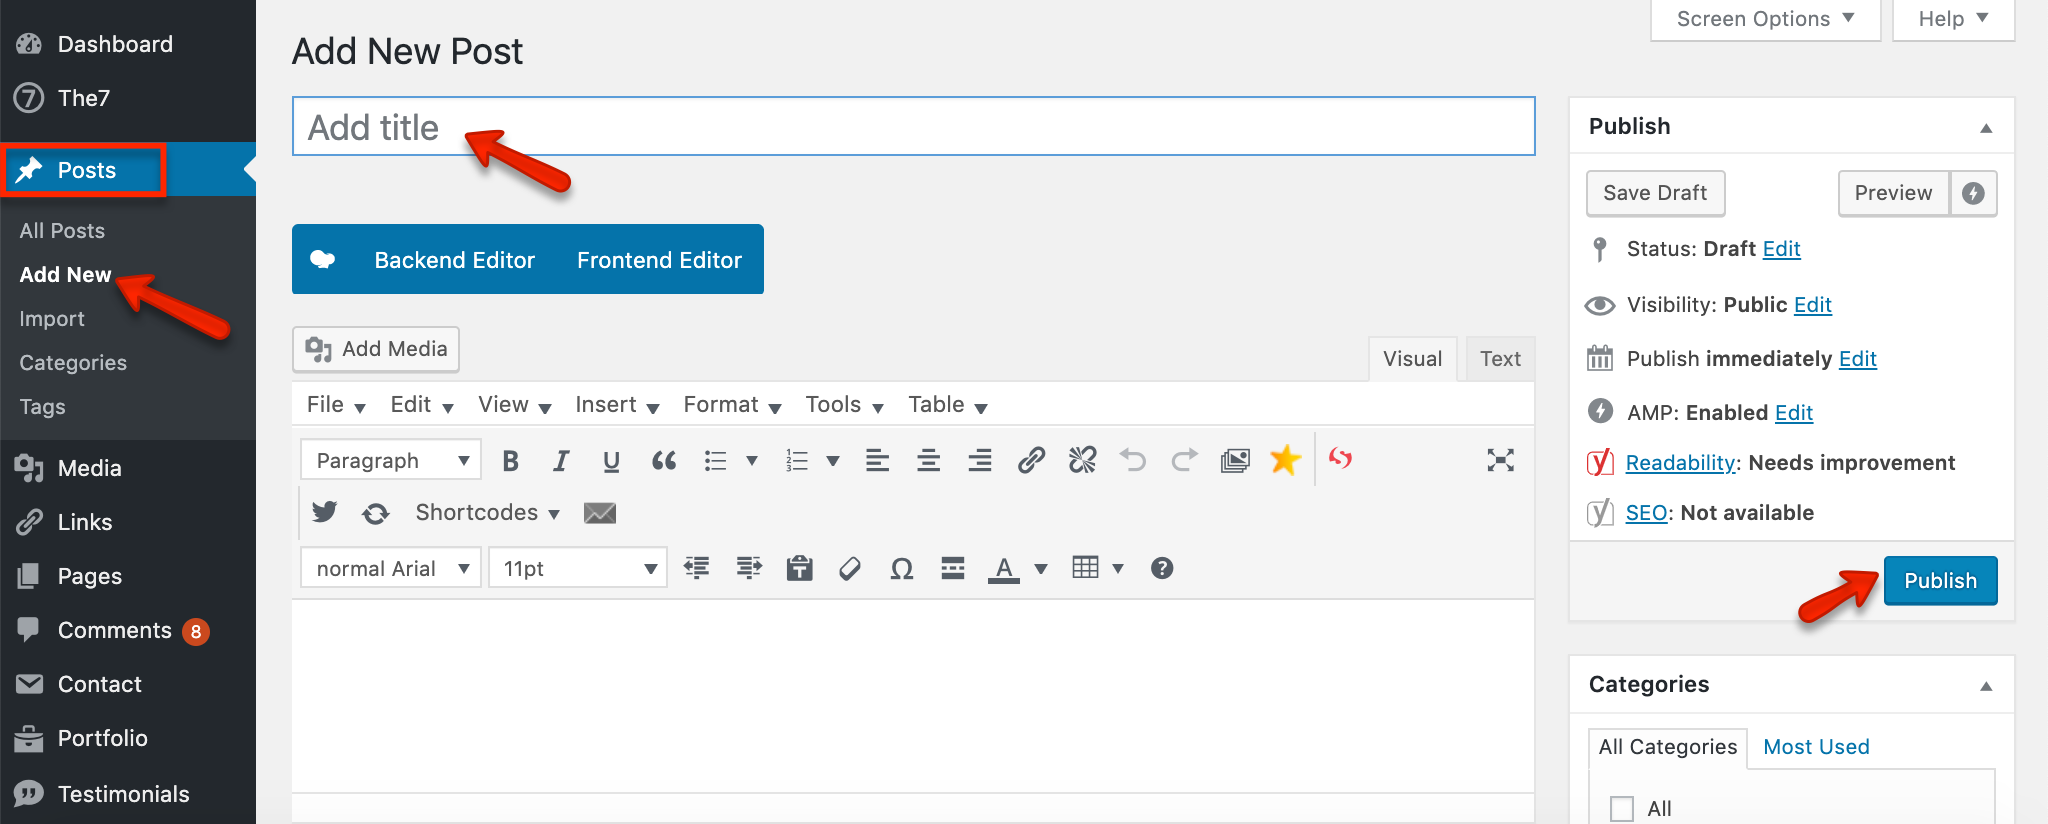

Next, you’ll see a post editor screen. This is where you write your first blog post:
- Write a catchy headline or blog title for your post
- Write your post content
- Add an image, video or GIF to your post by clicking “Add media”
- Change the text size or color
Once you finish writing your post, click “Publish” on the top right of your editor to publish it.
That’s it. Now you’re blogging.
Step 7: Customize your WordPress with Plugins
After publishing your first blog post, you might need to add some essential WordPress plugins to enhance your blog such as improve SEO and build a bigger following.
I’ve written a quick guide on how to install a WordPress plugin here.
Here’s a list of top 12 must-have WordPress plugins for your new blog.
Pro tip: WPForms is the Number 1, Must-Have plugin that you’ll need to install on your blog. It’s by far the most powerful and beginner-friendly plugin for creating contact forms.
WPForms Lite version is completely free while its Pro version allows you to easily create different kinds of forms such as Conversational Forms, Signature Forms, Payment Forms and more.
Bonus Step: Marketing Ideas To Get More Traffic
Most people just write and forget. What’s important is NOT to forget to promote each blog post your published by sharing on social media too.
Its also vital for you to build your email list so that you can send instant messages to your readers telling them you just wrote a new blogpost, you can use:
After that you can try using Sked Social to schedule for ALL your social media needs.
-
Click here to Reveal The Summer 60.5% OFF Coupon Code. (Limited Time Only!)
-
Or go to HostGator and Enter: “THINKMAVERICK” to get 60% OFF on All Plans.
Last but not least, use some of these free logo makers create your own unique logo.
I want to hear from you!
Do you have any concern not to self-host your own blog?
Do you have any problem or question following this tutorial to create your own blog with HostGator? Feel free to comment below
Once you set up your own blog, please tell me about it and remember to send me your link! You can leave a comment below or find me on Pinterest, Facebook or Instagram! Welcome to the Family!