
Will you believe that my secret designing weapon is using a simple tool like PowerPoint?
PowerPoint has many built-in tools that can help you design and create visually attractive work. All can be done easily without any complicated software.
Whenever I want to design something, often times I have to remove the unwanted background of a photo. I will either make it into transparent background or change to another background that I like.
Here is an example that I get from Pexel, one of my favorite Free Stock Images websites. By removing the dark and dull background (left image), I can use this image for more appealing presentations in books, Slideshare, blog post or social media, which looked like the image on the right.
In my previous post, I have revealed the 10 best sites where I get most of my beautiful, high-quality images for absolutely FREE!
Head over to one of this Free stock images sites, grab an image and let’s get started.


If you’re like me, dread to use complicated software or photoshop in editing your images, this simple technique might be useful to you.
Follow this simple steps to remove the background from an image in PowerPoint:
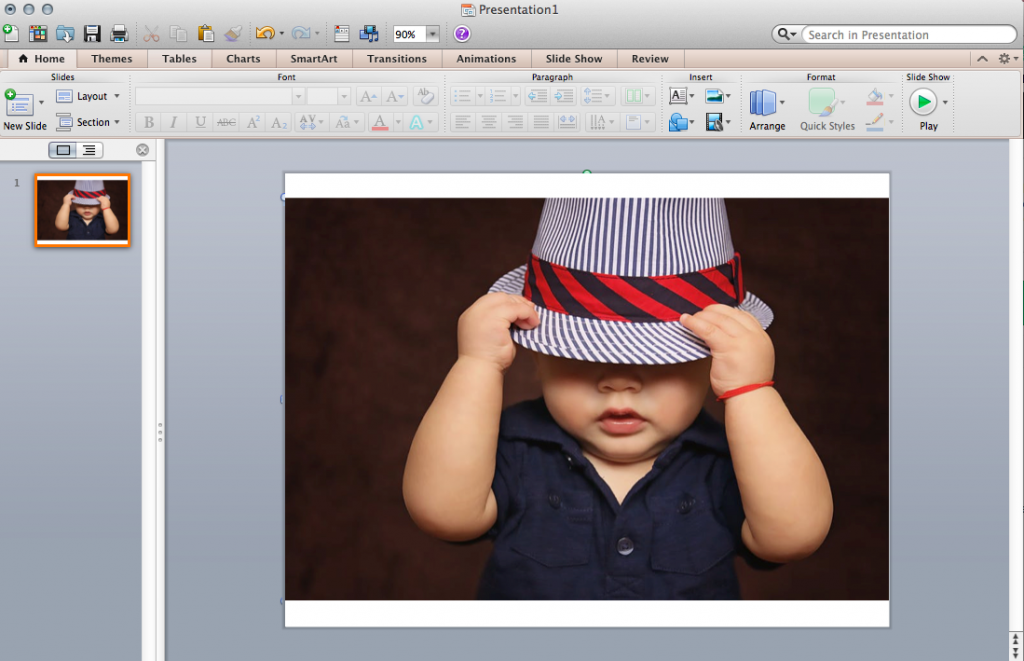
Step 1: Insert or Copy Paste the image into PowerPoint

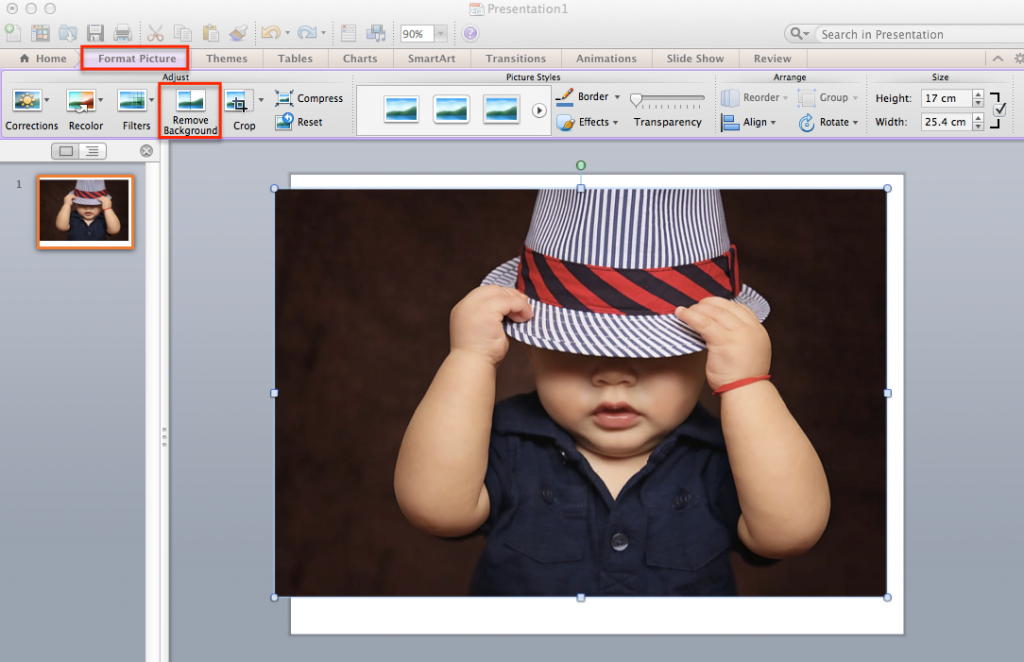
Step 2: Click on the Image. On the toolbar, click Format Picture > Adjust > Remove Background

Step 3: PowerPoint will automatically remove the unwanted background.
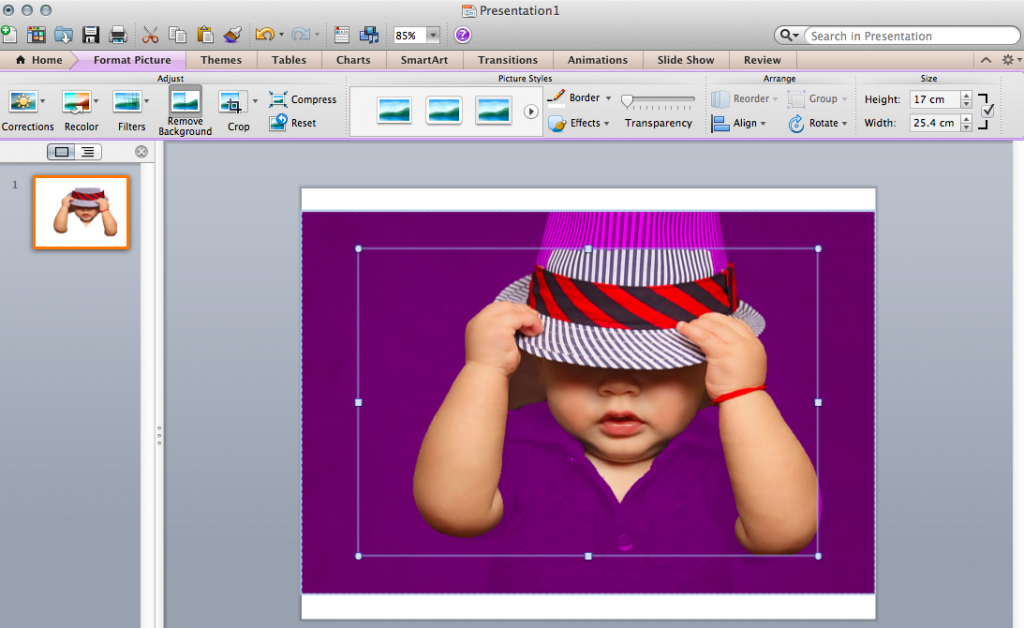

The background highlighted in purple will be removed. So you have to do some adjustments as PowerPoint doesn’t get it right with what you want.
Step 4: Adjust the size to cover the area of the image that you want
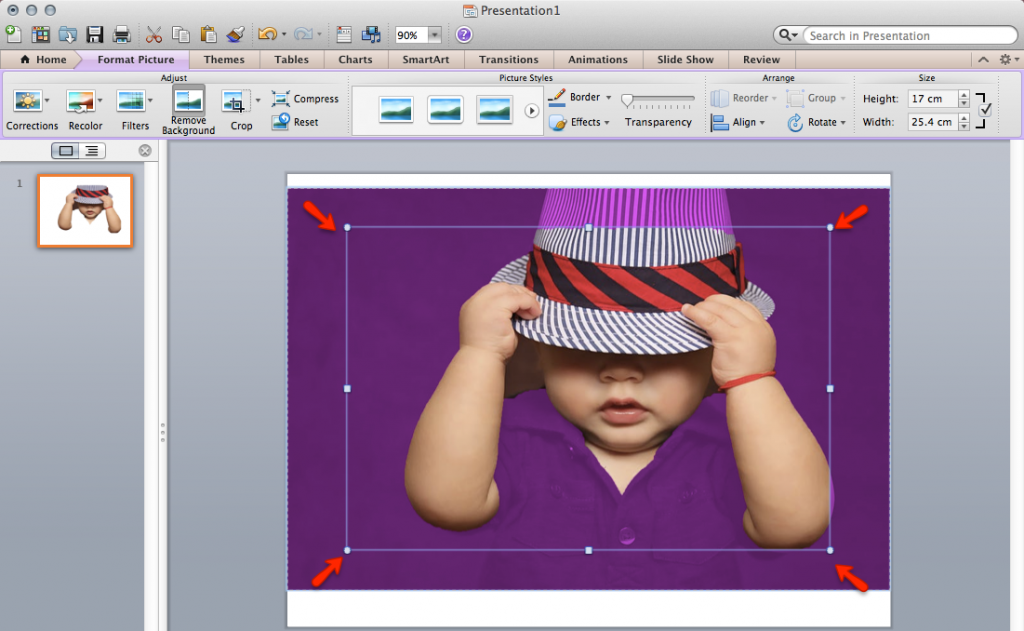

Can you see the torso’s cutting off? You have to drag the box to cover the area that you want to keep.
Step 5: Click Mark Areas to Remove to select any area that you want to remove
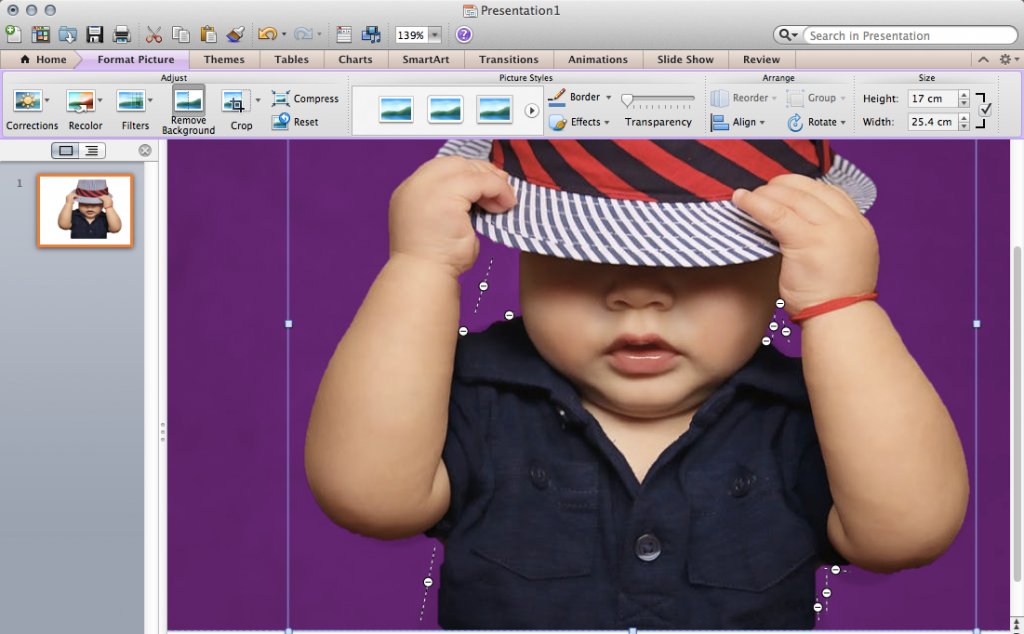

Click on the area you want to remove. For a larger area, you can draw a line to get it removed, which will be featured with a minus sign.
Zoom in on the image to have a closer look and work on the detailed areas. For those purple highlighted areas that you want to keep, simply click on it and it will be featured with plus sign.
At the end, all the areas that you want to remove are highlighted in Purple.
Step 6: When you’re finished, Press enter or Click somewhere outside of the image
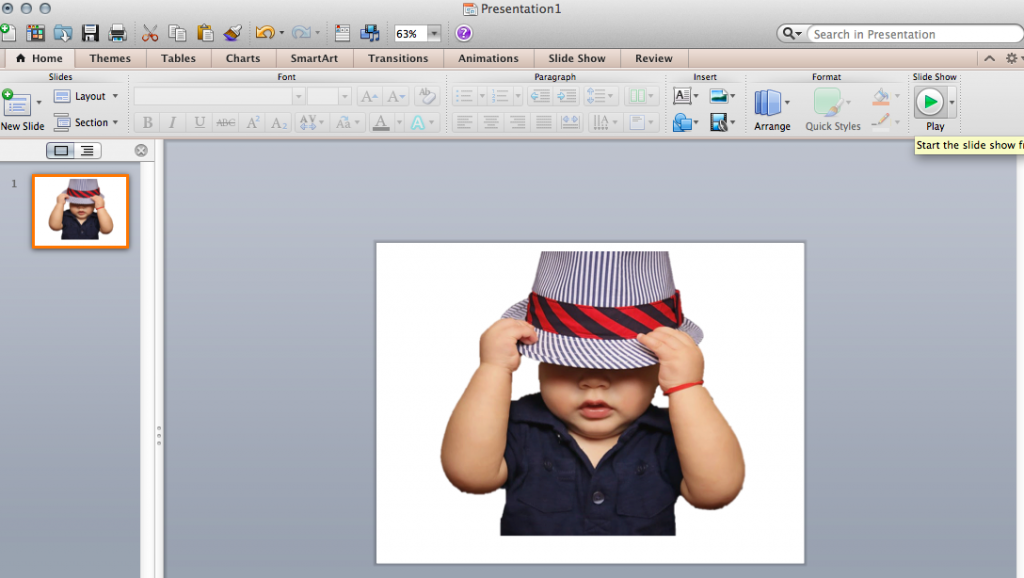

Step 7: Save the image as PNG file to preserve the transparent background
You can choose to continue working on the image by inserting any beautiful background or you can save it as PNS to get the image in a transparent background
How Do You Remove Backgrounds?
By just using this method in PowerPoint, you can now remove backgrounds from any picture easily and quickly.
What’s your favorite way to remove picture backgrounds?
Do you have any other background removal tips that you want to share with us? Feel free to share them in the comments.
And lastly, if you liked this post, don’t forget to share it on Facebook, Pinterest and Twitter.
Also, check out this 4 best free tools to remove image backgrounds without photoshop