


Medium is a great publishing platform where you can write, share, read and interact with other’s stories that you like.
For bloggers like you and me, it’s simply an extension of your blog! You have invested lots of time and effort into writing a blogpost, so why not republish it on Medium and drive extra traffic for FREE? I’ve seen pro-bloggers having success by simply doing this little extra step.
You may ask: “ How about duplicate content?”
That’s my main concern too- it may be penalized in search engine rankings. But you don’t have to worry about that as it’s well taken care of at Medium. Medium will use rel=canonical tag to attribute the ultimate authority to the website of original content. You can always recheck about this tag after your story is live on Mediym, I will talk about it later on this post.
Are you ready to start re-publish your content on Medium?
Follow this simple 3 steps
1. Import your content to Medium
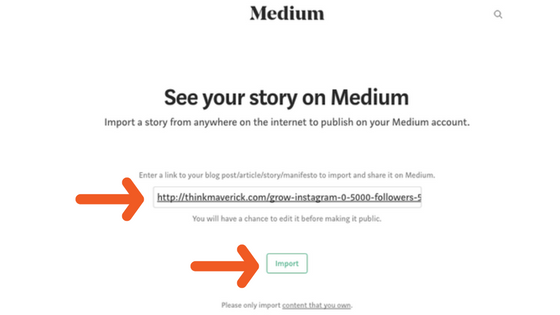

- Use this Medium tool
- Copy paste any blog post link that you want to import to Medium
- Click import
2. Edit Your Story
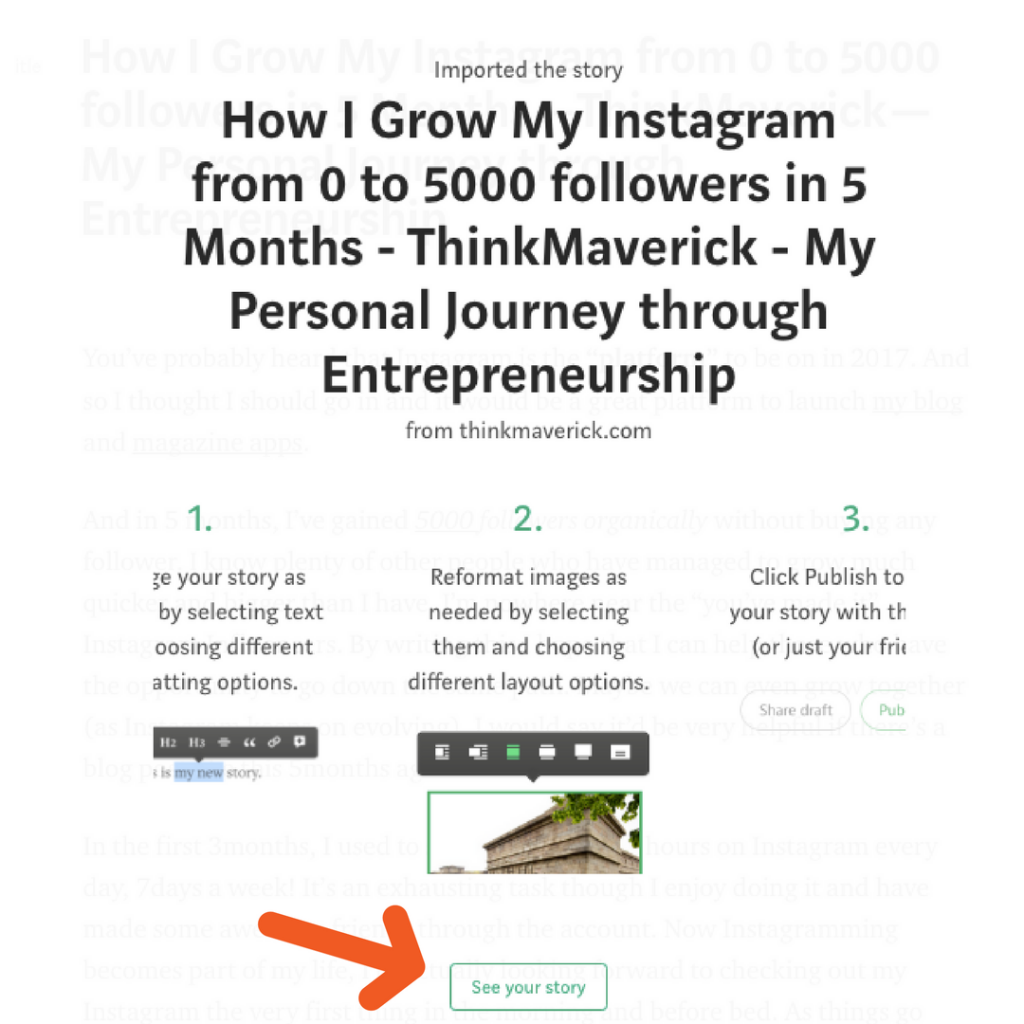
The Medium Tool will fetch all the text and formatting from your original contents to Medium.
Click “see your story” button
Your story is in a draft mode now and you have to do some editing before publish it.
3. Add Images and other Multimedia
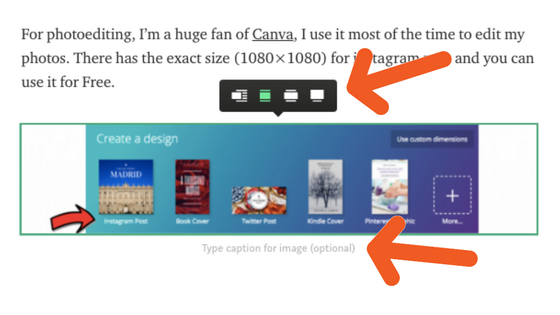
It will be much easier if you only have text content. Medium may miss out some of your images so you have to upload those images to your story on Medium. If you have the source of images with you, you can click the add button and start uploading to the post. Or you can always save the images from your original post and upload to Medium. You can add video and other multimedia too.

If you just have text content, it’s advisable to add some images which make your post more readable and presentable.
Align the images and type any caption for images if you want.

4. Customize Your Post Title and Link
Next, we want to customize the title and link to make the post a search engine friendly site.
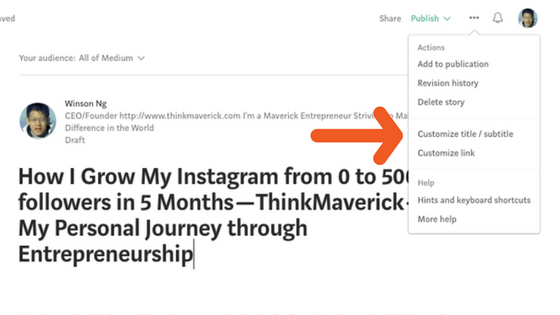

Click on the “three dots” on the top left of your post, you can see the options as shown in the picture above.
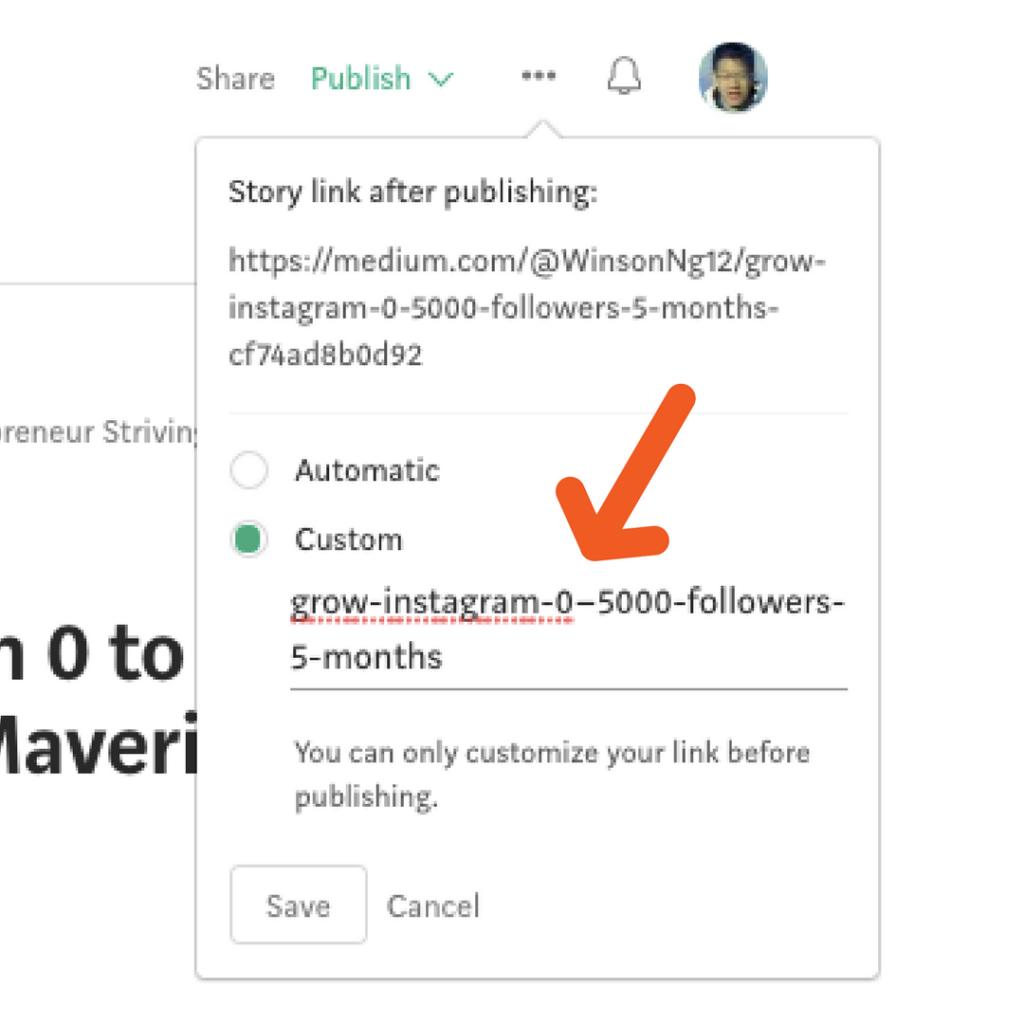

Here is an example of my post, I like to customize my post link. Click “Customize Link” and enter link that I want and save.
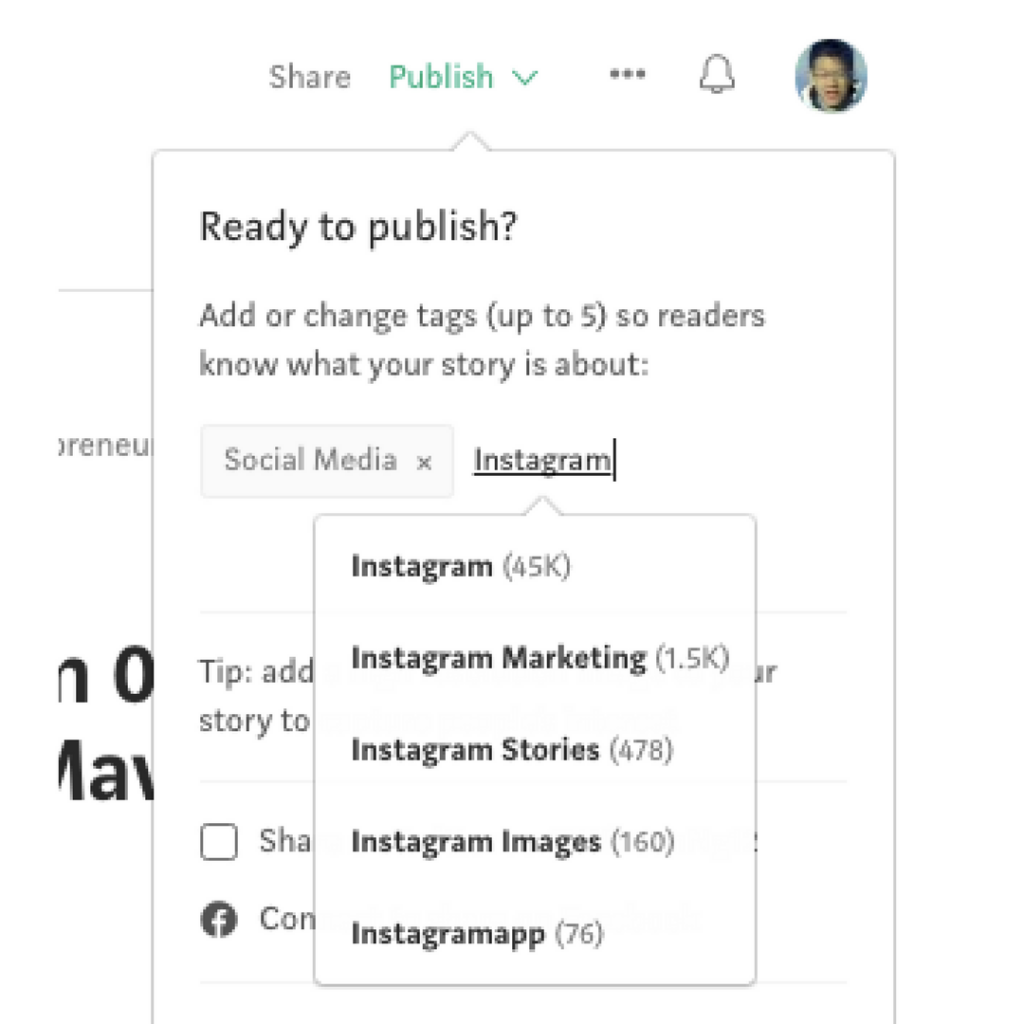
5. Add Tags
The last and most important step is to add some relevant tags to your post. Click “Publish” on your top left, you will see a dropdown as shown in the picture below. You can add max 5 tags to your post. And the number beside the tag indicates how popular is the tag.

After you have done adding all the 5 relevant tags, click publish. Your story is now live on Medium.
6. Check on Page Source (Optional)
This step might be redundant. But if you want to make sure that your content on Medium is published properly, and it isn’t something too technical.
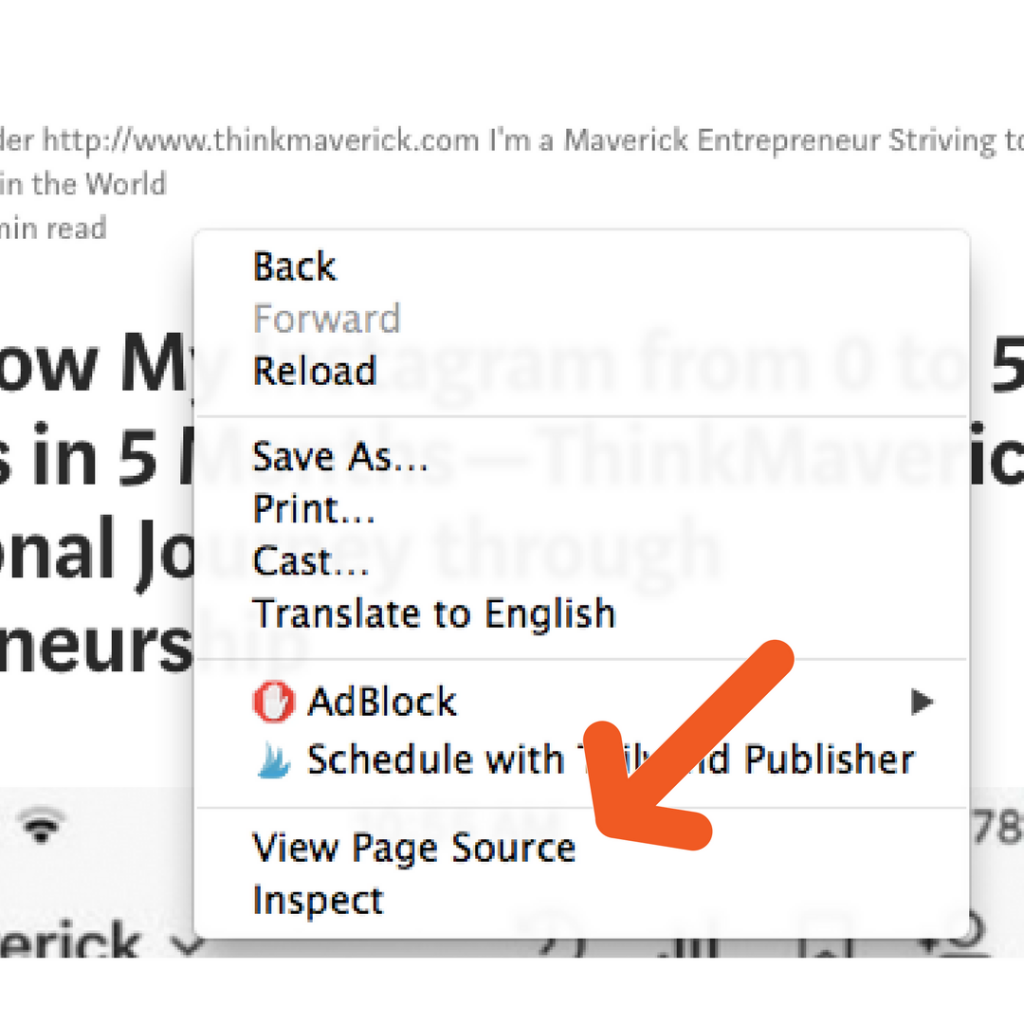
RIght click anywhere on your post on Medium, click “View Page Source”

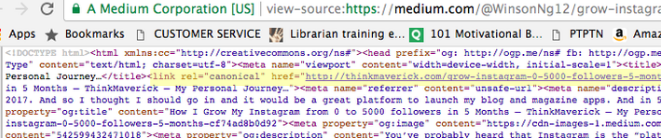
Then, you will come to this page with lots of code, which I can hardly understand. Search for rel=canonical tag . If you can see the website link of your original content behind this tag, then you’ve done it correctly.
You may want to try this step for your first post and skip this step for your future posts.

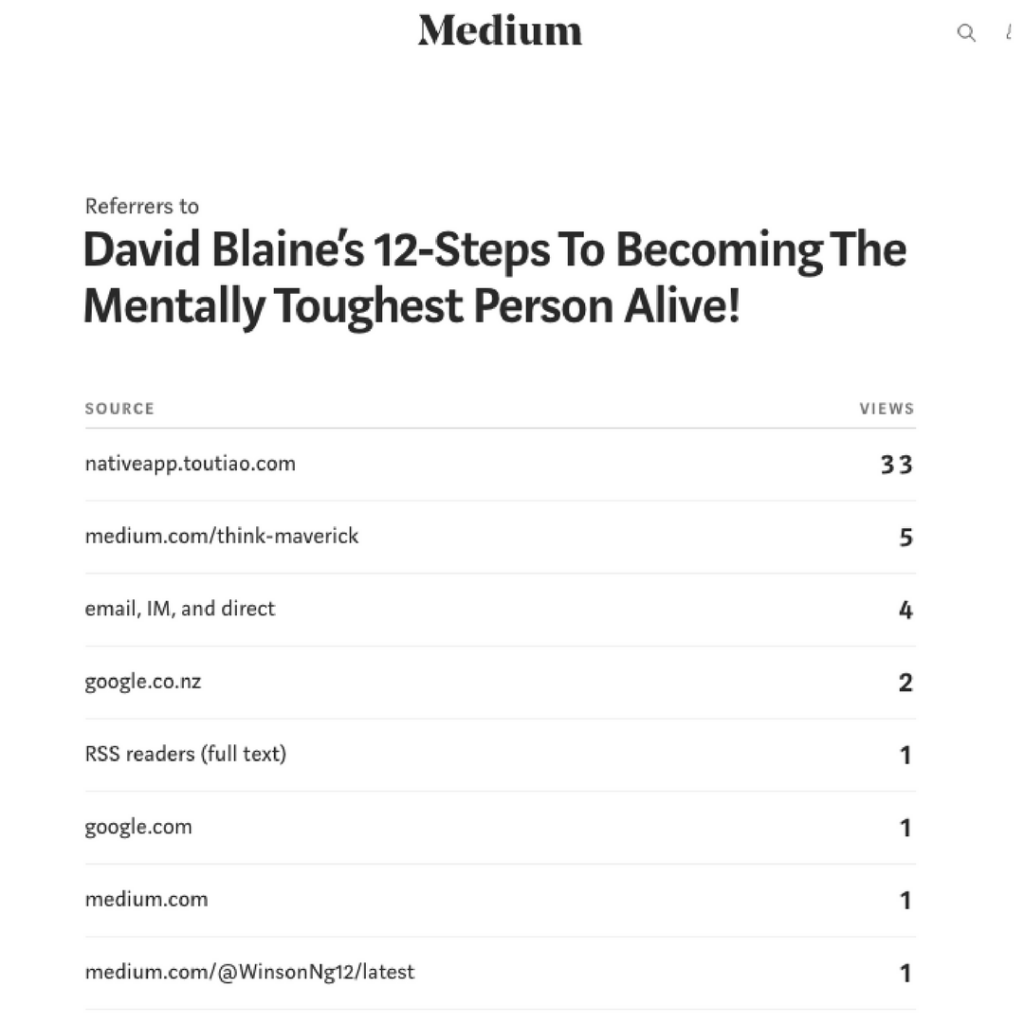
Stats On Medium
Numbers don’t lie. It’s important to track your insights on Medium. You can see the statistic for your page and publication.
Click “Referrers” under any story that you want to see the stats.
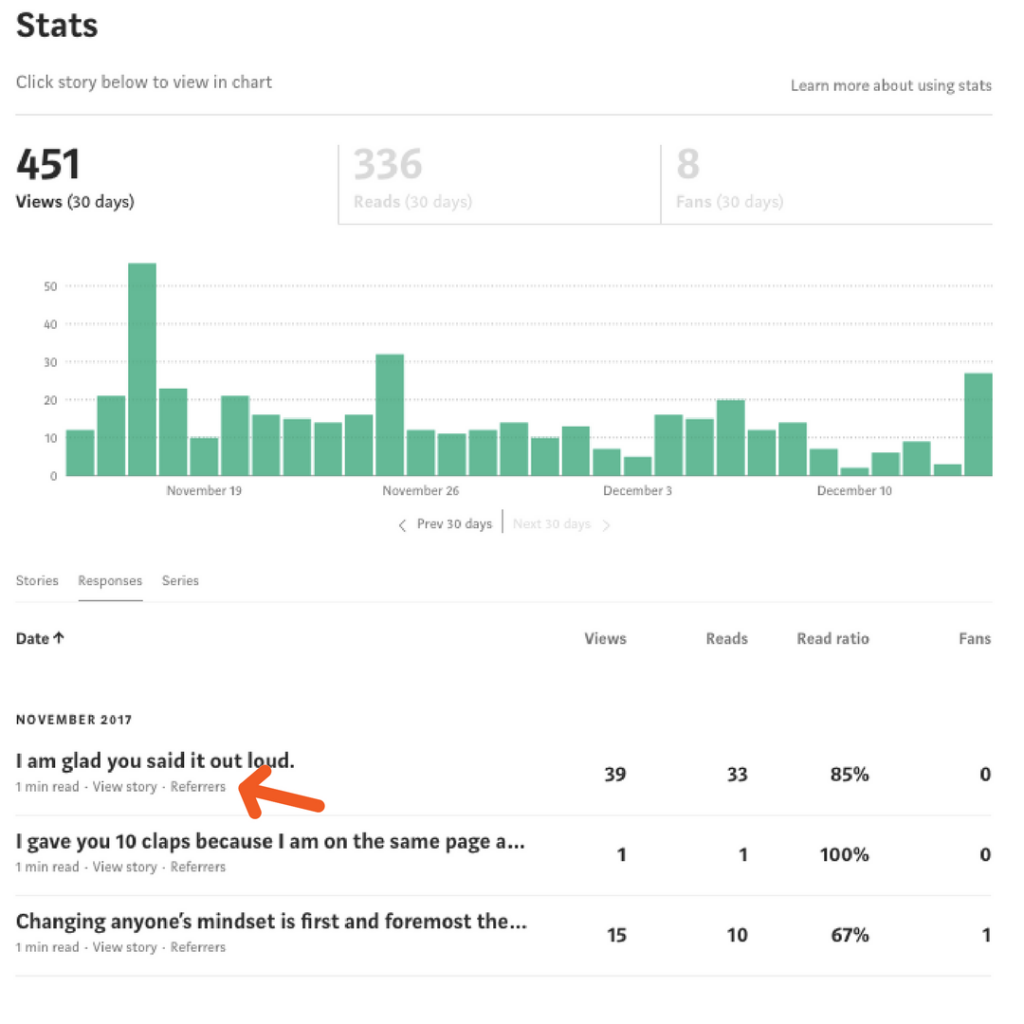

Here is a stat example of one of my published stories on Medium.

Conclusion:
Medium is one of the most popular platforms when it comes to content. Spend an extra 5 minutes or less on republishing your existing contents will help you reach more targeted audiences and get more traffic to your website.
Have you started using Medium?
What’s your experience with Medium?
Do share your knowledge, experience or any opinion in the comment below.