


Pinterest has quietly risen to success as a powerful marketing platform for businesses. If you’re not using Pinterest in your digital marketing strategy, you are missing out a HUGE opportunity to reach new customers.
I’ve been using Instagram to drive traffic and building my brand since last July. And in 5 months, I’ve gained 5000 followers organically without buying any follower. As things go with a flow, I thought it’s the time to build my brand presence on another social network. After reading many traffic and income reports from other bloggers, Pinterest marketing truly intrigued me. Afterall, it’s FREE to join.
I decided to give it a try and I’m glad I did it- totally surprised with the result!
I’ve less than 200 followers on Pinterest but it drives more traffic to my blog compared to my 5000followers Instagram account!


If you haven’t started your blog yet…
I have written a helpful guide to help you start your profitable blog with Bluehost (Only for serious beginners). For less than $4/month, you can create your own blog and get a FREE domain name! click here to get started now.
Why Pinterest?
Pinterest is a powerful visual search engine and it’s one of the most important online shopping platforms.
**FACTS**
- Over 300 million people globally are using Pinterest every month, an increase of 40% from the last year! It is one of the fastest growing social networks in the world.
- 1 out of 2 U.S. millennials use Pinterest every month, as much as Instagram
- 93% of Pinners use Pinterest to plan purchases and 72% use Pinterest to decide what to buy offline.
- On average, each user spends 14.2minutes per visit.
- A single pin lasts 3.5months, which is approximately 1,680 times longer than a Facebook post.
In short, Pinterest is a real game-changer for bloggers, small business owners and big corporations. People are actively using it to search for inspiring ideas, from dinner recipes, home decoration ideas, traveling tips to daily outfit ideas. Plus, they are ready to buy.
If your business interested in:
- Driving more website traffic
- Making more sales
- Increasing the longevity of content
- Helping your content get discovered in Google searches
- Introducing your blog/business to a whole new audience
Then you should use Pinterest in your marketing strategy.
But, wait…
I don’t think my target audience is using Pinterest.
Pinterest is for women only.
I don’t have time for another social platform.
I heard you. I have the exact same assumptions too when I just started.
But there are so many misconceptions about Pinterest Marketing.
None of that is true.
Every business can capture a wider audience and thus get new customers on Pinterest with the right strategy and visual content.
If you’ve been thinking about using Pinterest but haven’t done much about it, this ultimate guide will show you how to get started on Pinterest in no time.
Related reading: 10 Strategic Ways to Use Pinterest to Drive Blog Traffic
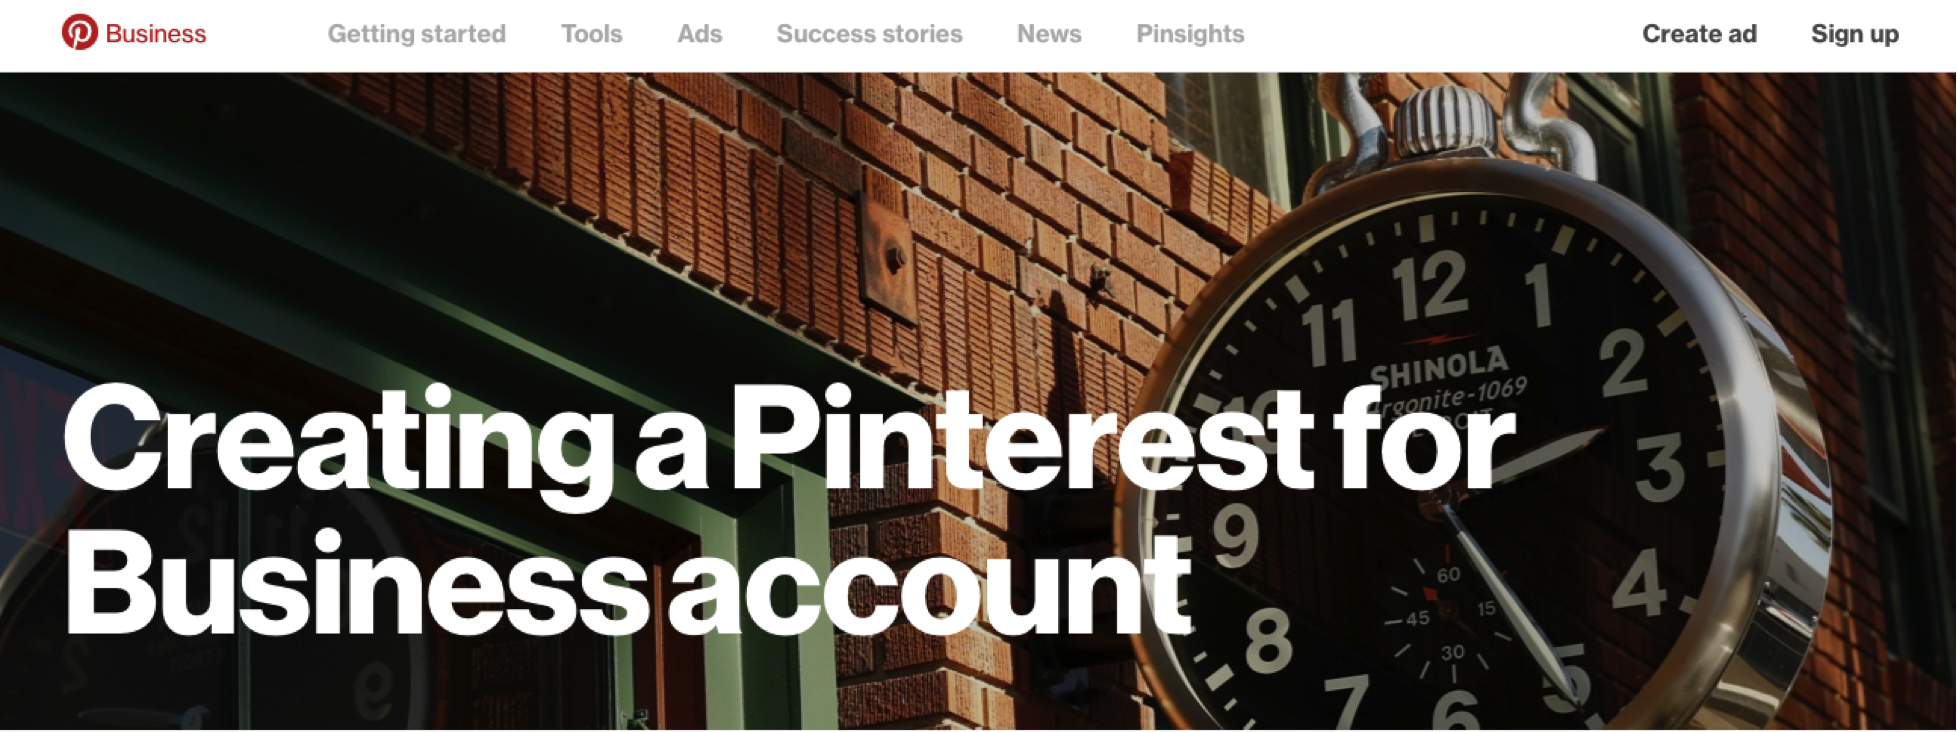
How to Use Pinterest for Business
1. Setting up Your Business Account
To get started on Pinterest for Business, you’ll need to create a business account.

With a Pinterest Business account, you’ll have access to a bunch of amazing business features, which are
- Promoted Pins
- Rich Pins
- Analytics Function
To take full advantage of this business features, you have two options:
Option 1: Create a brand new business account
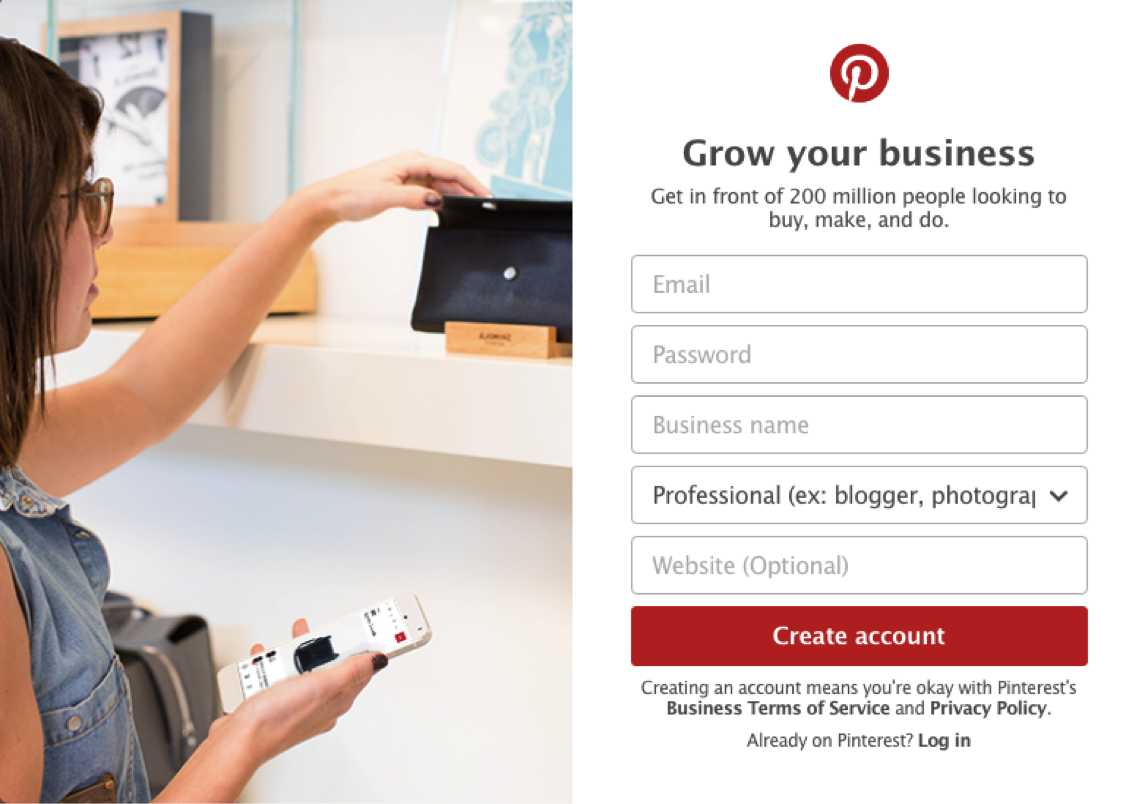

- Click here to create a free new business account
- Enter the information about your business: Business name, email, and profession.
- Read and accept the Pinterest Business Terms of Service and click “Create Account”.
Option 2: Convert your personal profile to a business account
- Login to your existing Pinterest personal profile.
- Go to Pinterest for Business.
- At the top-right corner, click on this “three-dot”.
- Click “Upgrade Now”
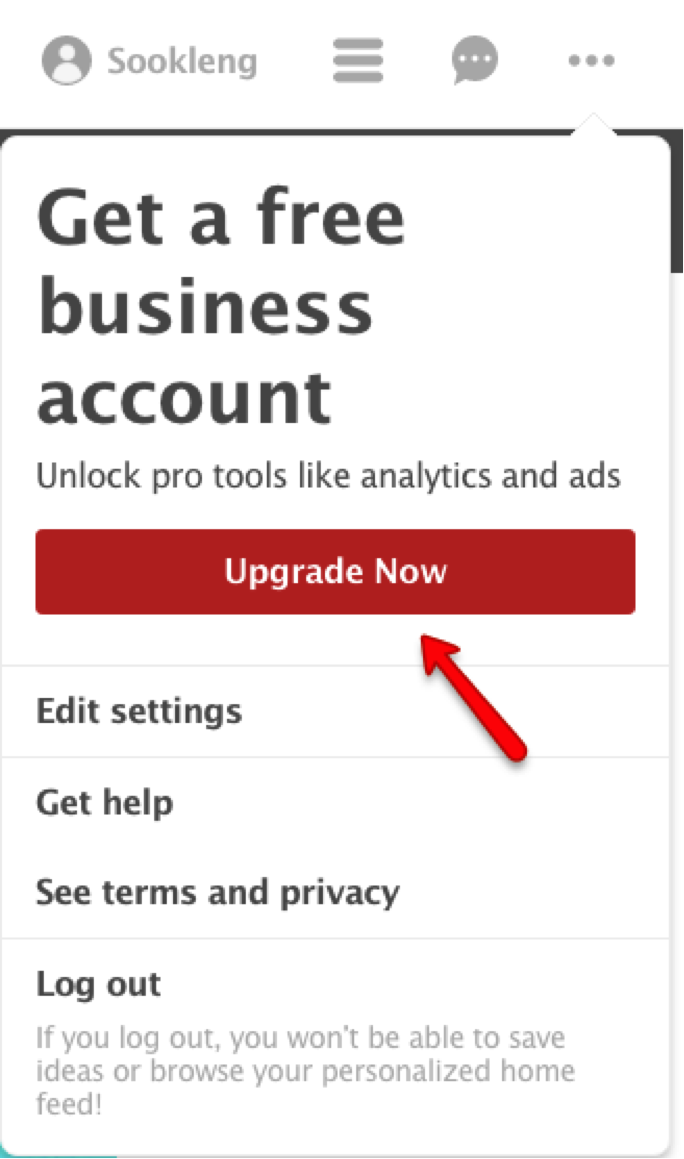

- Complete the details about your business and click “Convert”.
Don’t worry, all your pins, boards and followers will migrate to your new business account. Your profile will still look the same, except with some extra features.
2. Complete your Business Profile
Potential visitors will go to your page and learn more about your business. So, the next important step you’ll need to do is complete your business profile:
- Upload your company logo or picture
- Change your username (it’s autofill when setting up your account). You can brand your Profile by adding relevant keywords
- Write a short and succinct bio. Remember to include keywords to optimize search
- Add a description on “About you” field. It’s your chance to tell people what’s unique about your business
- Add your location
- Add your website
Pinterest is a visual search engine, so use keywords and think visual! Let people know your story, expertise and passion.
As an example, this is our Pinterest profile. This is how your Pinterest Business profile should look like.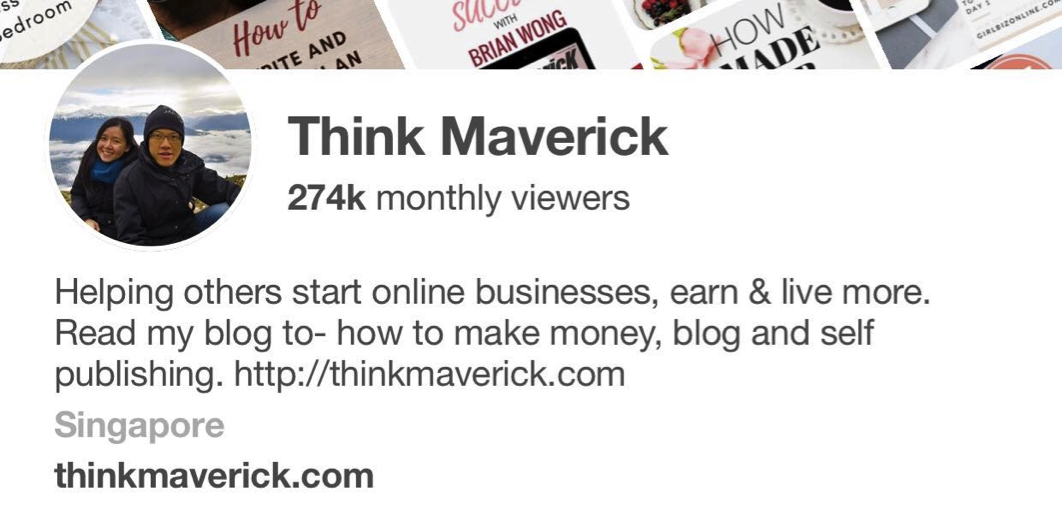

3. Verify Your Website
Next, you’ll need to verify your site so that you’ll able to have the access to Website Analytics, and featured logo.
Method 1:
- Login to your Pinterest profile.
- At the top-right corner, click “Edit Profile”
- Choose “Claim Website”
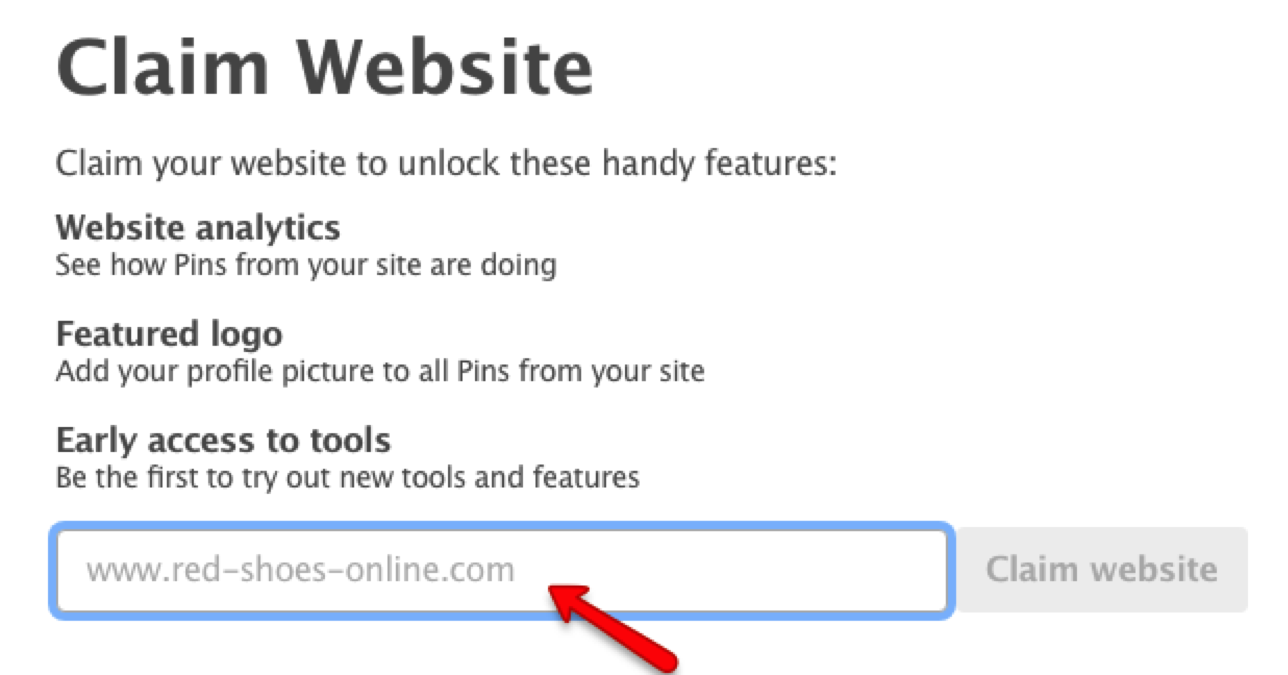
- Enter your website URL in to the box and click “Claim website”
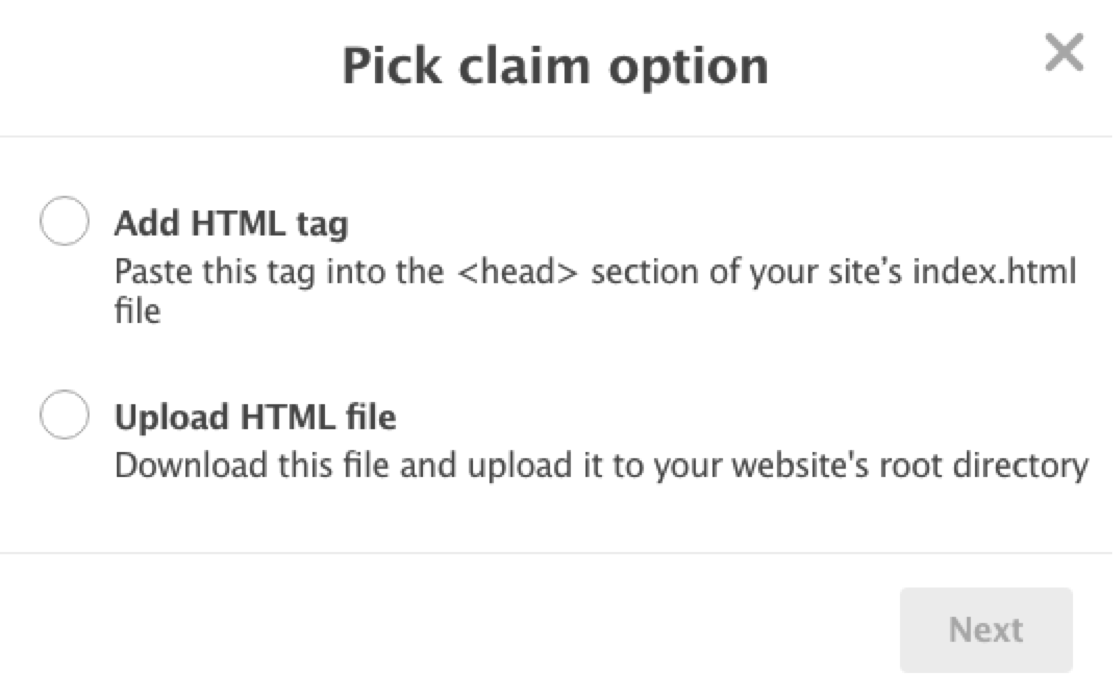
- You’ll see a pop-up claim option, select “Upload HTML file”
- Upload the file to your website’s root directory vie CPanel or FTP. Go back to your Pinterest profile and click “ Click here to complete the process” button.
- You’ll receive a message saying your verification was successful.


Method 2:
If you are not so tech-savvy or if you don’t want to mess up with HTML code, I would recommend you use Yoast SEO plugin. It will help you to verify your website on Pinterest and set up rich pins easily.
If you haven’t installed the Yoast SEO plugin yet, you can get it here.It’s the best WordPress SEO plugin that you’ll need for your blog or website. Plus, it’s FREE.
Here’s how to verify your website with Yoast SEO plugin:
- Login to your Pinterest profile.
- At the top-right corner, click “Edit Profile”
- Choose “Claim Website”
- Enter your website URL into the box and click “Claim website”
- You’ll see a pop-up claim option, select “Add HTML tag”
- A popup window with a tag will show up on your screen.
- Copy the entire meta tag.
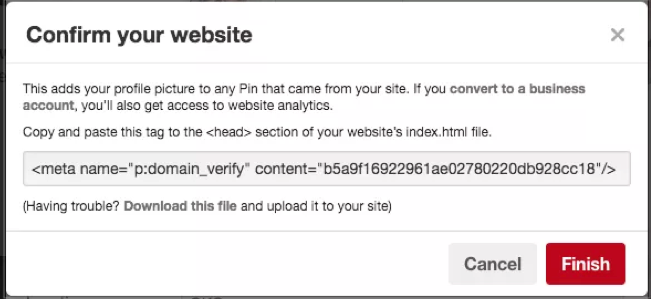
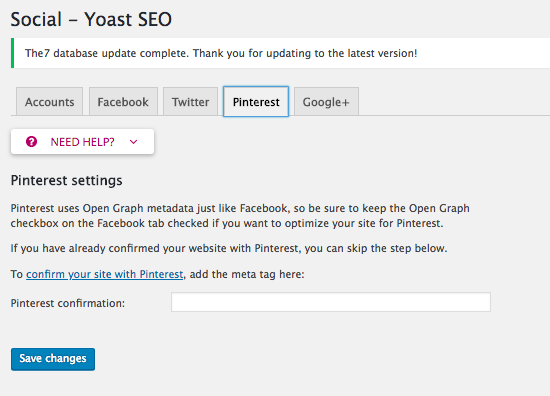
- Paste this meta tag to your website’s index.html file (On WordPress, click SEO>Social>Pinterest) and click “Save“.
- Go back to your Pinterest account, click “finish” button.
- Done. Now you should be able to see that your site has been confirmed.


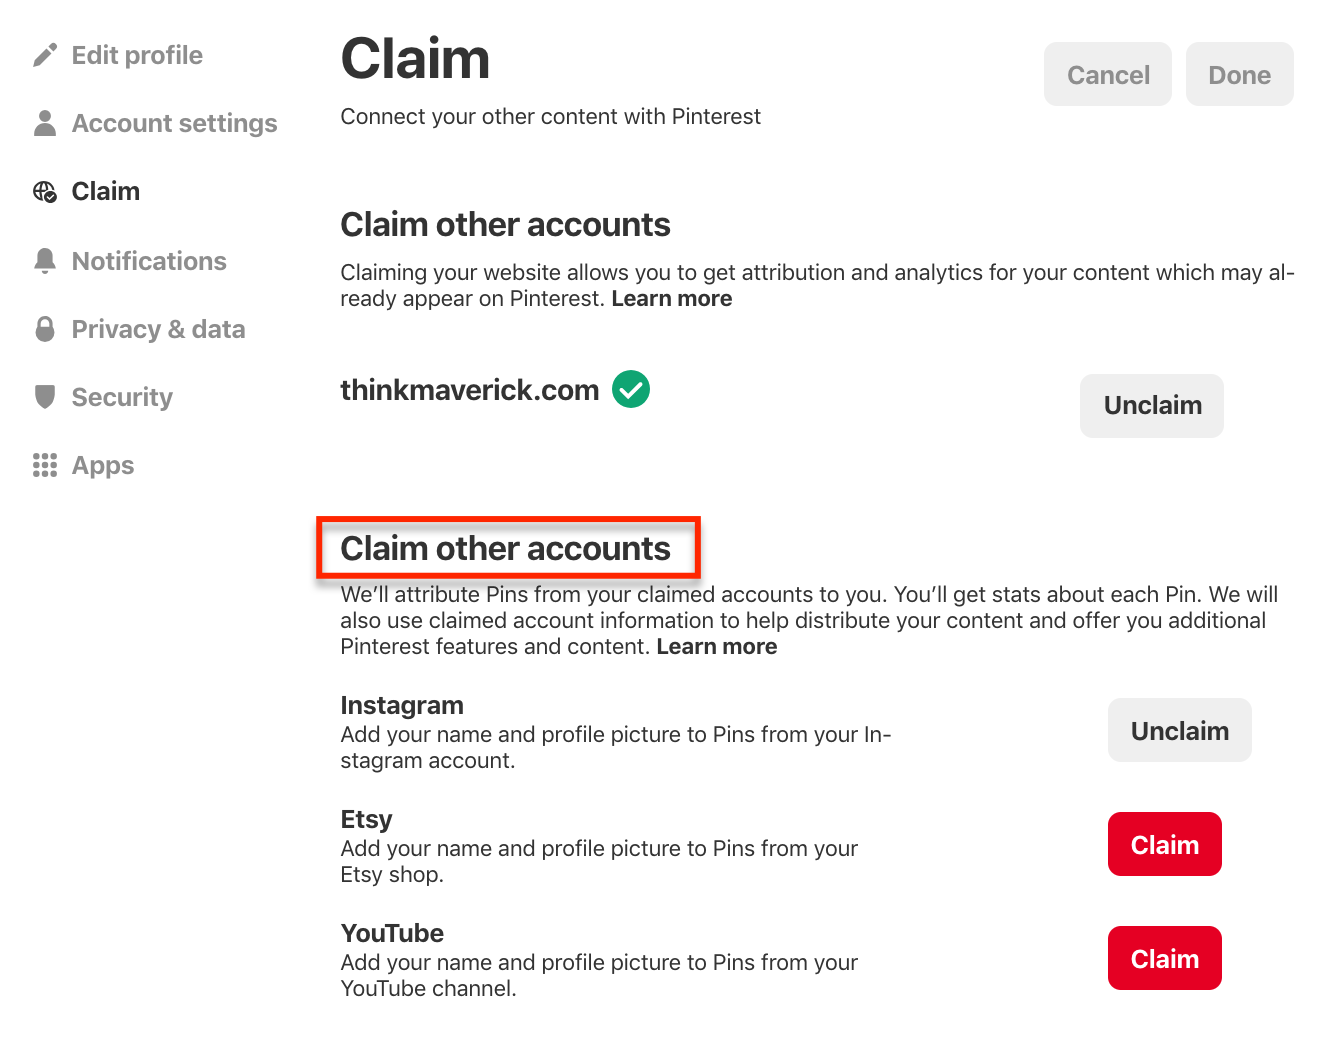
4. Claim your Instagram, Etsy or YouTube account
Plus, you also claim your Instagram, Etsy or YouTube. Claiming your other accounts not only helps to let people know where they can see more from you, but also give you claimed account information to distribute your content. It will also give you access to additional Pinterest features and content as well as analytics on all Pins saved from your claimed account.
To claim your other account, simply click “Claim” button next to the accounts you want to link.

If you’re serious about using Pinterest for your business, you’ll need to set up Pinterest rich pins. Rich pins provide more information directly on a pin. Currently, there are 4 types of pins that allow you to provide more contexts about pinned images: product, recipe, article and app.
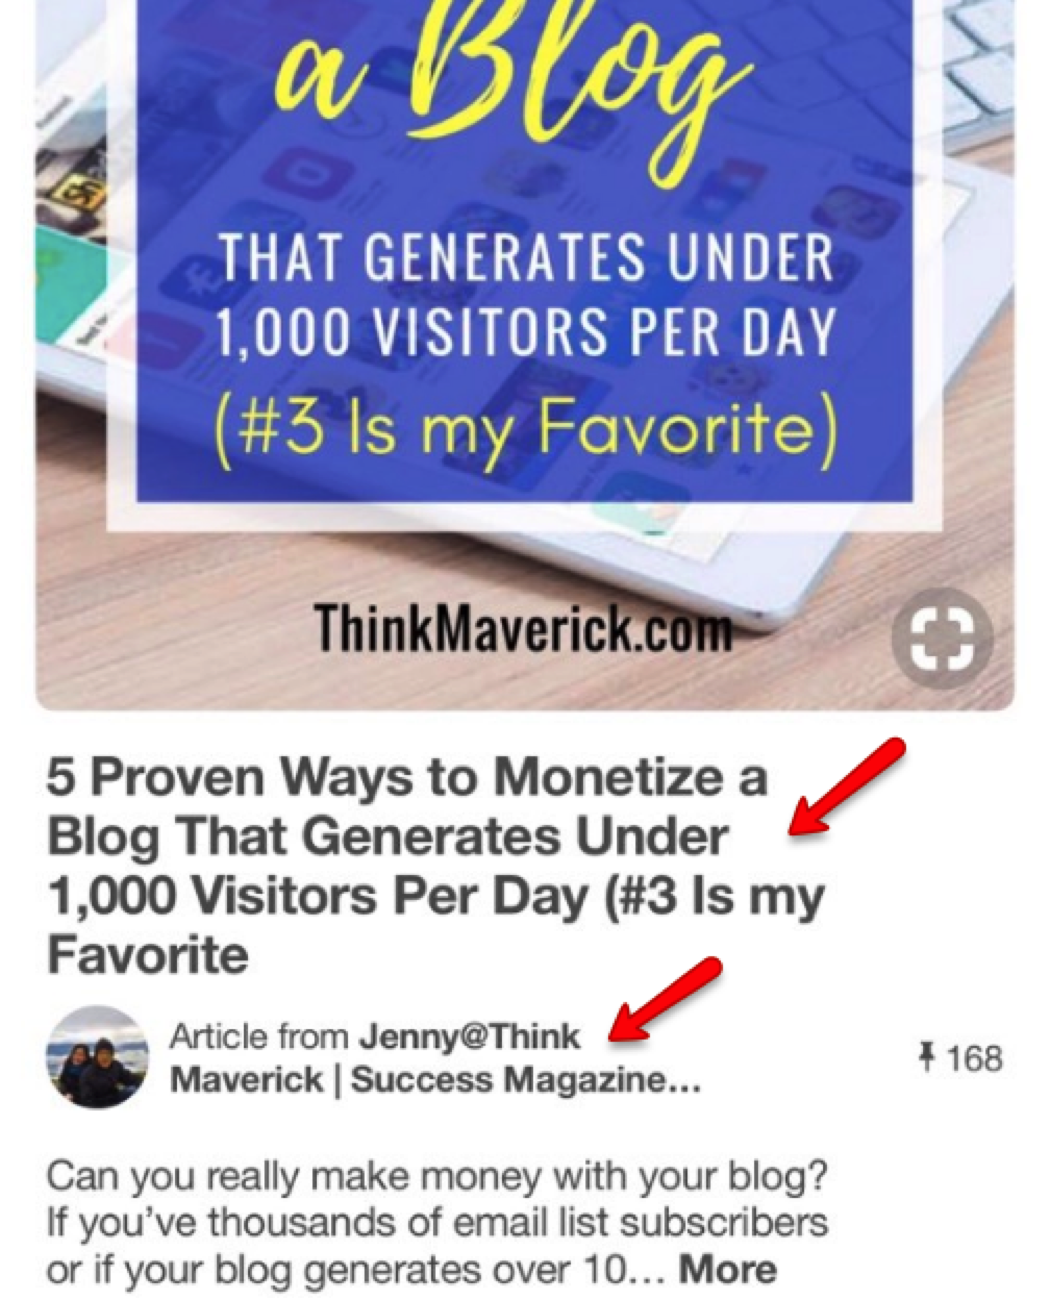
As a blogger, you’ll want to add rich pins for several important reasons:
- Each of your article post will show a headline, author and description. If you use relevant keywords in your pins strategically, it’ll help you rank in Pinterest search.
- Pinterest favors pins with a fully verified and confirmed website. It’ll certainly help increase your pins engagement, reach and thus drive more traffic to your site.
How to Get Rich Pins
I will show you how to enable Pinterest rich pins using two methods as below:
Method 1
Firstly, you’ll need to add specific markup code in your website or blog. You can do this by using oEmbed or Semantic Markup (the most two common formats: Schema.org or Open Graph metatags).
After incorporating these into your website, use the rich pins validator to verify your work.
You’ll need to have some technical knowledge using this method.
Method 2 (with Yoast SEO)
If you hate dealing with HTML code, Yoast SEO plugin can help you do the work. This is how I set up my rich pins.
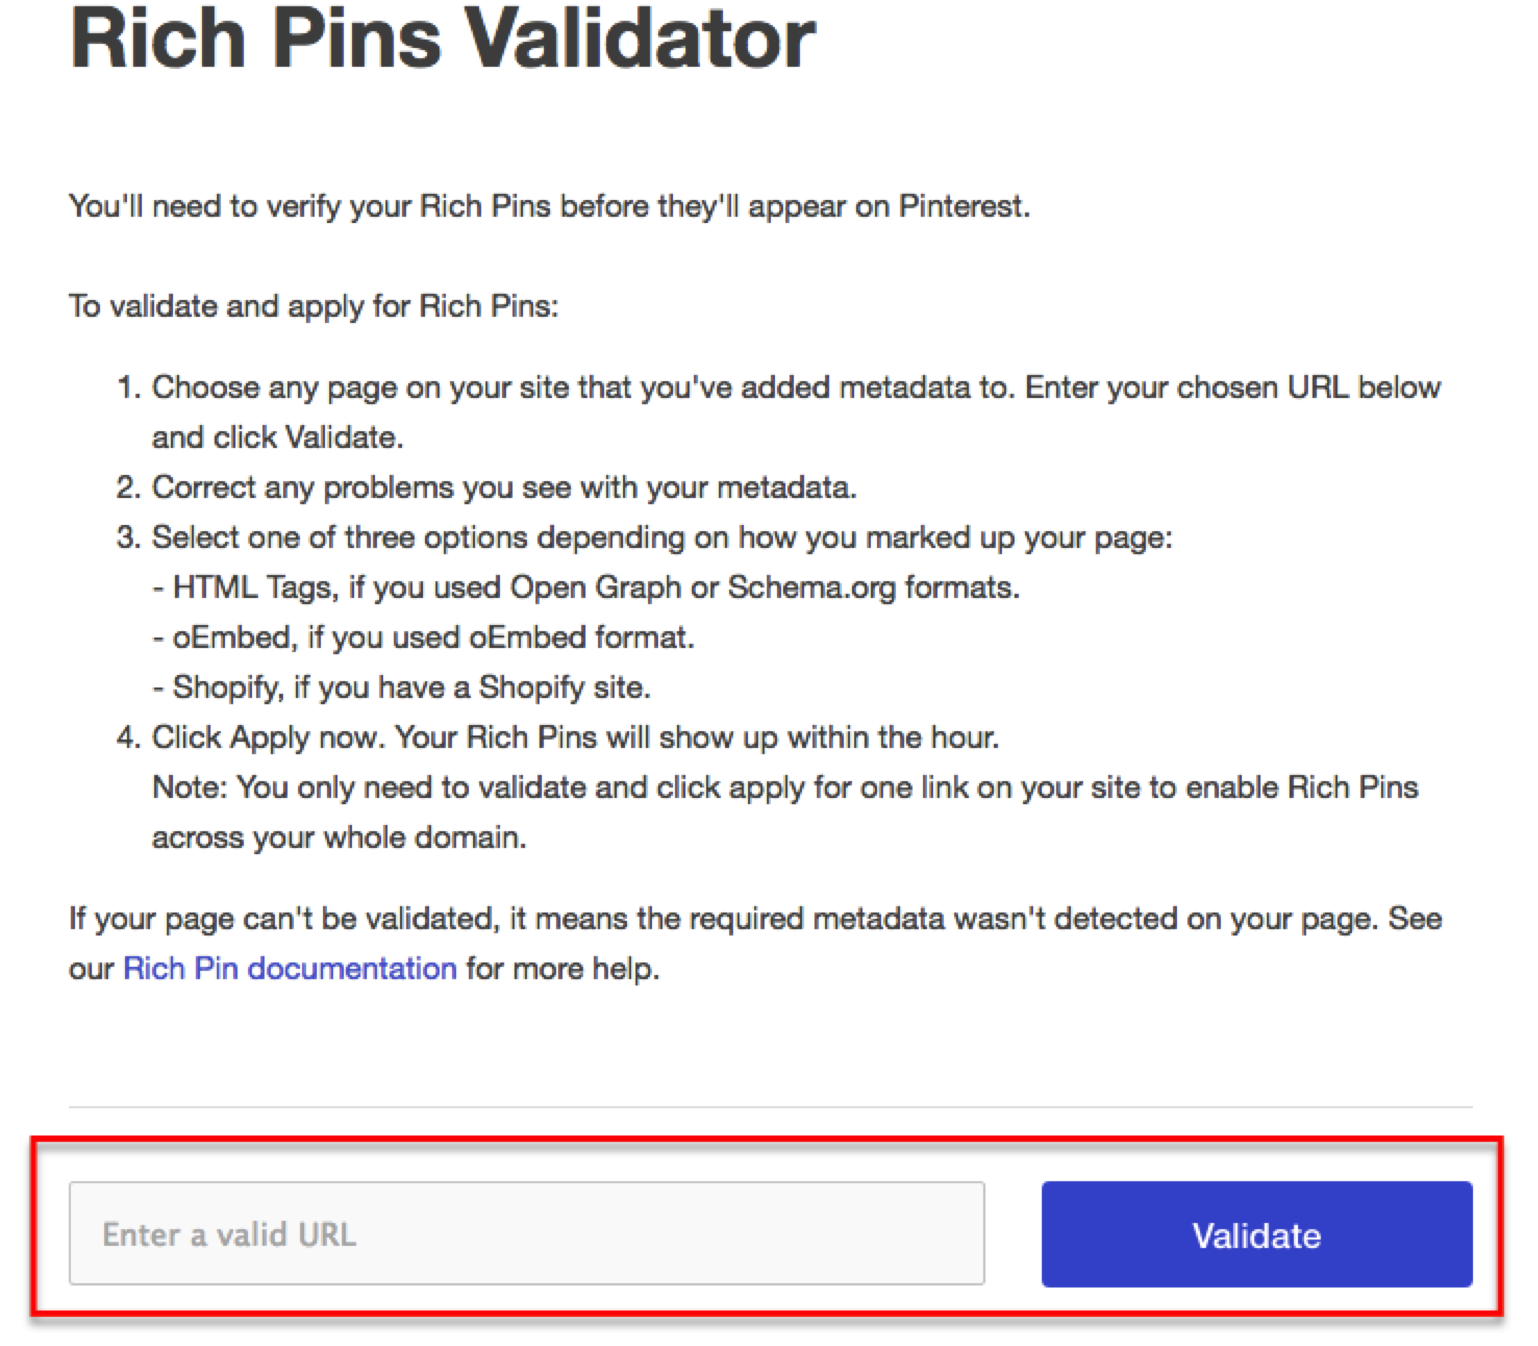
- Go to the Rich Pin Validation page
- Copy a URL from any post on your blog and paste it into the Rich Pin Validator
- Click “Validate”
- Then, you’ll see a notification that your pin has been validated.
- Click “Apply Now” button.
- Pinterest will notify you of the approval in less than 24hours.
Note: You’re required to validate and click apply for only one link on your website to get Rich Pins across your domain. Simply use a post URL and not the link to the main page.


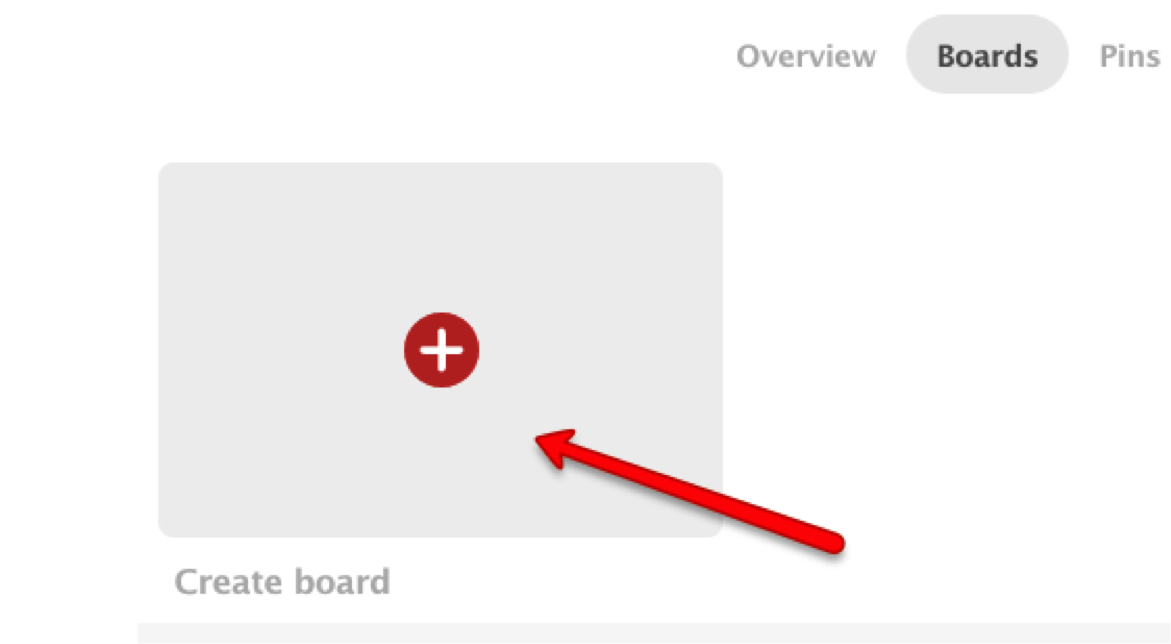
6. Create your First Board
After setting up your Pinterest, now it’s the time to create your boards and start pinning, repining, liking & commenting.
Boards are where you’ll save your pins. Generally, you’ll want to categorize your pins into different boards depends on your interests and topics.
For a new Pinterest account, I would recommend you begin with 10 boards.
To create your first board, go to your profile page, click “Create board”

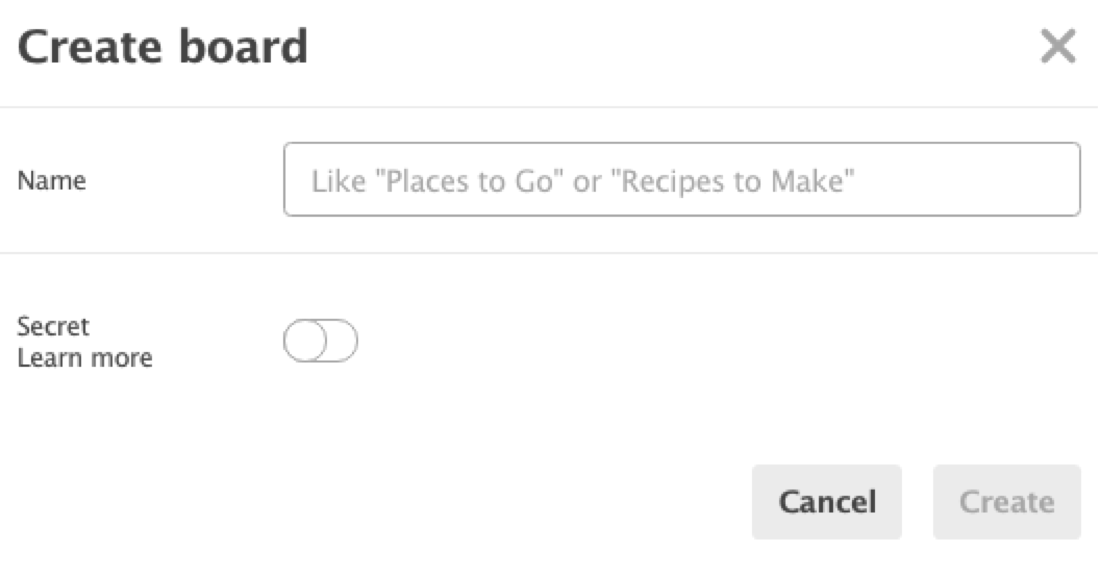

Choose the right name for your board is very important because boards searchable. Remember, Pinterest is a visual search engine. Using keywords, phrases and terms in your board’s titles will increase your content’s discoverability. You’ll get more pins, followers and click by naming your boards properly.
Do a keyword search and find out what keywords do your target audience use in the organic search.
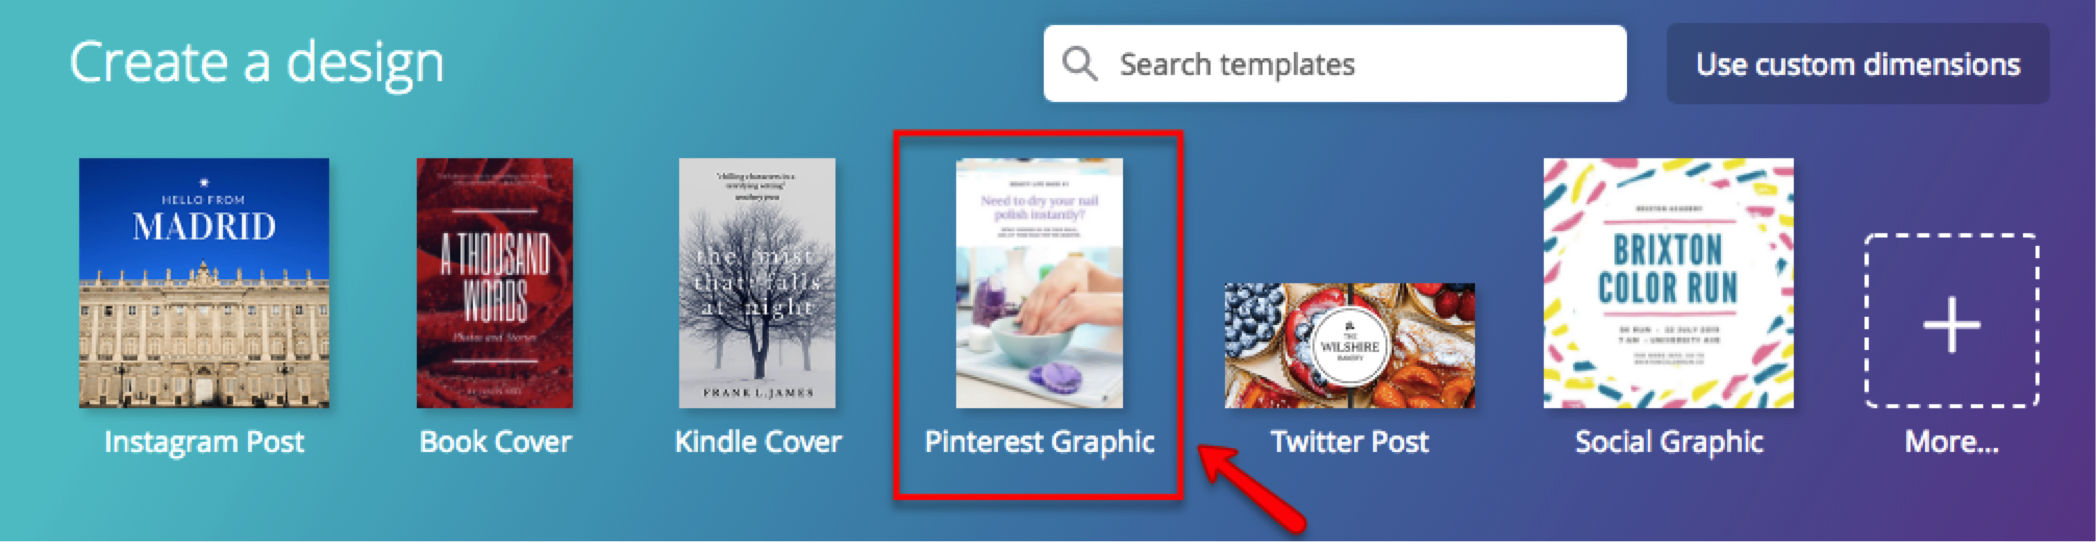
7. Create your First Pin
I like using Canva to create Pinterest pins for all my blog posts. Plus It’s free.
If you don’t have a Canva account yet, do it now here.
On your dashboard, select “Pinterest Graphic” and you can start designing your pins.

8. Start Pinning
Wait, no one likes an empty board. So, the next important step that you’ll need to do is finding and pinning useful content to your boards.
As a start, I recommend you pin 5 images to each board. You want to share both your own pins and other people’s content too.
Final Step: Pin Like a Boss
Just like other social networks, a consistent pinning strategy is of utmost importance on Pinterest in order to build your following and get more traffic.
So, “how many times should I pin per day?”
Many social media experts recommend pinning at least 5 times a day. For the best result, you’ll need to pin up to 30 pins per day. I’ve come across lots of bloggers who pin more than 100 pins on a daily basis and get massive website traffic by doing that.
I think it would an easy task to pin 30, 50 or 100 times manually by allocating 15-30minutes every day. But you don’t want to spam your followers or other Pinterest users with content. So the trick is spread your pinning throughout the day.
Your daily task: Login to your Pinterest account numerous times and pin manually every day. This sounds much more time-consuming. I don’t know about you. But often I’ll get distracted and end up spending more unnecessary time on Pinterest.
Fortunately, scheduler like Tailwind can help you pinning on Pinterest automatically. What you’ll need to do is set your pins once and they will take care of the rest. You can save your time focus on your core business.
I schedule my pins with Tailwind for all my blog posts. While you don’t need to use two schedulers for your Pinterest, both of them have different features that complement each other.
For a start, you can start pinning manually. In the long run, if you’re serious about driving massive traffic, you’ll need the help of a scheduler.
I highly recommend signing up to Tailwind now. You’ll receive 100 scheduled pins for FREE. No credit card required.
You can maximize your Pinterest efforts and see how it works for you.
Spread the Word
Wait no more! Now you’re on Pinterest.
It’s time to let people know about your Pinterest profile and all the great content.
More awesome tips
- Pin eye-catching and attractive images
- Make your pins vertical
- Have a pinnable picture on each blog post
- Send an email to your subscribers and tell them you’re on Pinterest
- Add Pinterest link to your email signature
- Promote your Pinterest profile across your social networks
- Join Group Boards
- Use Pinterest analytics
Related reading:
Ready to get started with Pinterest marketing?
I hope this convinces you to use Pinterest for your business. Lastly, remember to connect with us on Pinterest where we share awesome blogging tips, self-publishing & social media strategies.
Do you have any problem or question about getting started on Pinterest? Feel free to comment below
I live and breath making an income online.
I’ll be sharing more of ideas and guides soon. Stay tuned.
If you haven’t already, sign up here to receive my emails and a free magazine subscription
Note –This post includes affiliate links. If you make a purchase through any of the links on this post I’ll earn a small commission at no extra cost to you. It helps us support the running of this website and continue to publish helpful content. Thank you all for your support!