


I don’t know about you. But for me, it’s to protect my bitcoin from any potential attacks and keep it in a secure place.
After much research, I found that Ledger Nano S is one the cheapest and most secure ways to store and manage your bitcoin and other digital cryptocurrencies. This is because it protects your private keys to your funds.
“If you don’t have a private key, you don’t own your Bitcoin.”
I can’t stress this enough.
In a traditional bank, if you forget your password, you can easily retrieve your money by contacting the bank and proving your identity with an ID card.
However, in the cryptosphere, if you lose your private keys, you will lose all of your funds. Private keys are the critical component in the ownership of bitcoins.
If you read until now I believe you must have already made up your mind to invest in a good, reliable Ledger hardware wallet for long-term HODLing investment.
I’d say it’s a smart choice that you won’t regret!
But wait…
Before you rush in and buy yourself a Ledger wallet, make sure you buy a new Ledger Nano S directly from the official store.
Avoid buying from any 3rd parties or eCommerce sites like eBay because there’s a chance that you’ll get a tempered device and you can lose all your funds permanently.
No one wants to repeat the same mistake made by this man who lost over £25000 overnight because he bought a Ledger from a middleman.
Yes, it may take longer and cost more to purchase a hardware wallet directly from the manufacturer but the alternatives just aren’t worth it.
Once you received your Ledger Nano S, you may need to take some time and learn the basic function of the device.
In this article, I’m going to show you how to navigate and setup your first ever Ledger Nano S in a few simple steps and hopefully it will shorten your learning curve.
Setting up a Ledger Nano S: A Step-by-step Guide for Beginners
1. Unboxing Ledger Nano S
The first step in setting up your hardware wallet is unboxing the Ledger Nano S package.
Now, let’s check the box contents.
An authentic Ledger Nano S product should contain:
- A Ledger Nano S device
- A USB cable
- A keychain
- A lanyard
- 3 paper cards: a blank recovery sheet, a Getting started instruction sheet, and a Did you notice card

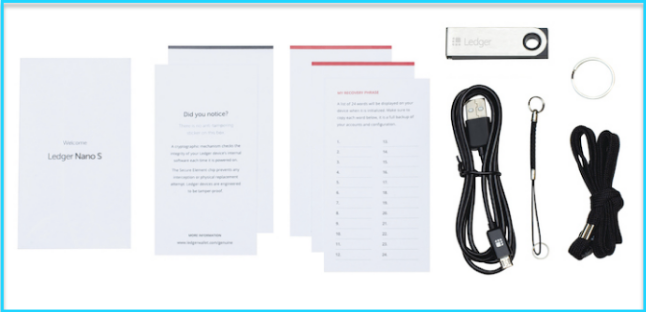
Photo courtesy of Ledger: Box contents of the Ledger Nano S
2. Controlling the Ledger Nano S
Once you’ve made sure receiving a complete and genuine product, you’ll need to know how to navigate and control the device.
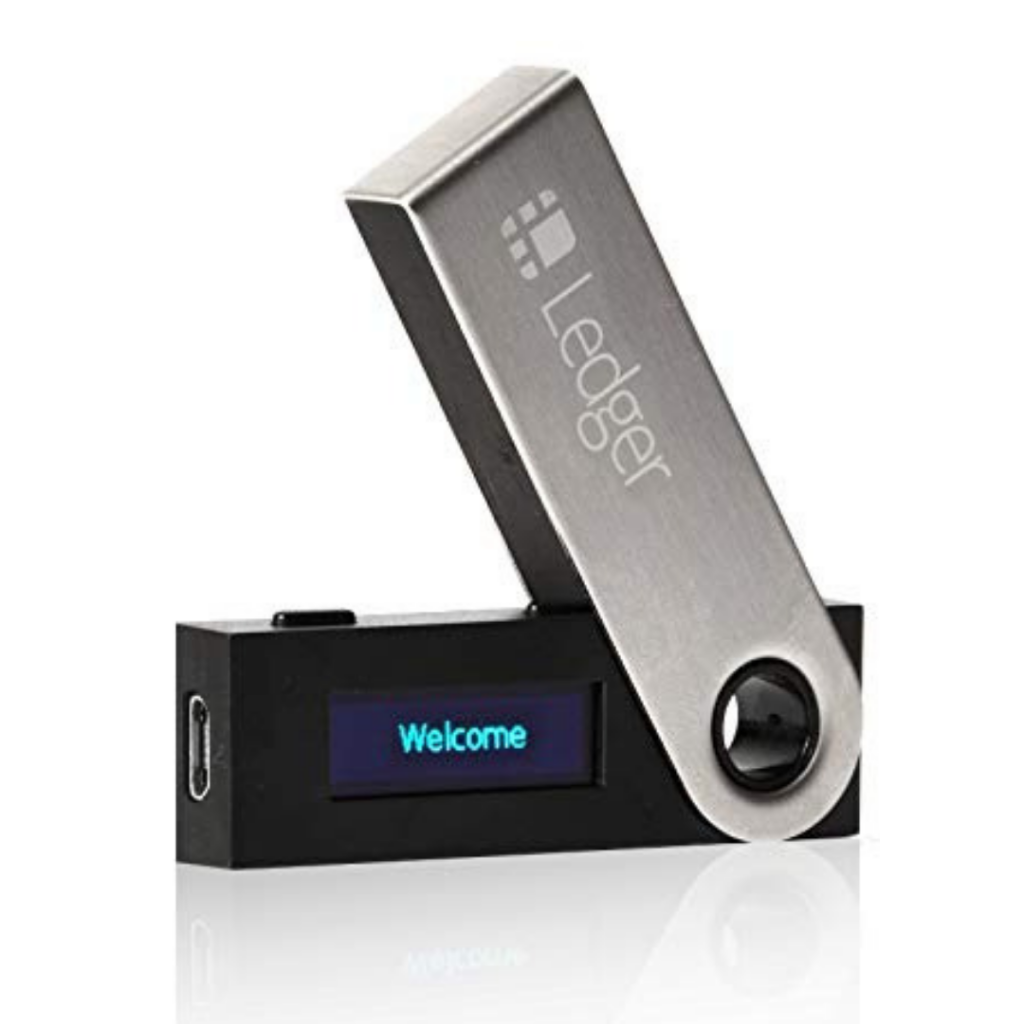
A Ledger Nano S has a small LCD screen and two buttons as shown in the picture below.
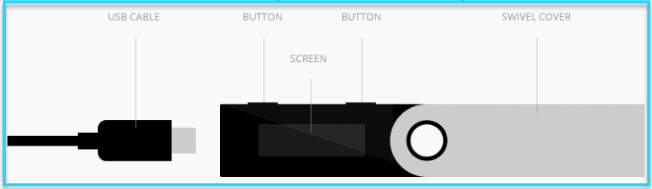

Firstly, hold the device horizontally in your hands – with the screen facing towards you and two buttons on the top. And it looks like a thumb drive.
Get used to the design, this little device is going to help to protect your cryptocurrency assets.
3. Plug-In Ledger Nano S
Since the Ledger Nano S has no internal power source, to get started you’ll need to plug it to a USB port on your computer with the supplied USB cable.
Once it’s connected, you’ll see a welcome message on the display screen and a brief introduction of how to use the two buttons.
- To navigate the menu items, press left or right button.
- To select an item on the menu, press both the left and right button at the same time. This is equivalent to hitting “confirm” or “enter”.
Next, press both buttons to begin.
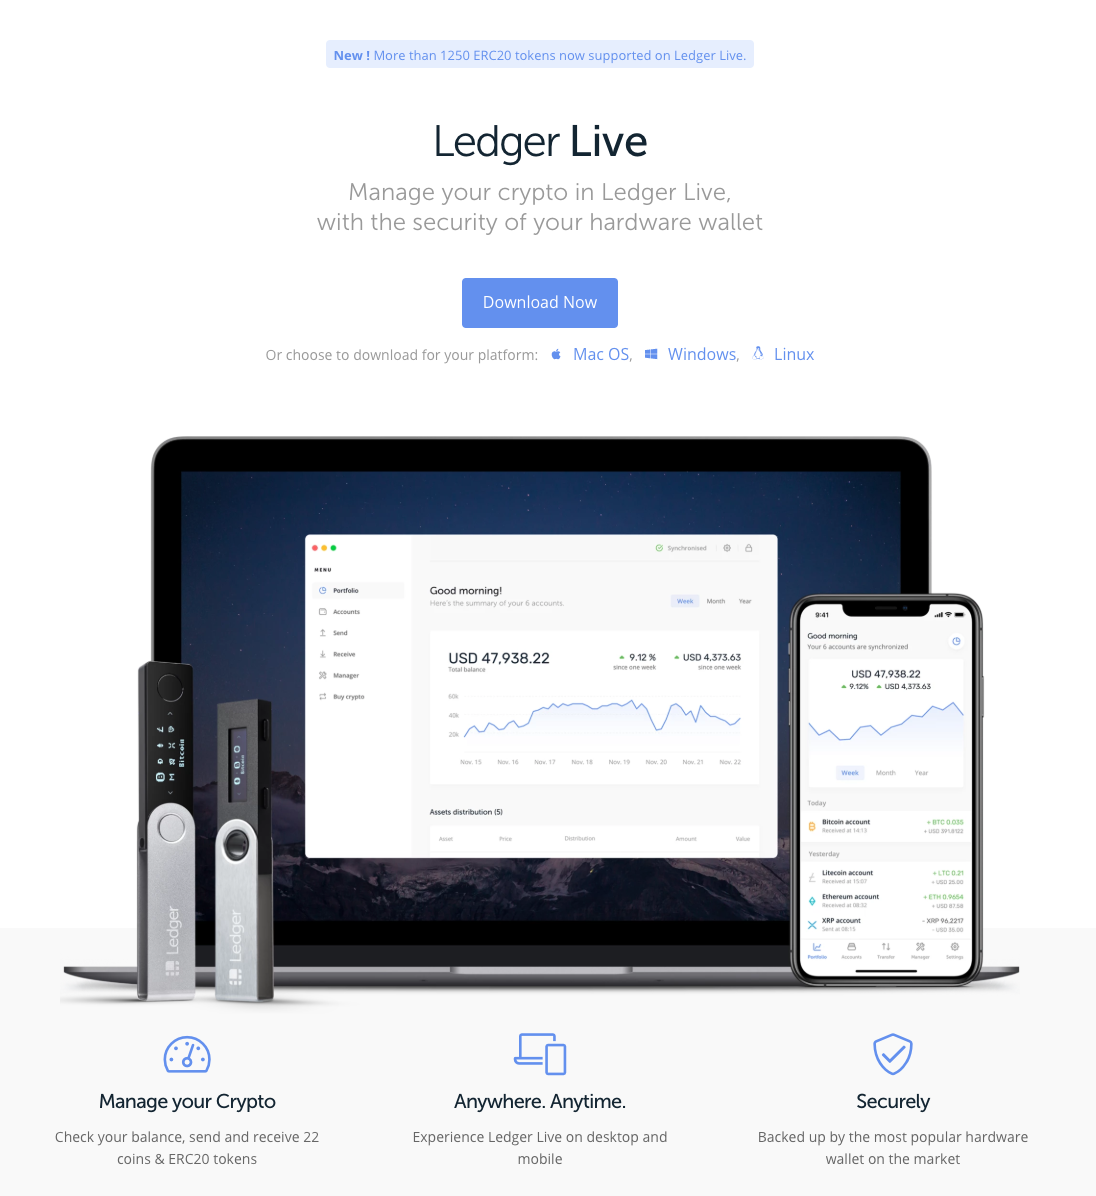
4. Install Ledger Live on your computer
This is an important step that you need to do which is download Ledger Live application into your computer or laptop.

Check out this Step by step guide on Installing Ledger Live: What Is Ledger Live & How To Install for your Ledger Hardware Wallet
What is Ledger Live
A replacement for the old Chrome Apps, Ledger Manager.
It isn’t a wallet but a software that allows you to manage Bitcoin and altcoins as well as updating the software on the wallet.
Use it to view, send, receive and manage your crypto assets, all in one simple, user-friendly interface.
Download the Ledger Live here and launch it. It’s available for Windows PC, Mac OS or Linux.
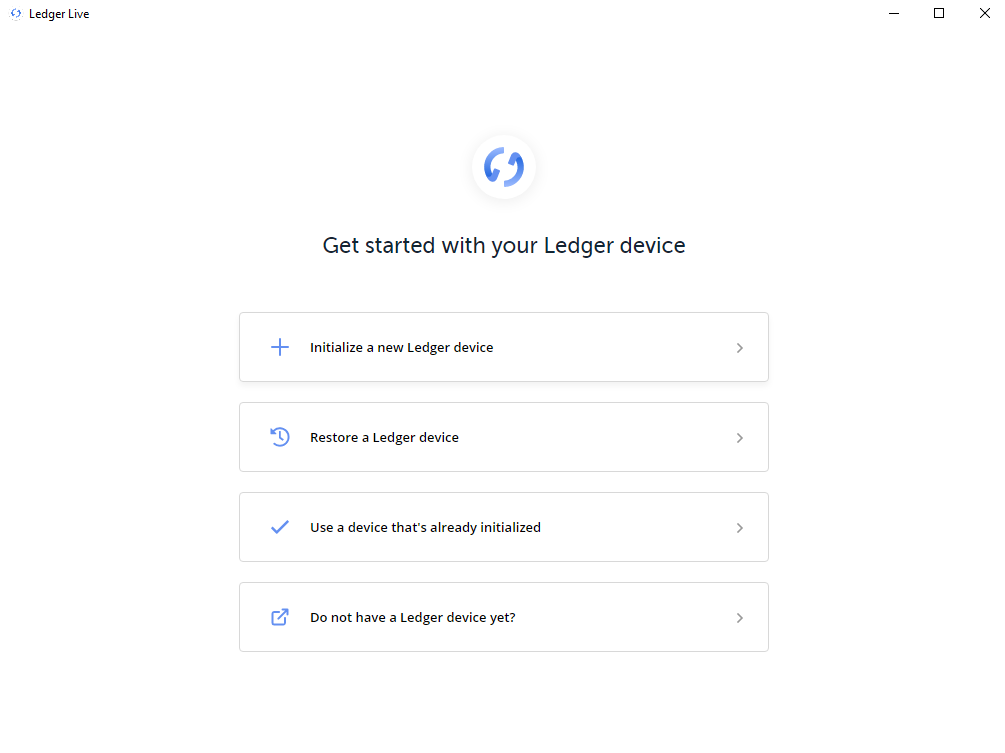
Click on the “Get Started” blue button to proceed.
Select “Initialize a new Ledger device” to set up as new device.

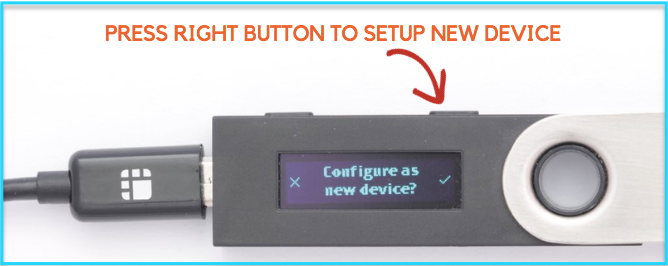
5. Configure New Device
In this guide, we talk about setting up the Ledger Nano S for beginners, so we’ll choose” “Configure as new device”.
Tap on the right button, which corresponds to checkmark (✓).

6. Set a PIN code
For security purposes, you need to choose a strong eight-digit pin to protect your hardware wallet.
Every time the device is switched on, you need to enter this pin number before gaining access to your cryptocurrency and confirming transactions.
To start choosing a new PIN code, press the left or right button to scroll through the list of numbers. To confirm a digit PIN, press both buttons simultaneously.
If you make a mistake, you can go through all the numbers till you see the delete option.
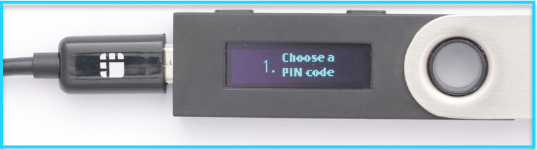

If you forget this PIN code, you can still recover your funds with a 24-word recovery seed, which we’ll take next in this guide.
7. Write Down your Recovery Phrase
Next, the device will show you the recovery phrase (a.k.a recovery seed).
You must store this 24-word phrase securely on an offline sheet. To protect your Bitcoin and other coins, always keep your recovery seed safe and secret away from the reach of anyone.
Take out the “My recovery phrase” sheet that comes with the box, carefully jot down the seed word-by-word according to the numerical order.
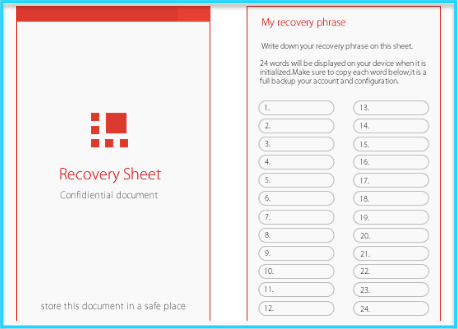

If your device gets stolen or if you forget your PIN code, this 24-word recovery phrase will help you to retrieve all your cryptocurrency investment.
Having said that, anyone who has access to this seed can recover your wallet on their device and steal your crypto coins.
This recovery phrase is everything! Who has this 24-word phrase will have control over the coins.
Once you’ve written down the recovery phrase, tap “continue”. It will test you on two different words to ensure you’ve recorded it in the correct order.
And now your device is ready for use.
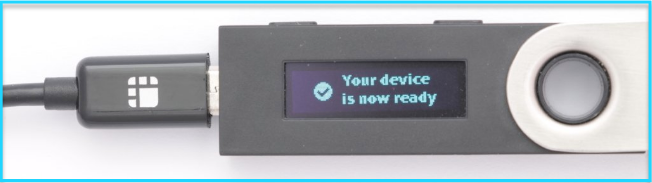

That’s it. Now you can start sending, receiving and managing your crypto assets efficiently with your Ledger device.
Conclusion
If you’re serious about cryptocurrency investment, you’ll definitely need a secure hardware wallet like Nano S. Apart from storing Bitcoin, Ledger Nano S also supports over 30 other cryptocurrencies such as Ethereum, Bitcoin cash, Litecoin and about 700 crypto tokens.
Above all, make sure you’re getting an authentic Nano S directly from the manufacturer. Or you’ll risk losing all your funds permanently.
And lastly, who doesn’t love the idea of carrying your own bank in your pocket? Managing your own finances wherever, whenever, however you like with a small hardware wallet. I think it’s the future!
In the meantime, spend time to educate yourself and stay safe.
I’ve handpicked a few guides for you to read next:
-
Crypto 101: The Ultimate List of Cryptocurrency Resource
- 10 Best Bitcoin Wallets You Should Use to Protect Your Crypto Investment
- 3 Best Hardware Wallets for Storing Bitcoin and Cryptocurrencies (for long term)
- 10 Best Bitcoin Wallets You Should Use to Protect Your Crypto Investment
I live and breath making an income online.
I’ll be sharing more of ideas and guides soon. Stay tuned.
If you haven’t already, sign up here to receive my emails.