


Then you’ve come to the right place.
Today, I’m going to show you how to install a WordPress plugin using two easy ways.
What is a WordPress Plugin
Before we begin, it’s important that you get a basic understanding of what WordPress Plugin really is.
While WordPress, the most popular Content Management System (CMS) that offers a wide variety of features and flexibility, there’s still a lot of capabilities missing from the core software.
And this is where WordPress plugins come into place.
Plugin is basically a small software app that allows you to add new features, extend and expand the functionality to your WordPress site. It’s similar to how apps make your smartphone great.
Whether you’re looking to build a simple personal blog, a podcast website, a coupon site, a job board or an online store, there’s a plugin for that.
Using the right WordPress plugins is the key to grow a bigger following, rank better in search engines, improve your site’s performance and enhance user experience.
Note: One of the main benefits of using self-hosted WordPress.org websites (not WordPress.com) is the ability to add or remove whatever functionality you want with WordPress plugins.
If you create a blog on WordPress.com, then you cannot install plugins.
If you’re new to WordPress, check out this article on Why You Should Use WordPress for Blogging.
Free vs Premium Plugins
There are tons of free plugins available out there for any kind of WordPress site.
However, if you’re looking for plugins that offer better features and full-time support, then you can get Premium plugins at a small fee.
At ThinkMaverick, we use a combination of both free and premium plugins.
By now you should know what’s a WordPress plugin. Let’s find out where you can find WordPress plugins and how to install them to your site.
How to Find and Install a WordPress Plugin
Searching for plugins that you’re interested in and add them to your site is a simple and straightforward process.
Here are two main ways of finding WordPress plugins that suit your needs.
(i) Search them directly from your WordPress dashboard (for free plugins only) OR
(ii) Go to WordPress.org plugin directory
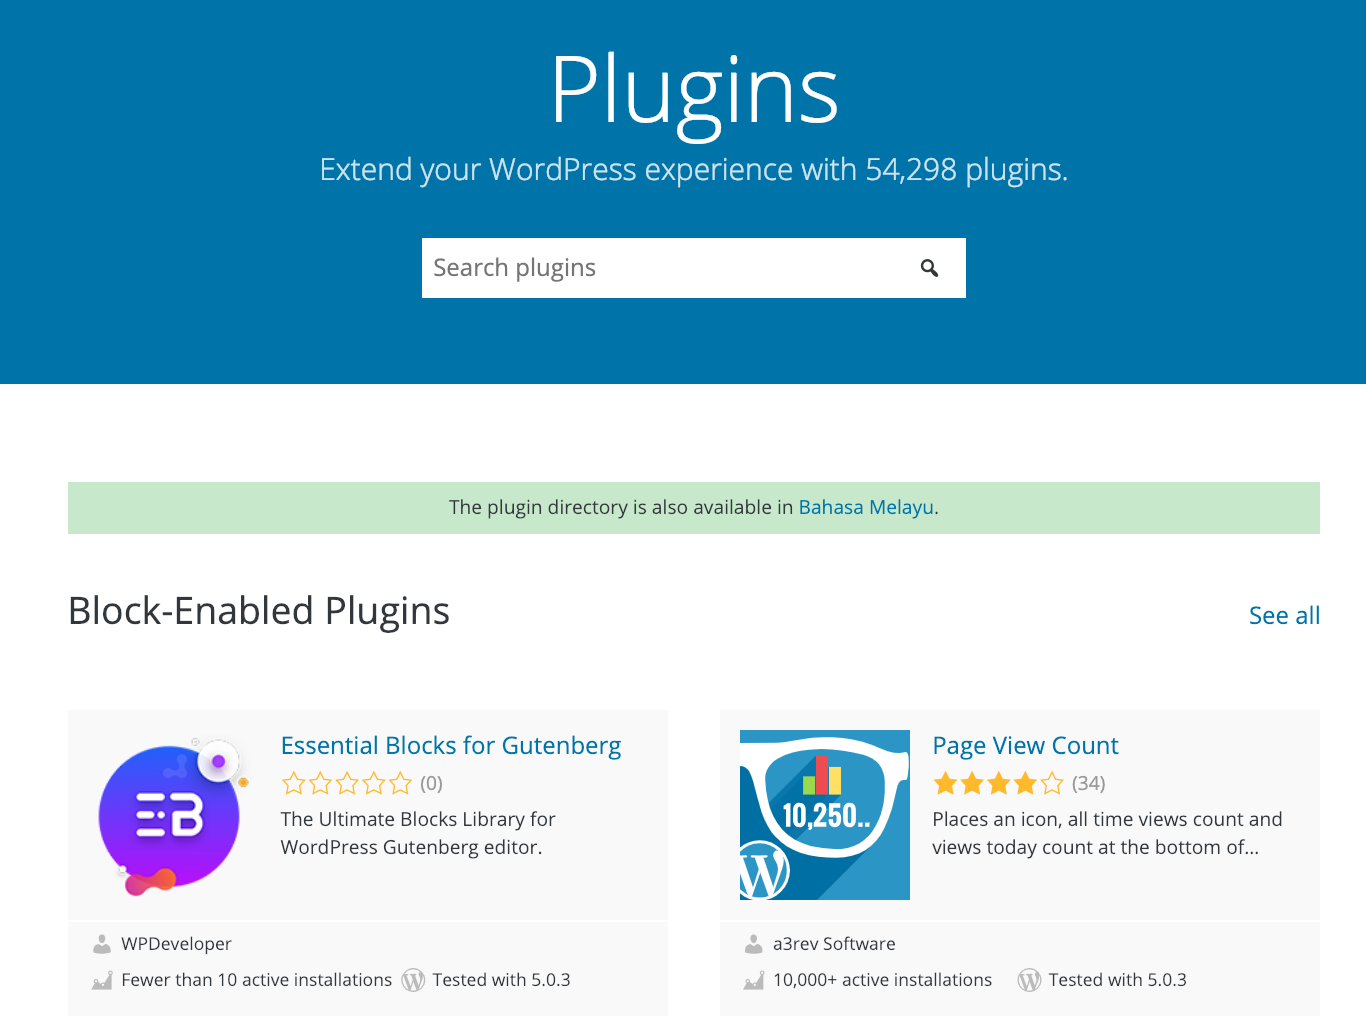

Note: Installing a free WordPress plugin works slightly different from getting a paid plugin. Don’t worry. I will cover both of them in this article. Let’s start with the free plugins
(i) How to install a Free WordPress plugin (WordPress Plugin Search method)
The easiest way to install a WordPress plugin is to use the plugin search of your WordPress dashboard.
1. Login to your WordPress dashboard/admin page.
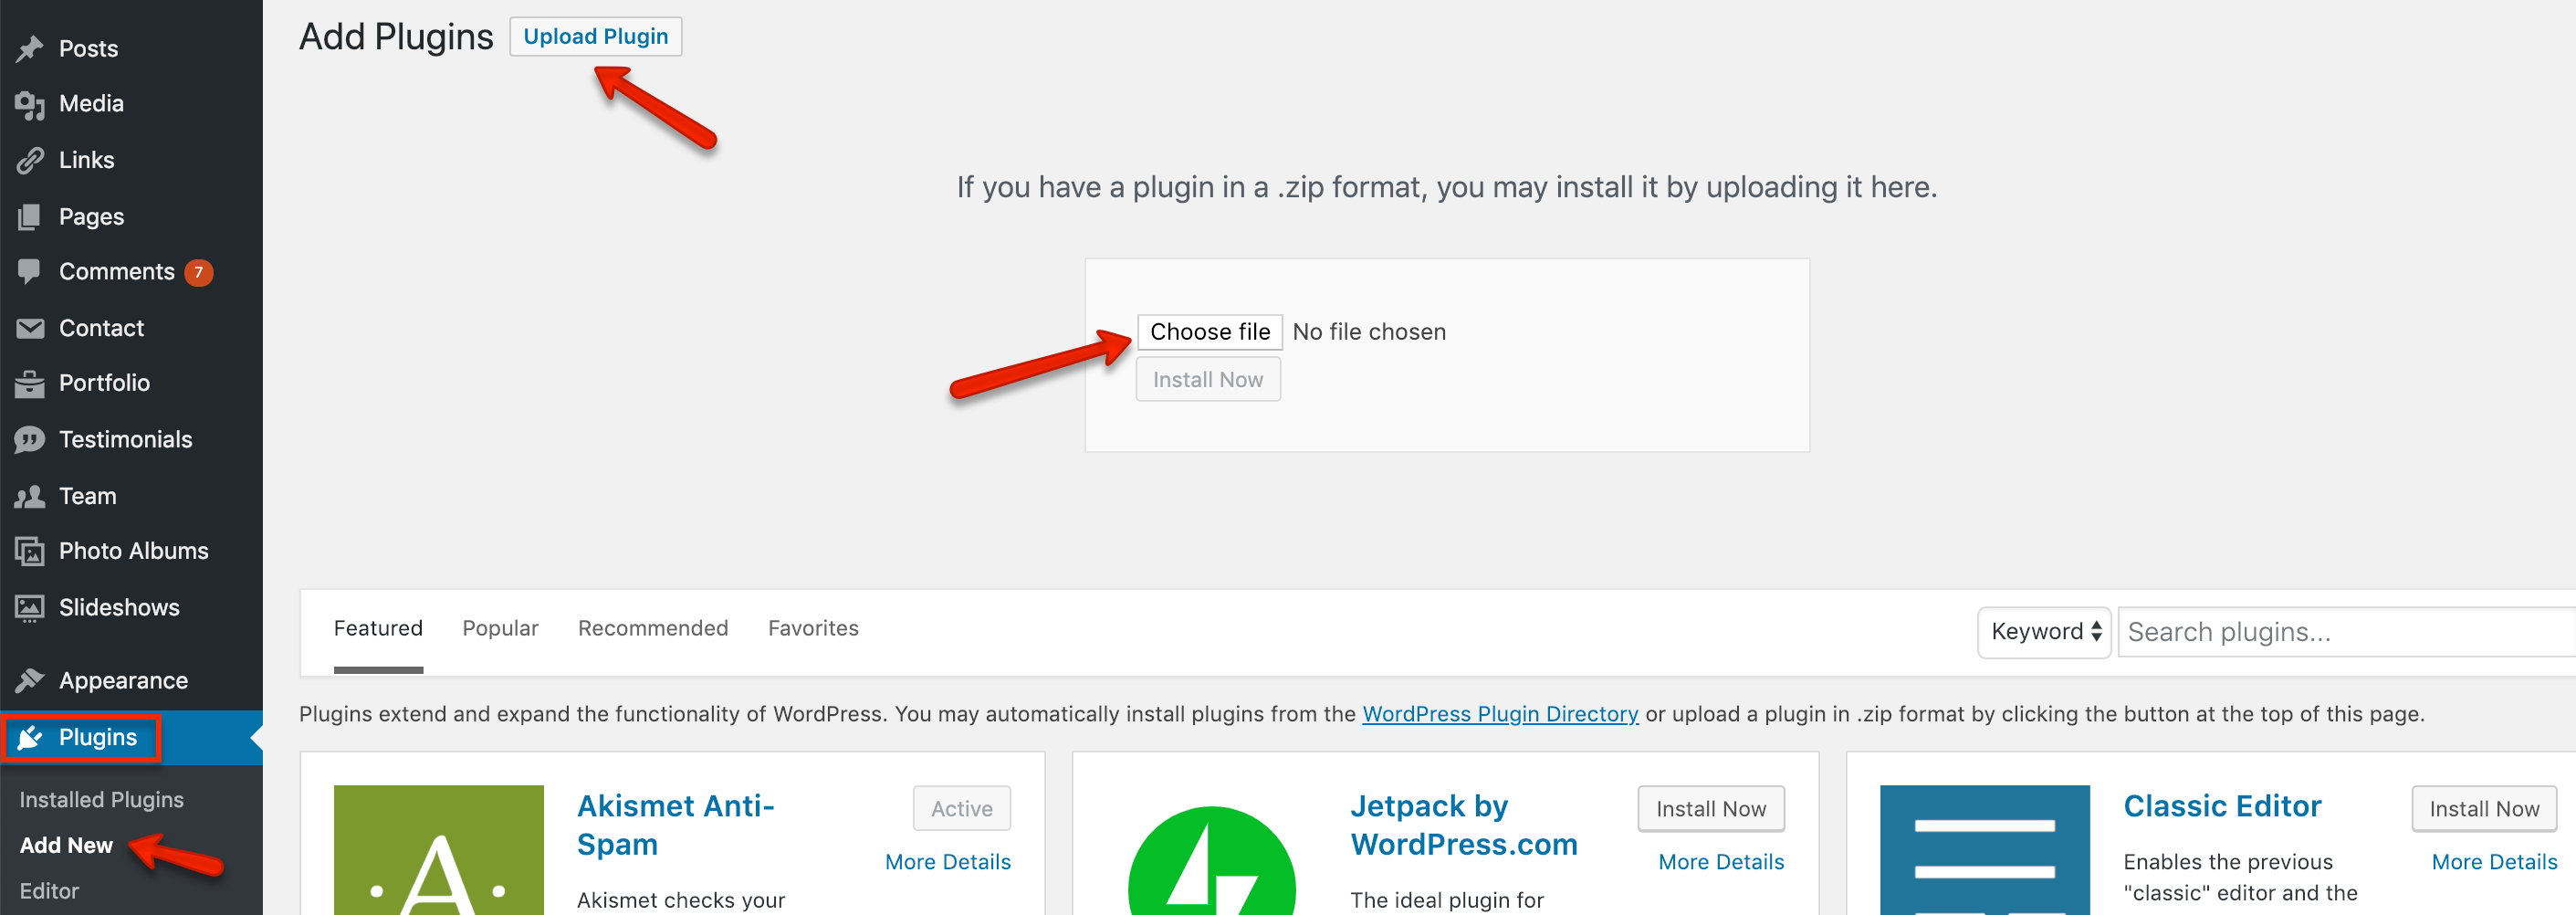
2. On the left sidebar menu, click “Plugins” and then click “Add New”.
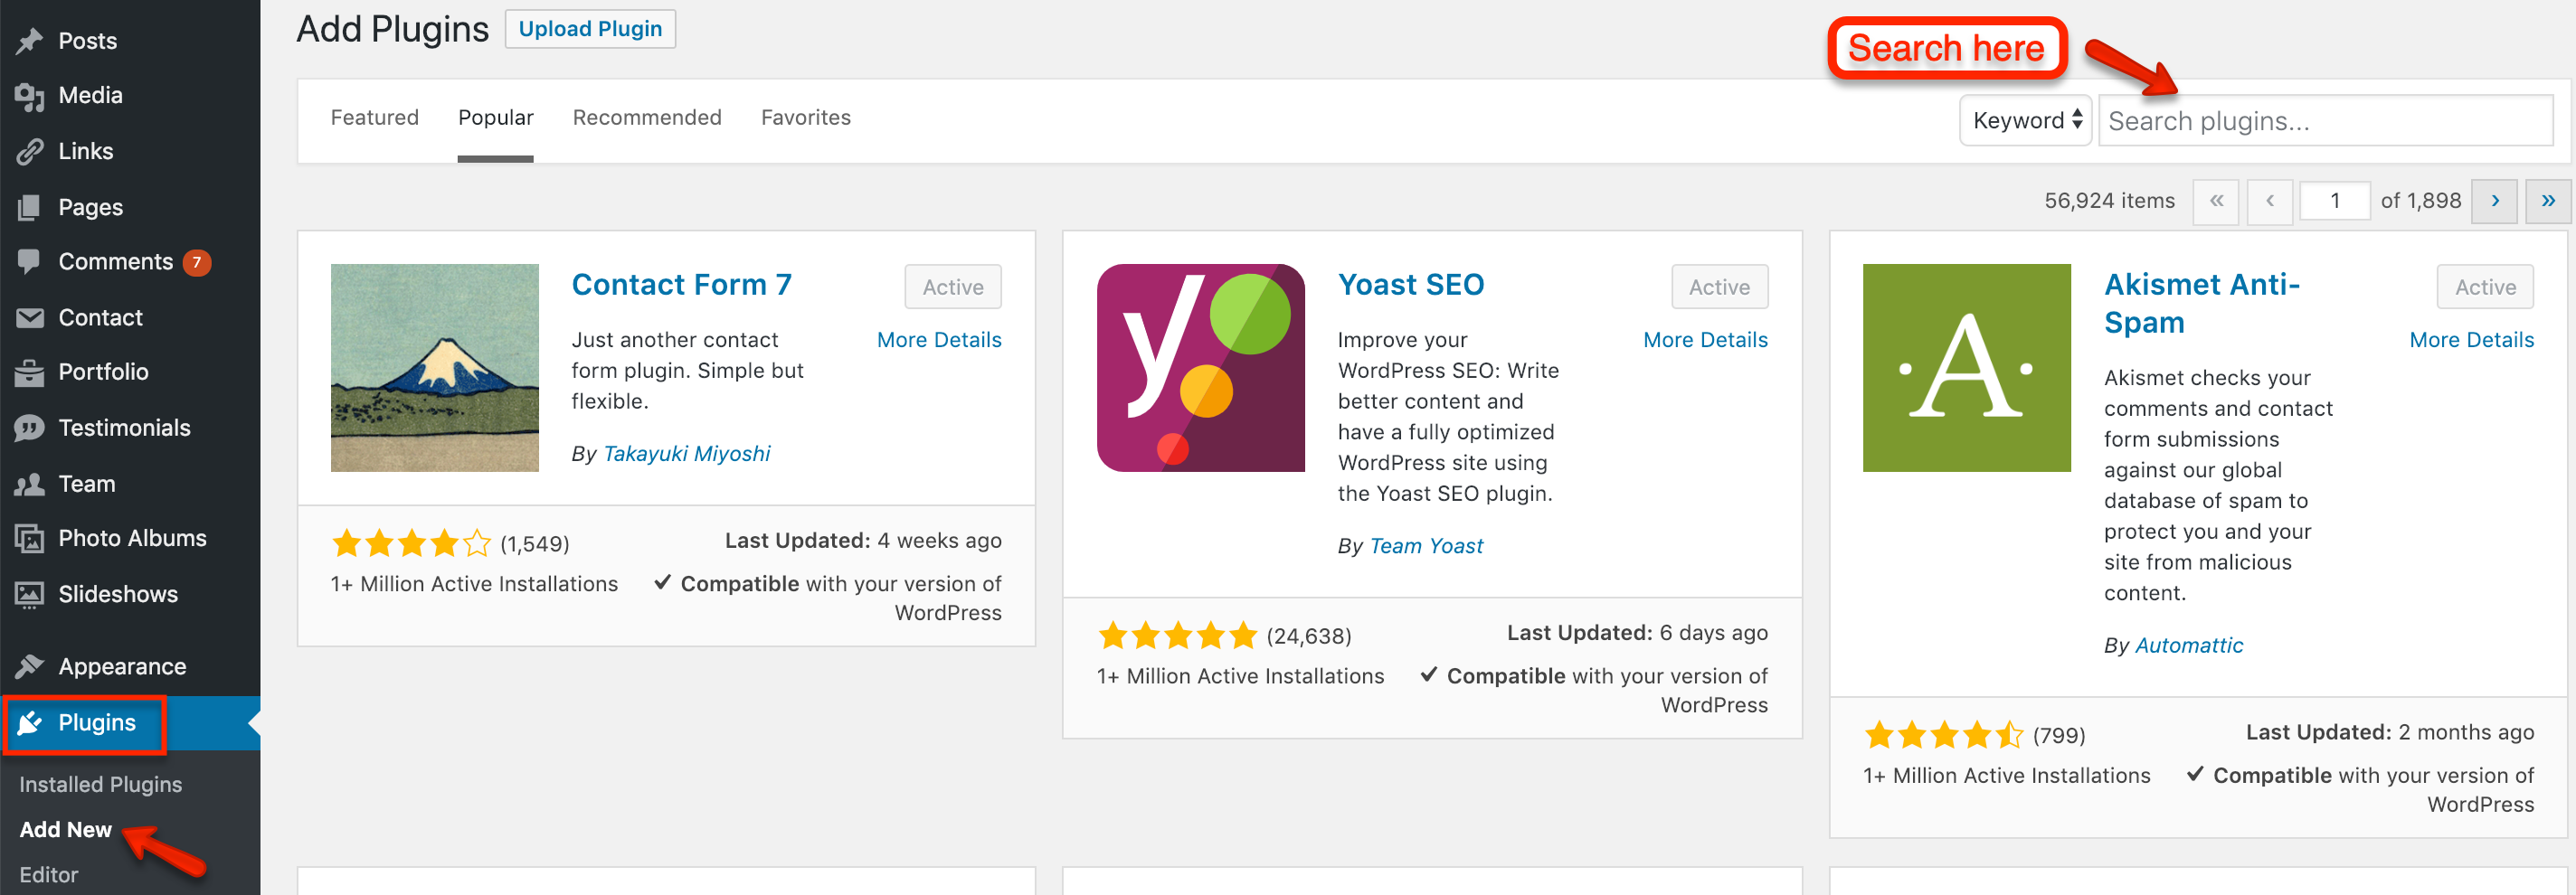

4. Simply type the plugin name (if you know) or the functionality you’re looking for (eg. SEO, contact form etc) into the search box on the top right.
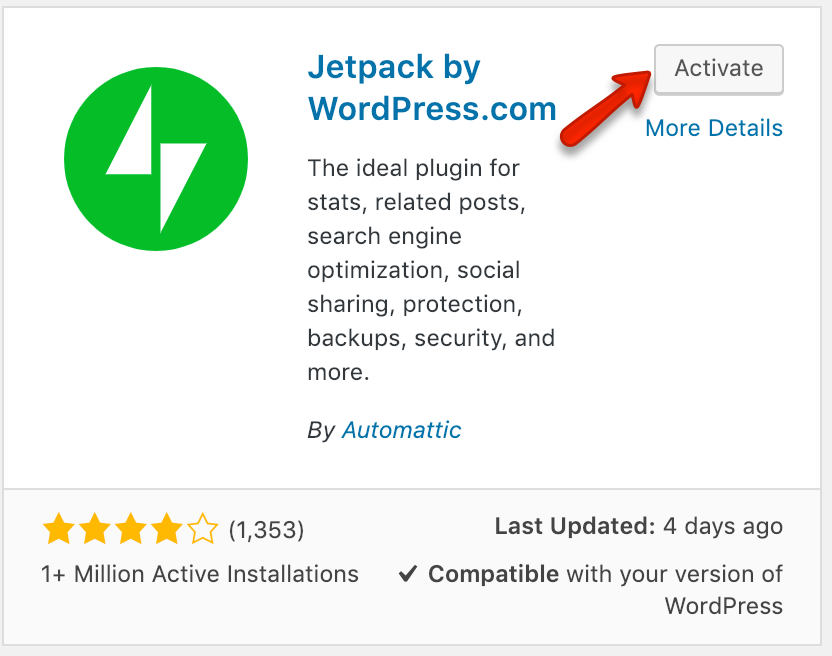
As an example, I entered Jetpack into the search box and here’s the result.


6. Click “More Details” to get more information about the plugin. Make sure that the plugin is compatible with your current version of WordPress.
7. To install a plugin to your site, click “Install Now”.


(ii) How to install a Premium WordPress plugin (WordPress Admin Plugin Upload method)
WordPress plugin directory only shows lists of free plugins, so you can’t install any paid/premium plugin using the method as discussed above.
Instead of using search in WordPress dashboard, we use Upload method to install a paid plugin in this case.
1. First, you need to download a WordPress plugin from the source.
2. Next, go to your WordPress dashboard, click “Plugin” and then “Add New”.
3. On this page, you’ll see the “Upload Plugin” button on the top. Click on it.

5. Once the plugin is installed, click the Active Plugin link to start using the plugin.
Note: At the time of this writing, WordPress only allows you to upload .zip format if you like to upload any WordPress plugin or theme.
After each installation (both free and paid plugins), you’ll also need to configure the plugin settings.
Conclusion
There you go. I hope this step-by-step tutorial on how to install any WordPress plugin has been helpful.
Next, check out this list of 10 best (and free) WordPress plugins that every blog needs.
If you have any problem or question, feel free to comment below.
Last but not least, if this post was of any help to you, please share it on Facebook, Pinterest and Twitter.
A quick share from you would seriously help the growth of this blog.
Thank you so much!
I live and breath making an income online.
I’ll be sharing more of ideas and guides soon. Stay tuned.
If you haven’t already, sign up here to receive my emails and a free magazine subscription.