

Hello! Today, I have a guest post from Grace Carter who is a tech specialist and business consultant. Enjoy!

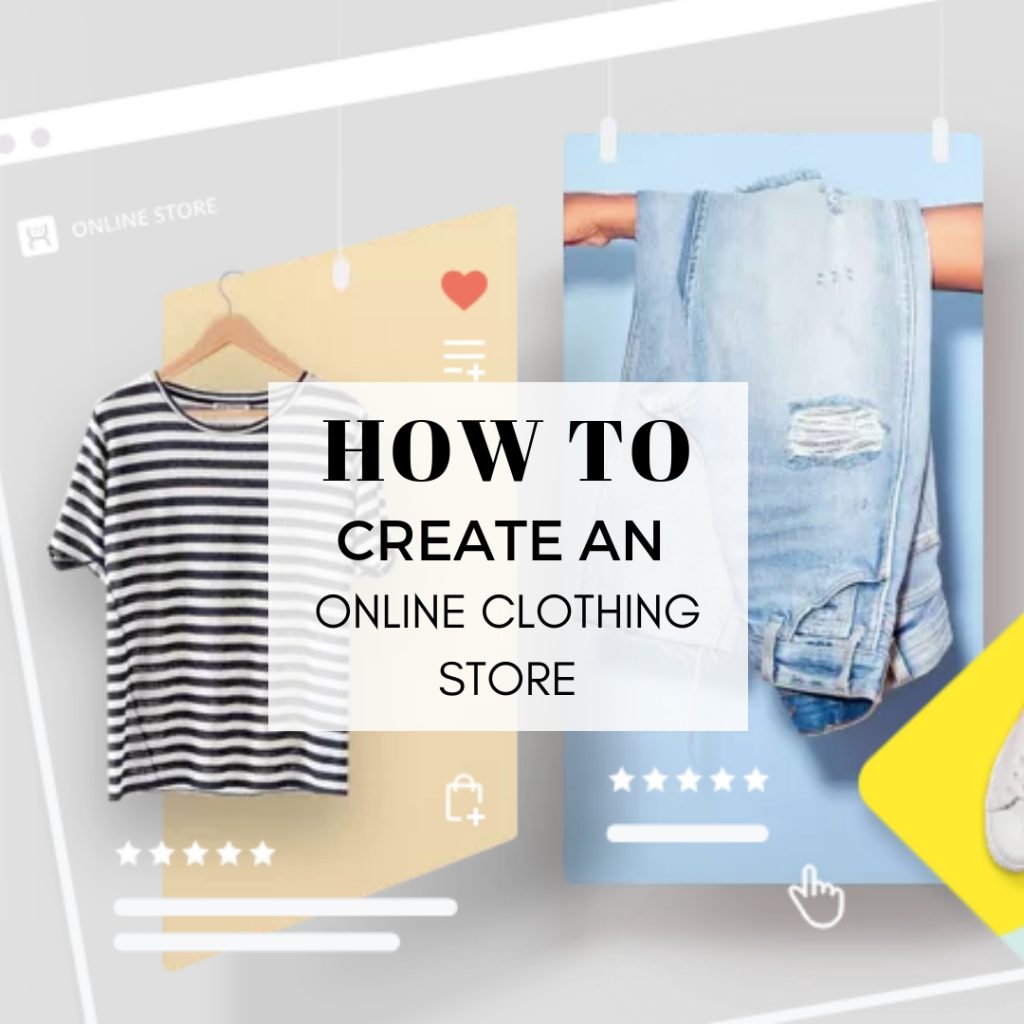
Have you ever dreamed of starting your own clothing store?
Maybe you’ve always had a passion for fashion and now want to share the things you love with the rest of the world. Perhaps you’ve started designing and making your own clothes, and now you want to let the people of the world enjoy your hard work.
Whatever your reason, starting a clothes shop would be the best way forward. However, while the first thought may be to opt for a physical store in your hometown, more and more people are taking to the internet.
“This is because high-street stores can be far too expensive to rent or buy and when you’re selling online, the entire internet-connected world is theoretically your customer base. Setting up online is also much more affordable,” shares Gordon Harrison, a webmaster for Best Essay Writing Service.
So, whether you’re a technological genius or new to the entire concept of selling online, where do you even start? Well, there are multiple options available to you, some easier than others. To get you off to the best start, here’s a complete guide to starting an online clothing store using X-Cart.
Related Content:
- How to Start a Business With just $50
- How to Self-Publish an eBook on Amazon
- Elon Musk’s Advice for Starting a Business
Promote Your Clothing Line with Apparel and T-Shirt Mockup Templates
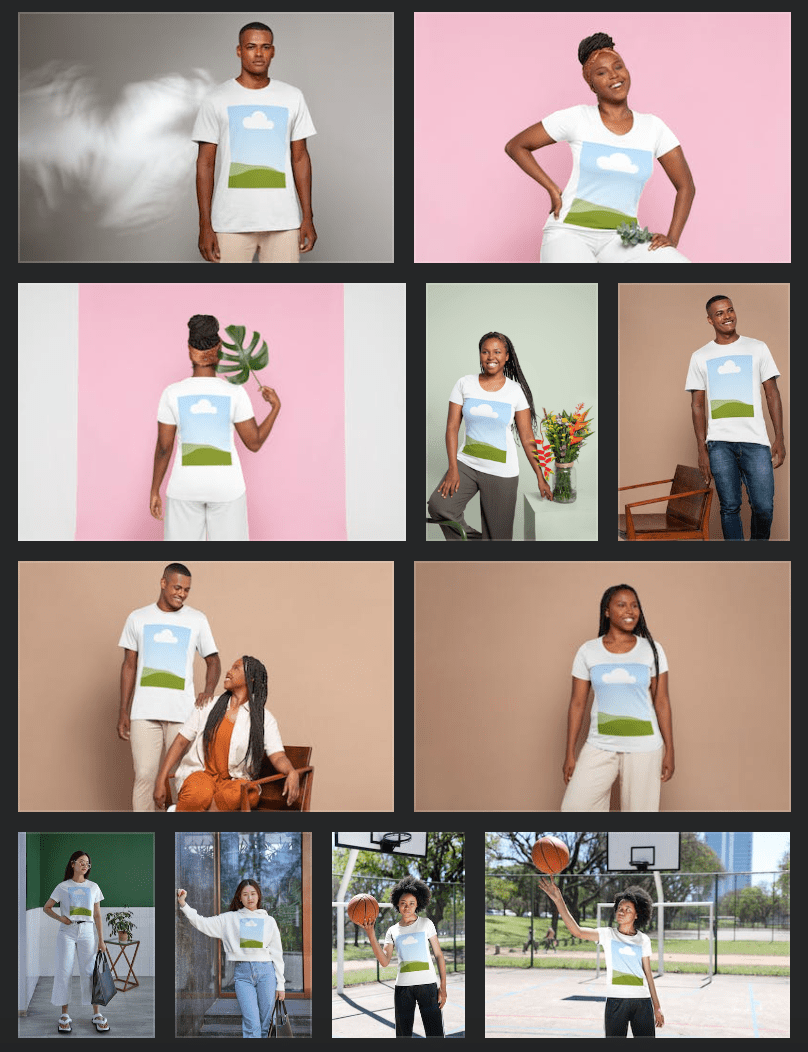

Apparel and clothing mockups lets you preview your t-shirt, sweater or hoodie designs in realistic mockup scenes without needing to organize a photoshoot yourself.
Steal the Designs. Sign up for Canva Pro 30-day trial and Instantly Download your first t-shirt mockup for FREE.
Introducing X-Cart
X-Cart is a market leading E-commerce store with a tonne of features that your online store can massively benefit from. In addition to being one of the most affordable platforms on the market, the platform also offers a comprehensive support team and is even open-source. This means you’ll be able to edit whatever you like so you can give your customers the experience that you want to give them.
The X-Cart solution is easy to set up, highly customisable and is available with a variety of plans to suit your business size. The larger your business grows, the more and more options that will become available to you. What makes it really attractive to new store owners is the fact that X-Cart also offers SEO consulting, ensuring your customers can find your store and host everything independently, so there’s no chopping to and from various websites.
This is a complete, all-in-one solution.
So, how do you get started? To teach you everything you need to know, here’s a comprehensive and complete guide to using X-Cart to start your online store.
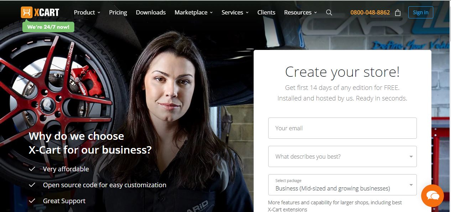
Step #1 – Registering Your Account
Firstly, you want to head over to the X-Cart website. Feel free to educate yourself a bit more about the features and solutions that are available to you on this page. If you’ve already opened a clothing store in the past, there’s a special option available so you can switch your existing store, rather than starting a new one.
When you’re ready, click ‘Create Your Store’ in the centre of the page. This will take you to the first page of the wizard where you’ll be able to input your email address that you want to be associated with your store, the best option that describes you (five options available) and the X-Cart package you want (this will depend on the size of your business).

Step #2 – Setting Up Your Store
Now that the background of your store has been set up, it’s time to start customising and making your store exactly how you want it. For this, head over to the admin URL you were given on the last screen. Here, you’ll need to log in using the other details you had on the previous screen where you’ll then come to a screen like this;


This will take you through the setup wizard where you’ll be able to add products, customise your logo, add your delivery and payment information and more. Once you’ve clicked this button, you’ll be able to add your first product. Enter the name, add your image and set your price. You’ll also have the ability to add other options, such as sale price, a product description and weight, but this can always be added at a later date.
On the next screen, you’ll be able to upload your logo in an image format. Then, you’ll be able to customise your local settings. This means selecting your home country, the currency that you’ll want to accept and the measurement system you’ll be using (imperial or metric).
After this, you’ll be able to insert your clothing company information, such as your phone number and your address before saving a clicking next. The penultimate option is whether or not you’re sending goods to your customers or they can download them online, in this case, click ‘Set Up Shipping’.
You’ll be able to choose the carrier that you want to use as well as your delivery and shipping costs. Don’t worry if you don’t know; this can again be changed at a later date if needed. Finally, you’ll need to add information regarding your payment details. Here, you’ll be able to let people pay by phone, i.e. calling you up, or you can connect your PayPal account for people to make online payments.
Once you’ve inputted all this information following this Wizard, your online clothing store will be set up!
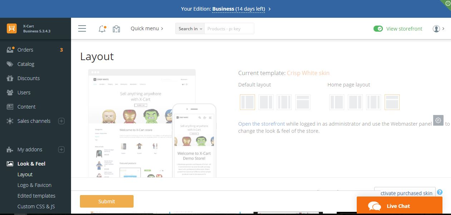
Step #3 – Customising Your Online Store
Now that your store has all been set up, you’re ready to start selling. By first, you’ll want to make sure that your store looks how you want it to look. For this, scroll down the menu on the left-hand side and click ‘Look & Feel’.
Step #4 – Using X-Cart – Managing Products
Once you’ve got your store looking how you want it to look, you’ll now need to familiarize yourself with using your store’s dashboard. Near the top of the menu on the left-hand side, you’ll find the Catalog option. Click this, and you’ll be shown ten unique options. These are the options you use to control everything that’s happening in your store’s inventory.
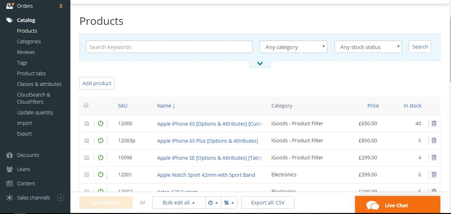

This can be done easily by clicking ‘Add Product’ and then following the on-screen wizard. Within the ‘Products’ menu, you’ll also see a variety of options, from managing the reviews of each individual product, adding categories, such as t-shirts, men’s, women’s, kids etc., as well as editing and creating tags so your customers can find exactly what they’re looking for.
Don’t forget there’s a live chat feature at the bottom of each page so you can contact support if you have any questions on what any of the features or pages do.
Step #5 – Managing Your Orders
The second most important aspect of managing your online clothing store is managing your orders, a process that X-Cart has made as easy as possible. To see what people have ordered from you, simply click the ‘Orders’ tab at the top of the menu on the left-hand side and click ‘Orders List’.
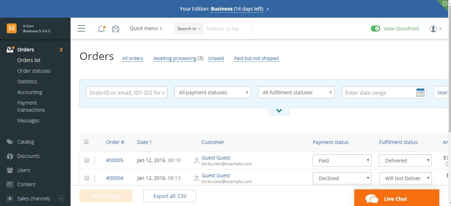

This is a very simple way to manage your orders, so you know exactly what people are ordering and what jobs you need to do. You even have the ability to export all your sales sheets to CSV spreadsheet formats so you can manage your tasks and accounts even easier.
Under the ‘Orders’ heading, you’ll also find a tonne of settings, such as sales statistics, customer messages and order statuses so you can easily keep on top of everything that’s going on.
Step #6 – Other Features
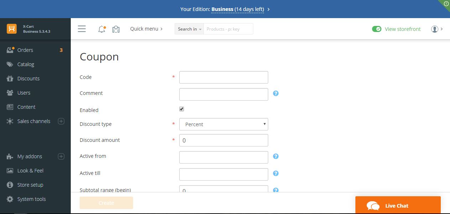
X-Cart is a market leading solution because there are so many features to explore so instead of going into them in detail, feel free to play around with them as you please. For example, under the ‘Discounts’ section, you’ll be able to create custom discount codes that your users can use, perfect for generating interest in your store through an email marketing campaign.
Step #7 – Promoting Your Clothing Store
Now that everything has been set up and customers can buy your clothing products from your store, it’s time to start getting your name out there into the big wide world. The best way to do this is by using a marketing technique known as content marketing.
This means writing blogs, posting and uploading them to your X-Cart store and then sharing these blogs and articles on your social media pages. You need to write about engaging, clothing-related topics that your followers will want to read which will then lead them to your website. Once they’re on your website, they’ll hopefully buy something!
“When writing content, especially if you’re trying to manage and run your store, you might not have time to create the best blog content possible, but you should never risk posting low-quality content,” shares Jim Doherty, a content manager at Dissertation Writing Service.
However, there is a number of online tools and resources available to you that can help you create this level of quality.
- ViaWriting – An online blog where you can learn all about how to use grammar properly for your blog writing.
- EssayRoo – This is an online writing agency that can answer all of your writing-related questions when writing your blogs.
- StateofWriting – An online blog with everything you need to know about blog and article writing, especially when spelling and using punctuation.
- Academized – An online writing guide you can download and follow when writing your blogs, making it a lot easier to get the right format. This site was even featured by the Huffington Post.
- EasyWordCount – A free online tool you can use to track and monitor the word count of your blogs actively.
- PaperFellows – An online writing agency that provides proofreading services you can use to proofread your content.
- CiteItIn – A free online tool you can use for adding professional formatted testimonials and reviews into your content.
Using these tools and your own creativity, you’ll be able to write and create content for your social media channels that will attract customers from all over the world. Don’t forget to use other forms of marketing, such as taking pictures of your products and sharing them on sites like Instagram. You can even use banner ads on other websites and paid targeted advertising.
Summary
Now that everything is set up, it’s all down to you. Be sure to keep up to date with your orders, provide the best customer service you can and always focus on the experience that your customers have. This is the best way to make sure that your online clothing store is a success.
When using X-Cart, don’t be afraid to try out different layouts and designs. There is even a whole dedicated add-on section you can use to expand what your website can do! Good luck!
If you’re interested in starting your own self-hosted blog, take a look at my step-by-step guide. I’ll show you everything you need to do to start a successful money-making blog.
Here’s a list of best resources and tools for your blog! I use them to manage, optimize and grow my blog. I’m sure they’ll help you as much as they’ve helped me.