


Well, you’re in luck. Constant Contact is an easy and affordable email marketing tool for bloggers and small businesses.
You can start building an email list with this special free trial from Constant Contact (no credit card required).
In this tutorial, I’m going to show you exactly how to create your first email marketing campaign with easy-to-follow screenshots and step-by-step written instructions.
You might also want to check out my previous article on Why you should start building an email list.
What is Constant Contact
Constant Contact is the most easy-to-use and beginner-friendly email marketing service in the market.
It allows you to easily manage your email lists, contacts, customizable email templates, marketing calendar, performance of your email campaigns and more, from one convenient dashboard.
Most importantly, using Constant Contact will be able to ensure that you’re compliant with CAN-SPAM laws. Which basically means that your emails won’t end up in the spam folder!
Here are some of the main features of Constant Contact:
- Unlimited emails
- Customizable templates
- Automated email resend to non-openers
- Subject line A/B testing
- Image library
- List-building tools and welcome email
- Tracking and reporting
- And much, much more!
Even with the free-trial account, you’ll get access to all these premium features.
Are you ready to get started?
Step by Step Guide to Getting Started with Constant Contact
Constant Contact makes it super simple and easy to create and manage your email marketing campaign.
1. Sign up for a free account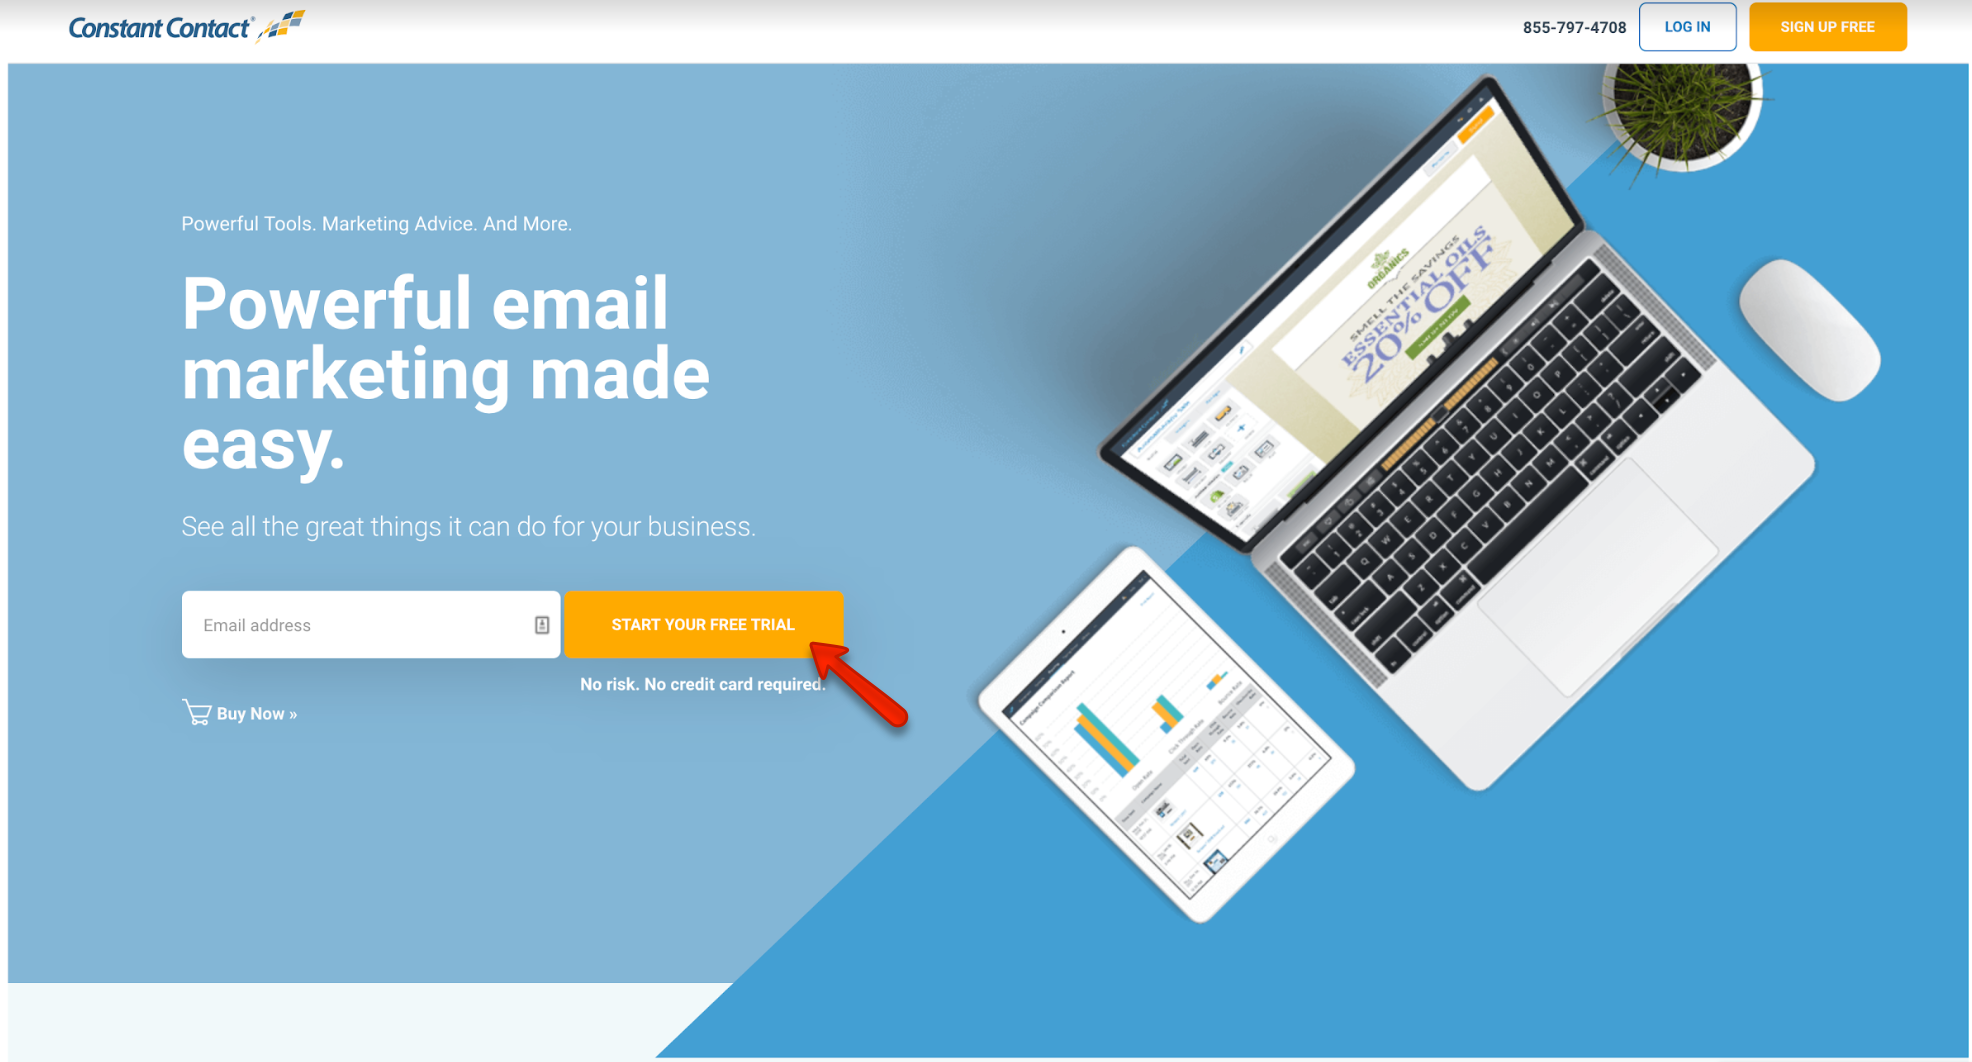

You can click here to get your 60-day free trial with Constant Contact.
To register an account, you’ll need to enter your name, email ID, and contact details (no credit card is required to start the FREE trial).


For international users (outside the US and Canada), here’s how the sign-up page will look like. You can start your 30-day Free trial here.


Once you’ve completed the form, you’ll be directed to your Constant Contact dashboard.
Constant Contact will guide you through exactly what you need to do in order to start your email list with its simple three-step process.
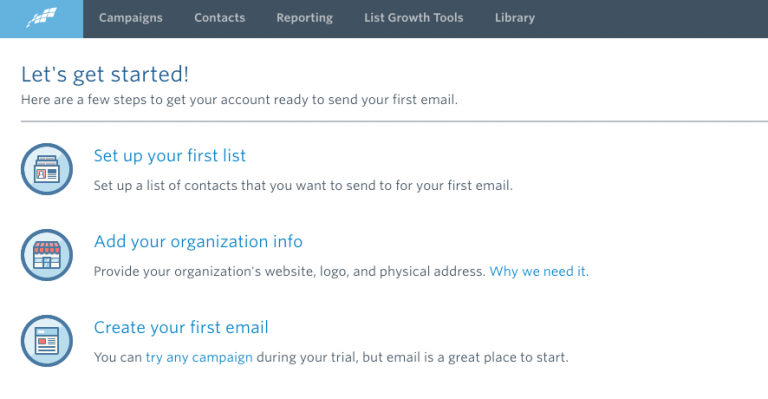

First, Constant Contact will ask you to setup a list of contacts.
This is a very important step because your list of subscribers is the backbone of a successful marketing campaign.
You’ll need a list of targeted people who you can send emails to.
To get started, click “Setup your first list” and you’ll be taken to a page to set up your test list.


If you don’t have an email list yet, you can enter your own email address or your friend’s email address as your test group.
3. Add Your Organization Info
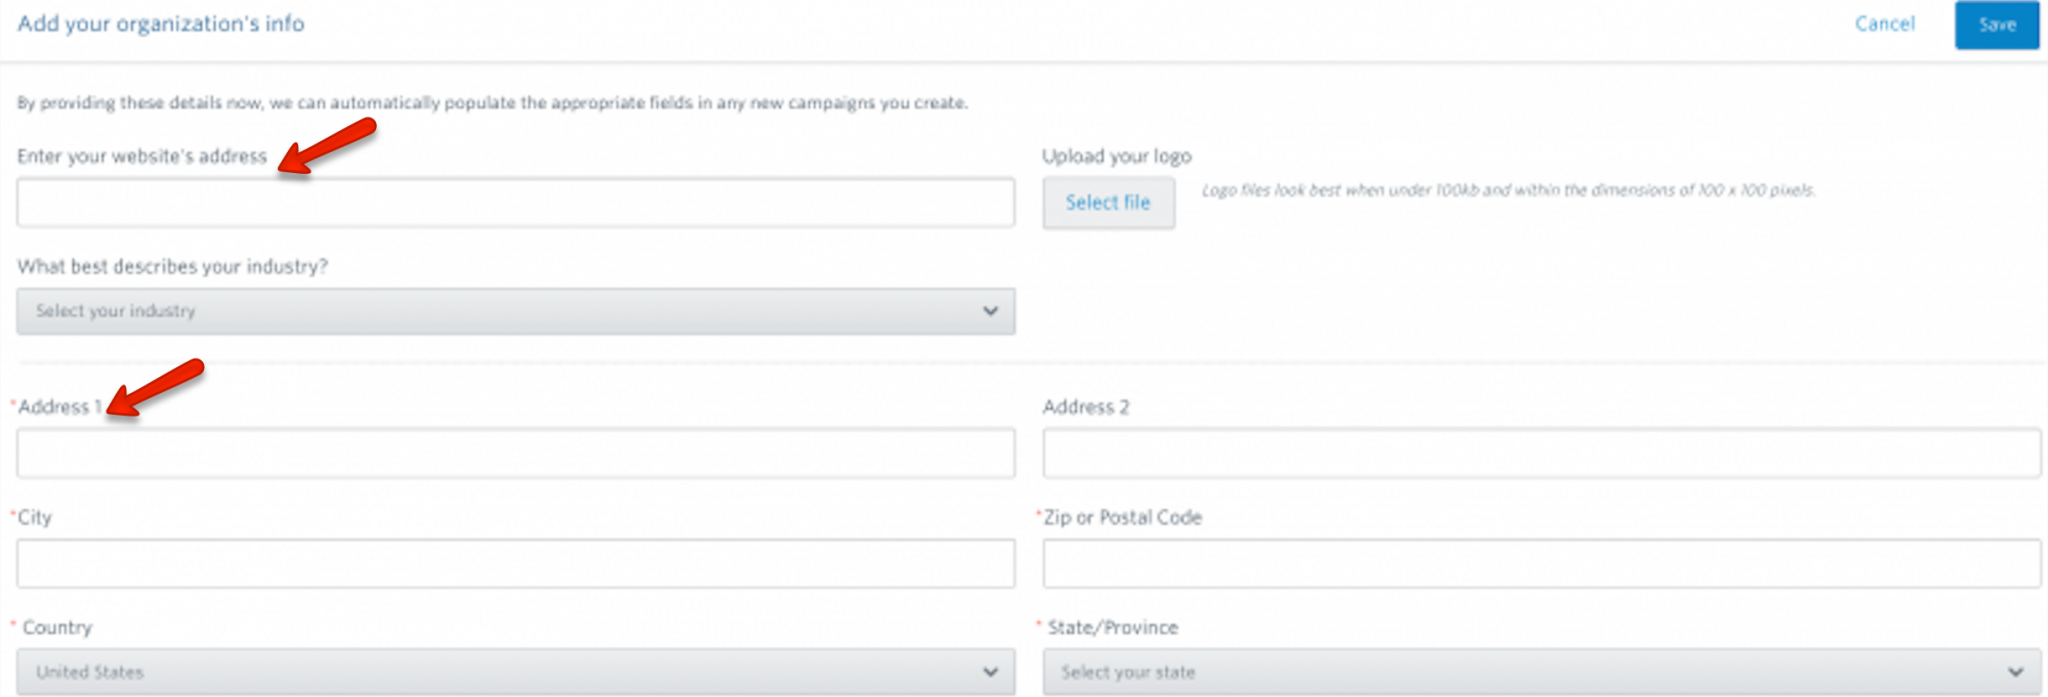

The CAN-SPAM act requires a valid physical postal address in all outbound marketing emails.
To ensure that your emails are CAN-SPAM compliant, you need to inform your recipients where you’re located by filling out your organization info.
Constant Contact will automatically add this info in your emails.
4. How to Create Your First Email Campaign
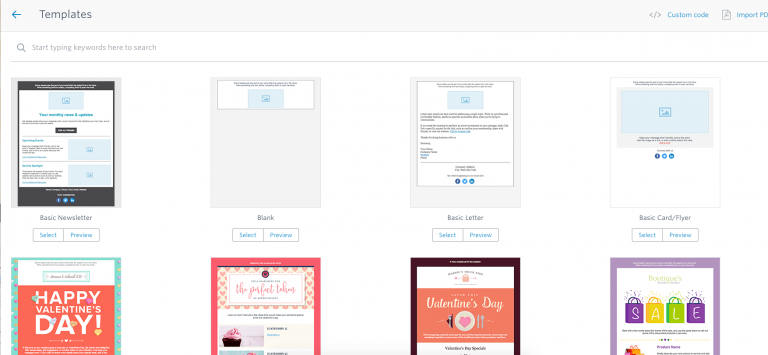

Constant Contact offers dozens of great-looking, professionally-designed email templates that are FREE to use. Browse through the selection, pick the one you like and then edit and customize it according to your needs, style and taste.
Using one of these beautiful pre-made templates is a no-brainer to crafting a highly engaging and effective email.
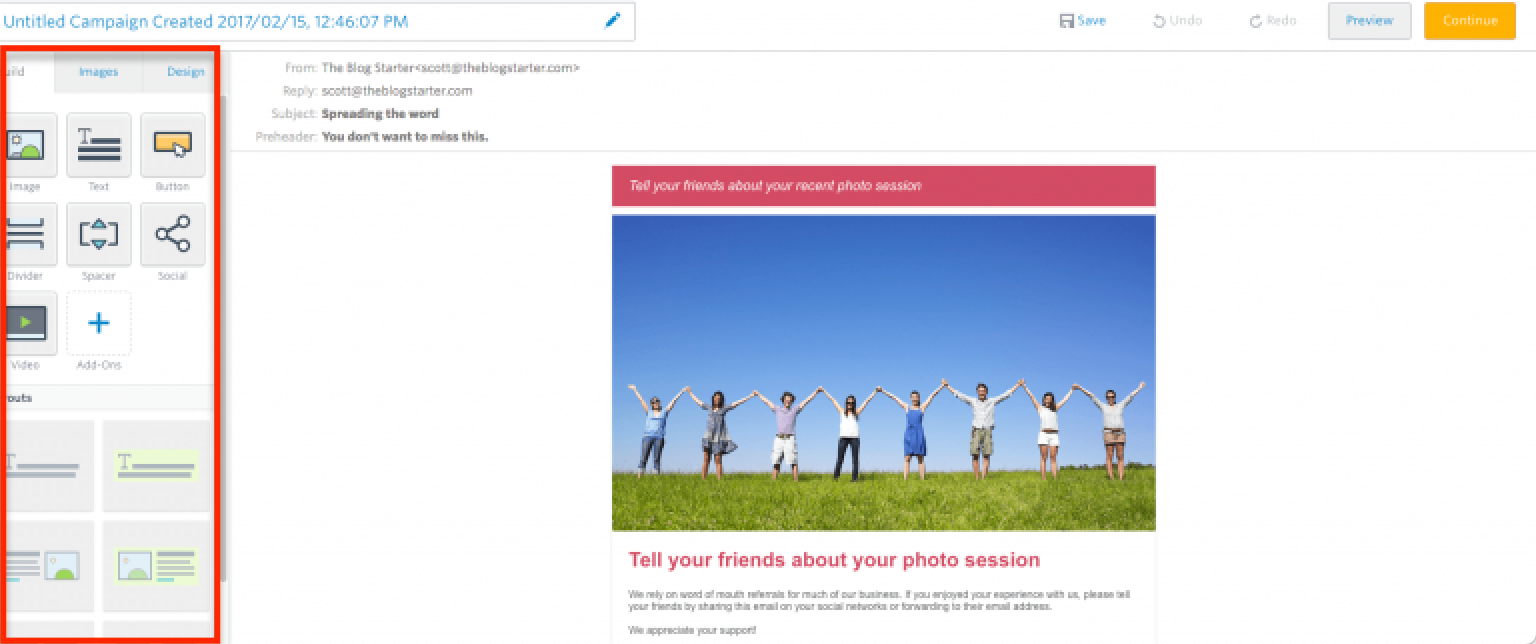

You’ll be taken to the drag-and-drop visual editor page.
Its WYSIWYG (what you see is what you get) editor is super easy to use and navigate.
How you place the image and texts on the editor is how it’ll look like once you hit the send button.
You can customize your email by uploading your own image, add text and video, change color and font.
Play around with the editing tools and tweak the design until you’re satisfied.
Create a catchy subject line
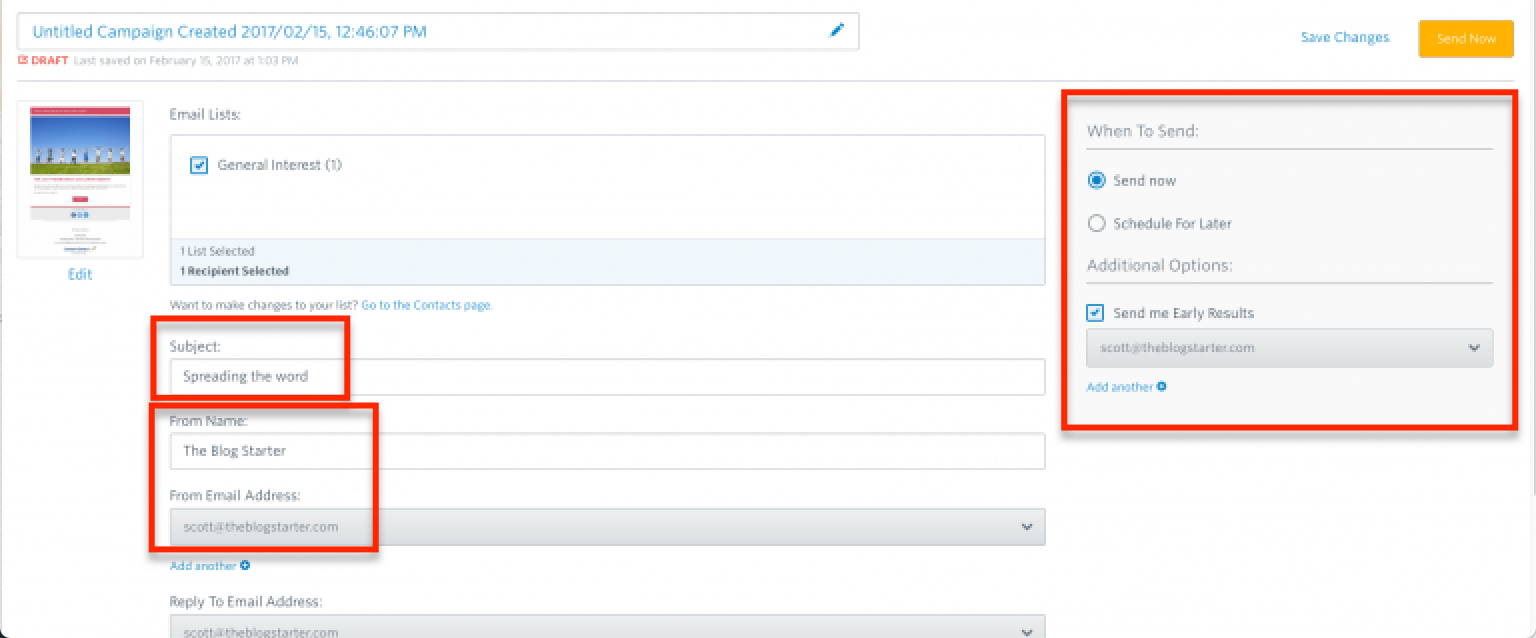

Everyday people (I’m one for sure) are inundated with TONS of promotional emails. To make sure that your emails break through the noise, having a click-worthy subject line is of utmost importance.
Keep your title short and sweet, and write something that can pique your recipients’ interest. Above all, show some personality.
Personalize the “From” name and email address
You can also edit the “From” name and email address which your subscribers will see.
Using “no-reply” sender name (such as noreply@domain.com) is a BIG no-no!
Send now or Schedule for later
You can choose to send out the email now or schedule it to be sent at a specified date and time.
Sending emails at the right time can get you more opens and more clickthroughs.
Studies have shown that the best day to email is on Tuesday, followed by Thursday and Wednesday.
It’s also best to send emails at 10 a.m. or 8 p.m.
Test with different time and day, track performance and find the time that works best for you.
5. How to Capture Email Addresses from Your Blog

You need their email addresses to send them emails later.
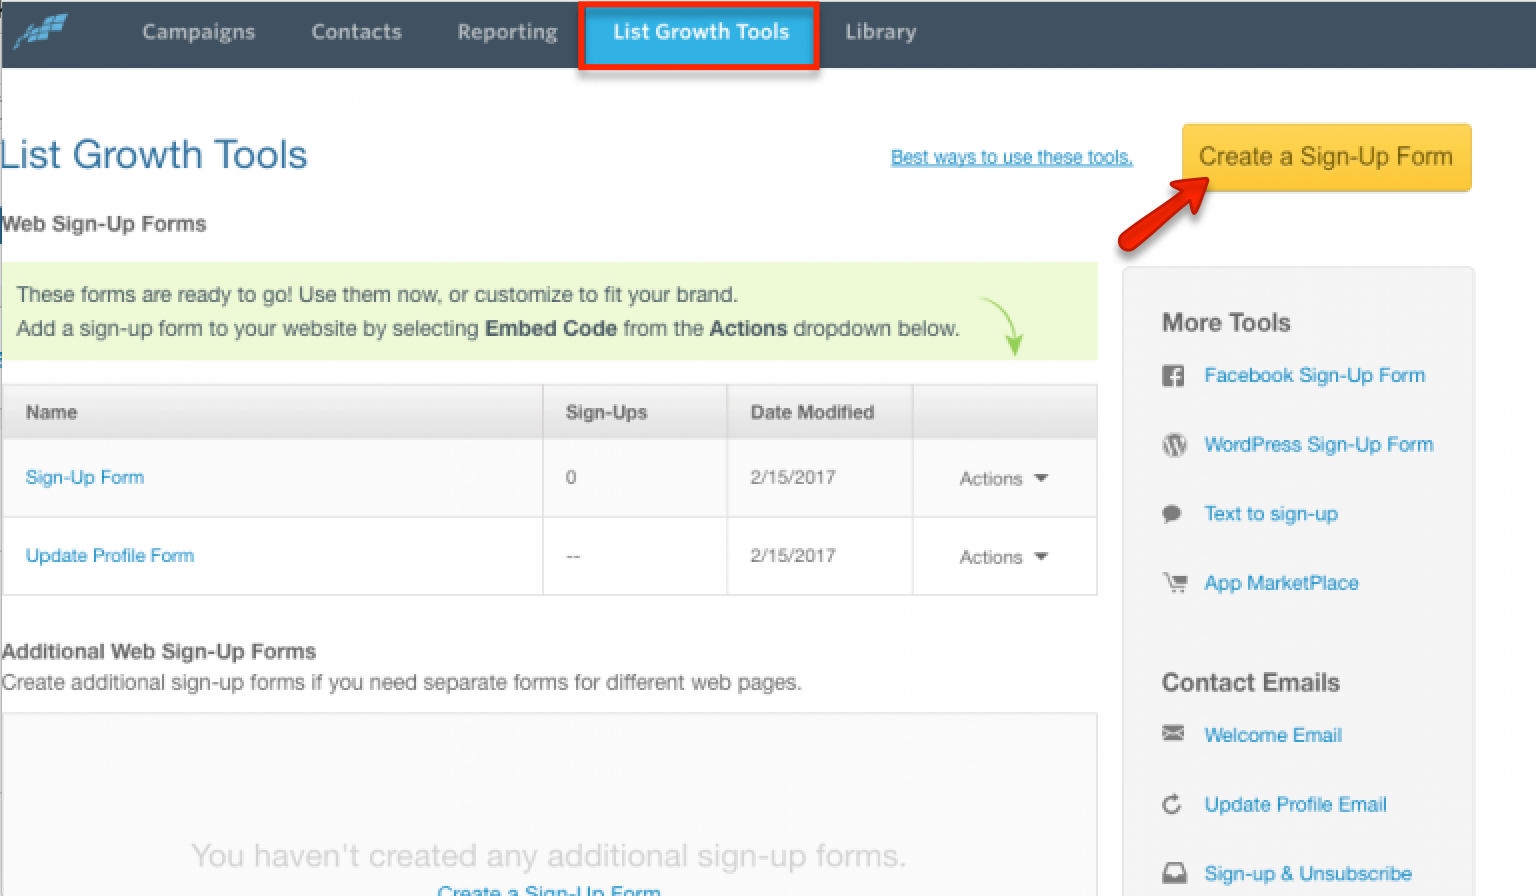
To start creating a sign-up form, click “List Growth Tools “ on the top menu bar.
Next, click “ Create a Sign-up Form” at the upper right corner.
You’ll then be taken to a sign-up form creator page. There are three sections that you need to complete:
(i) Form Details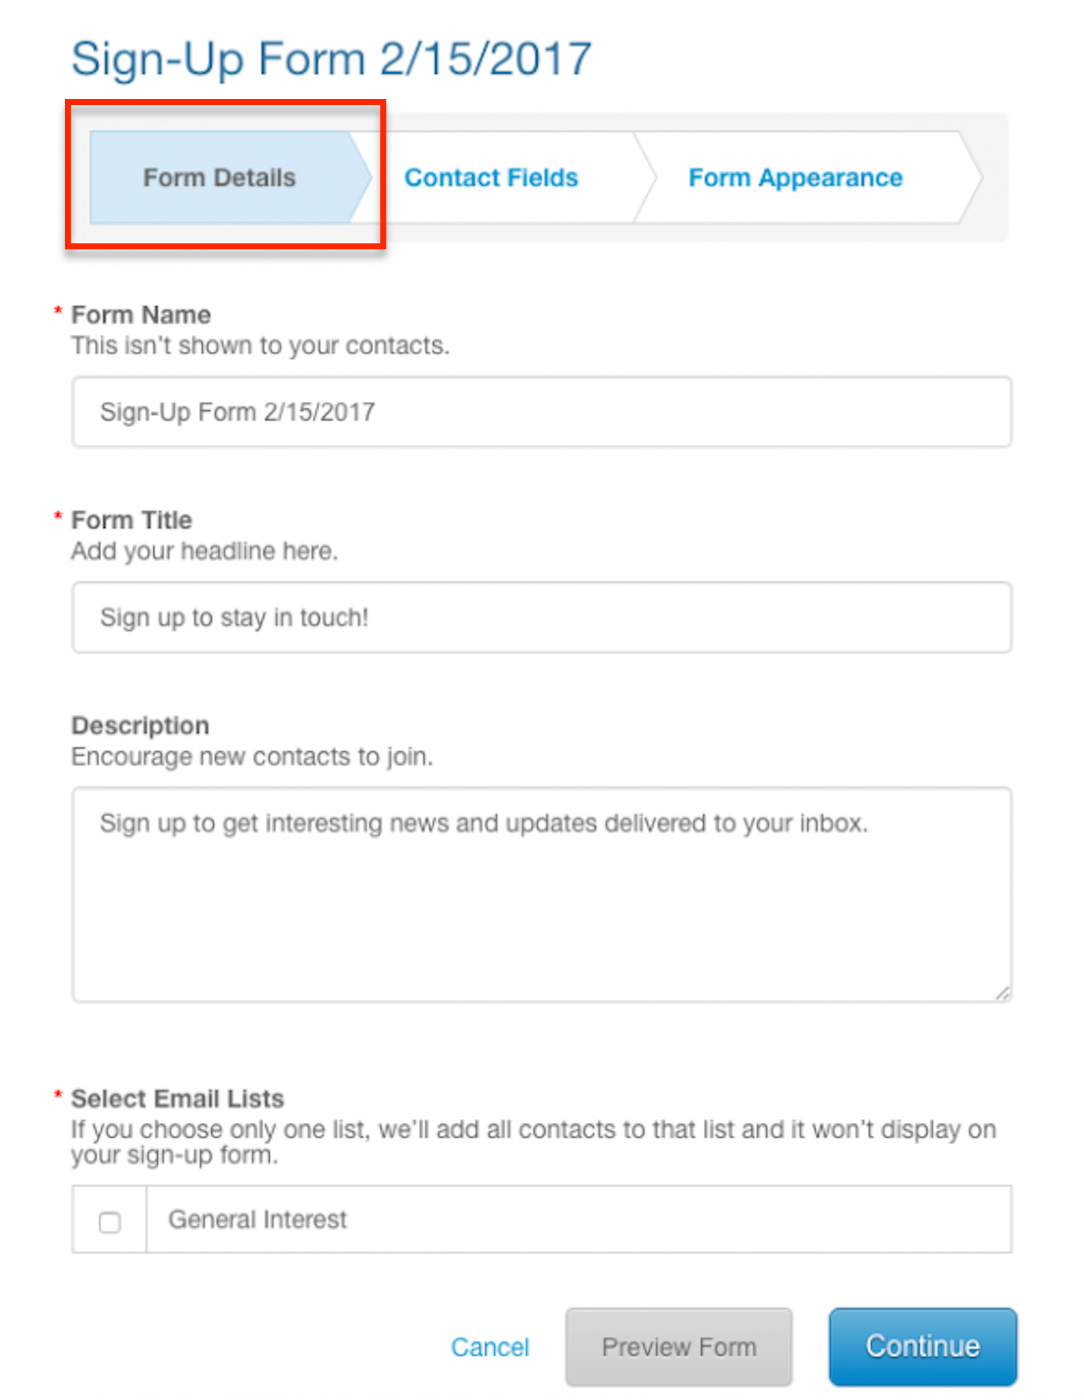

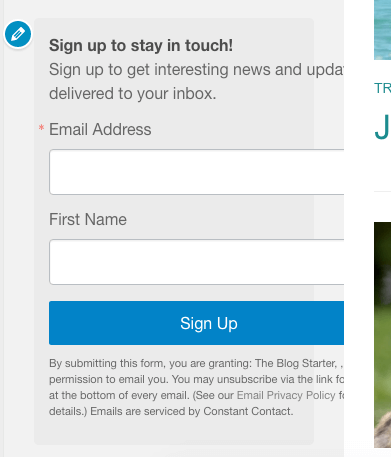
Next, fill out the “Form Title” and “Description” to invite your visitors to join your email list.
Write a short description about what your audience can expect once they sign up- receive information about your business, receive blog post notification or get a freebie/discount etc.
Also, use a clear CTA (call-to-action) such as “Sign up for our newsletter” or “Stay in touch”.
(ii) Contact Fields
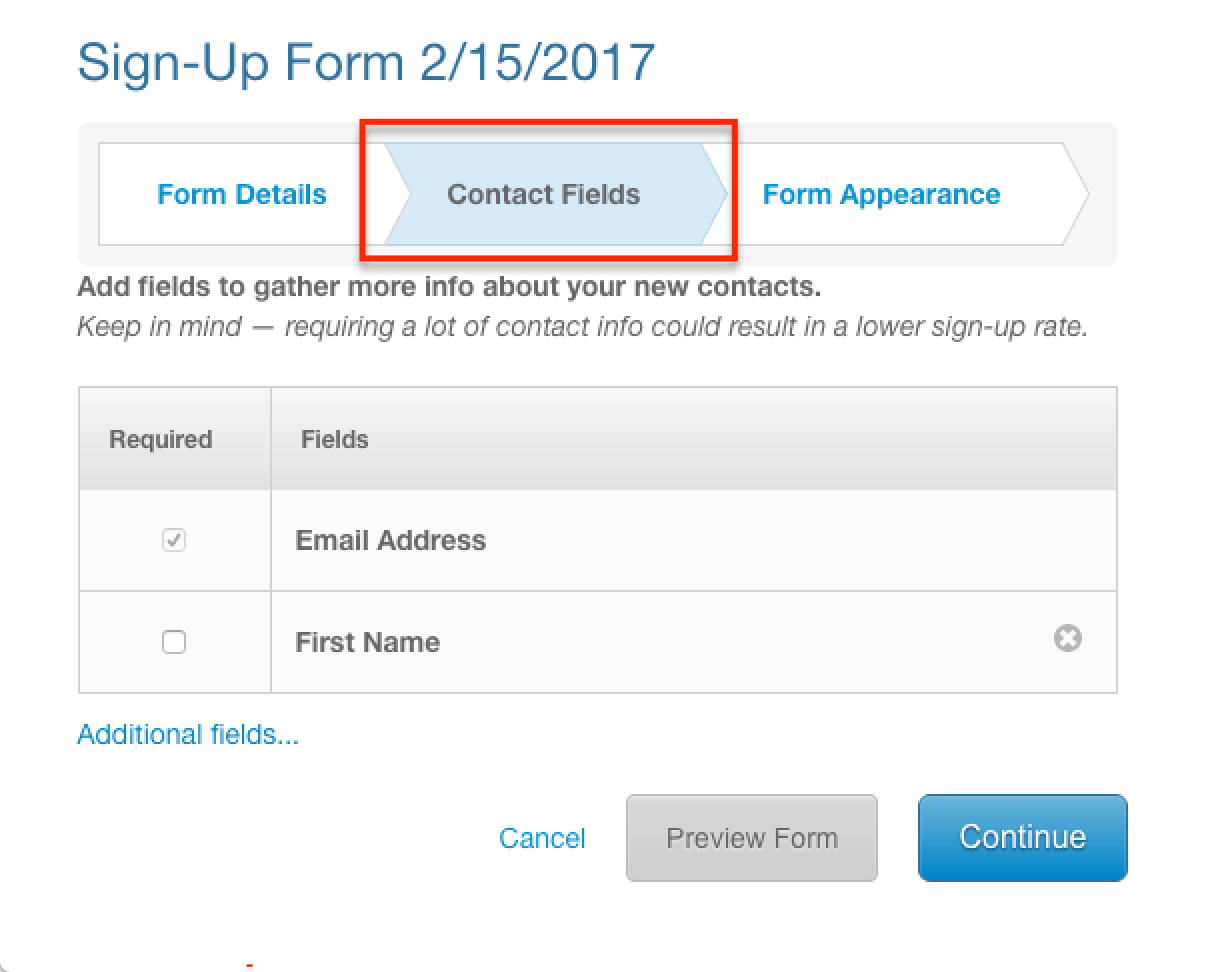

Remember, the more info you request to join your email list the less likely people will fill out a form.
So keep it as simple as possible.
Adding email or/and first name is sufficient in this case.
(iii) Form Appearance
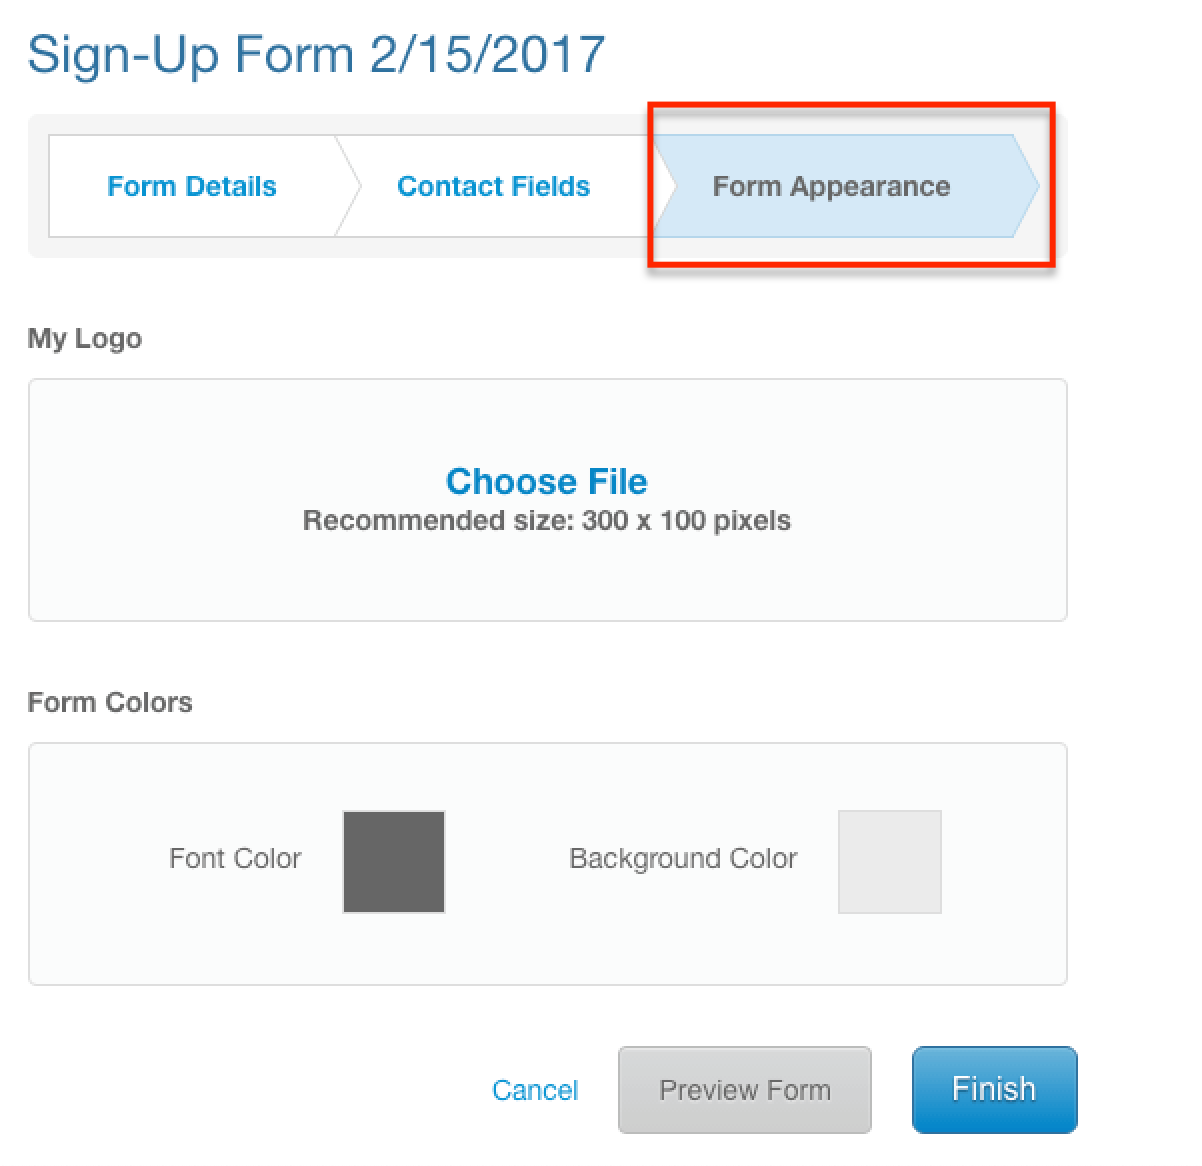

You can click “Preview Form” to see how the form looks and make any final changes if needed. Once it’s done, click “Finish” to proceed.
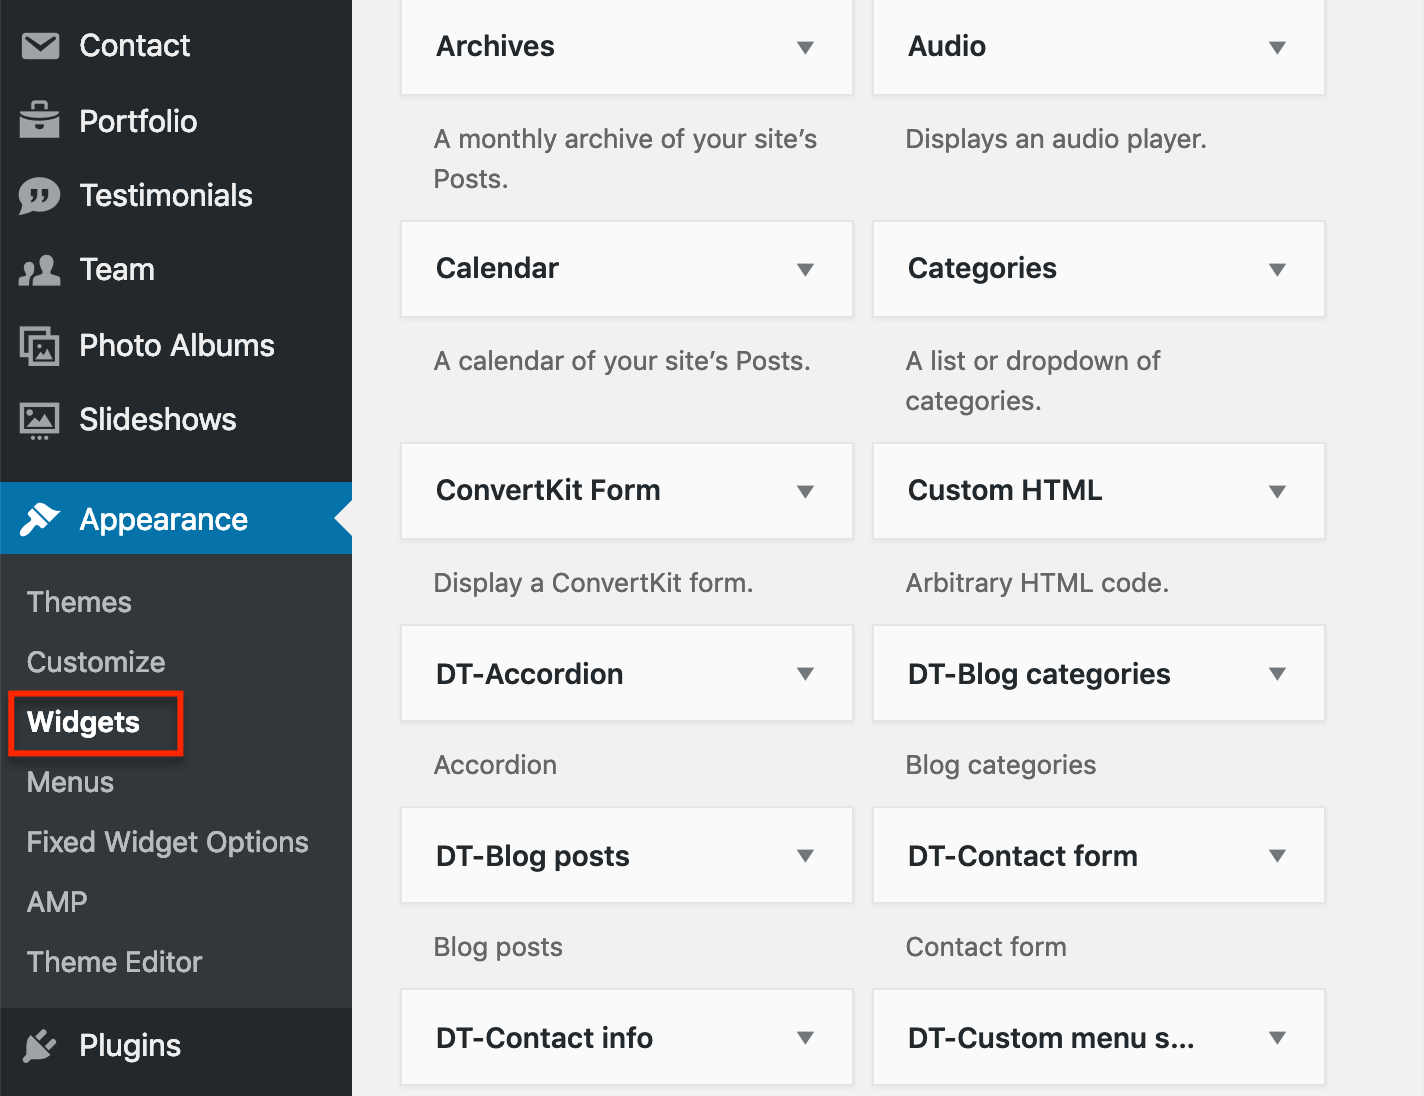
6. Adding Your Sign-Up Form to your WordPress Blog
Next, you’ll need to add your Constant Contact sign-up form to your WordPress blog.
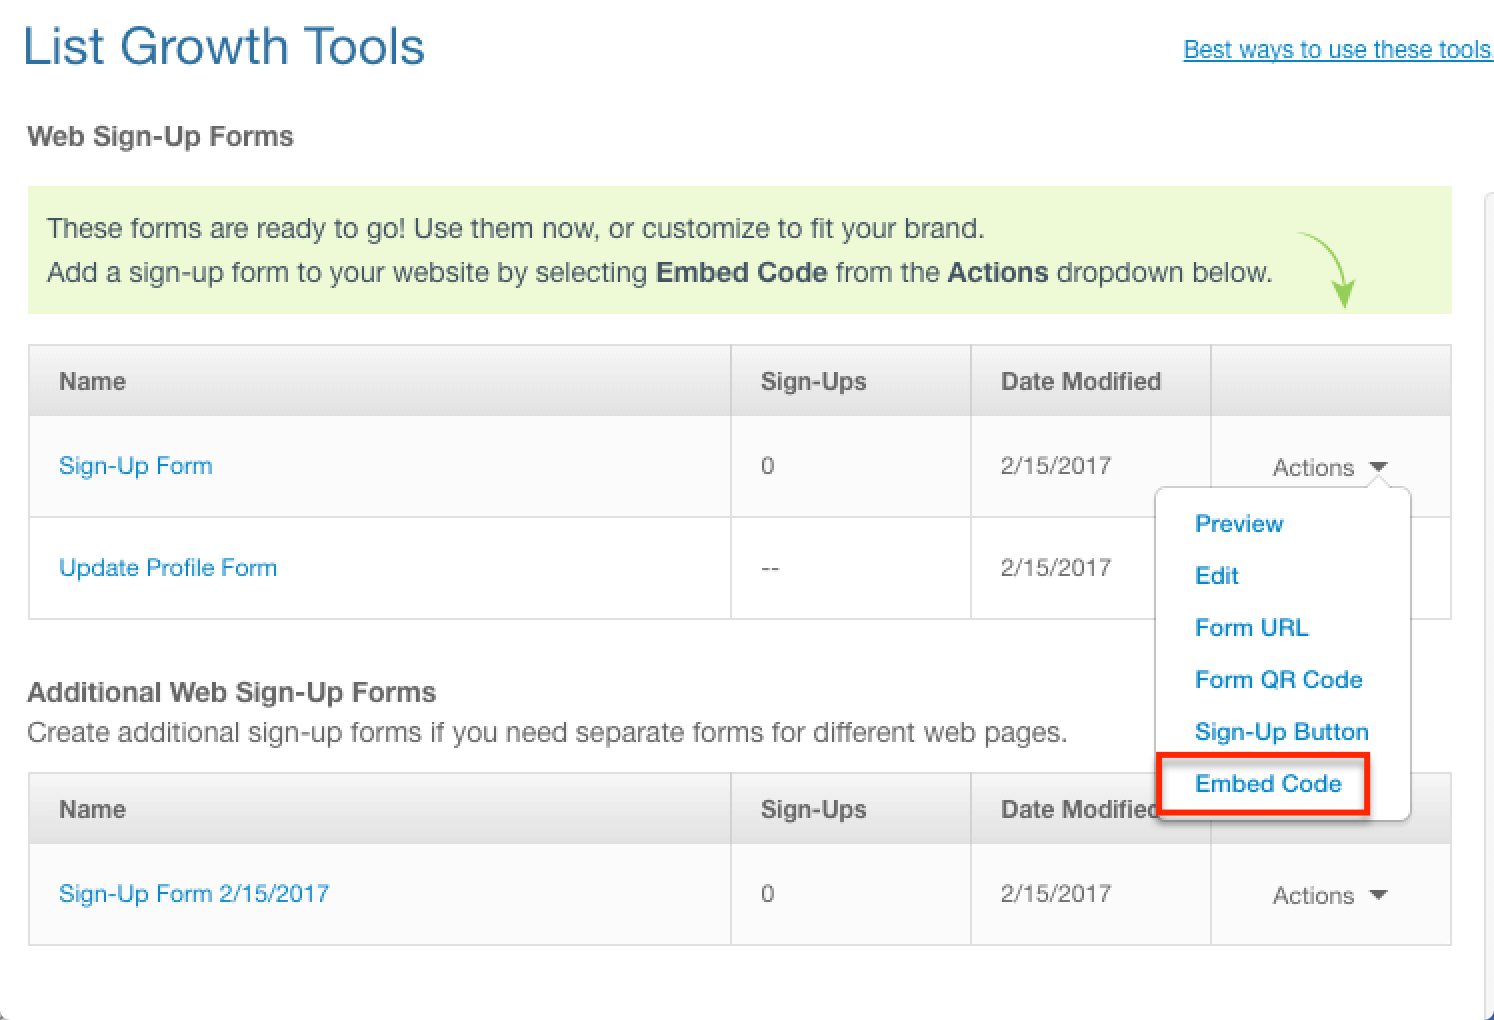
Go to “List Growth Tools” page, click on the “Actions” drop-down menu next to the sign-up for you’ve created (in step #5), and then select “Embed Code”.

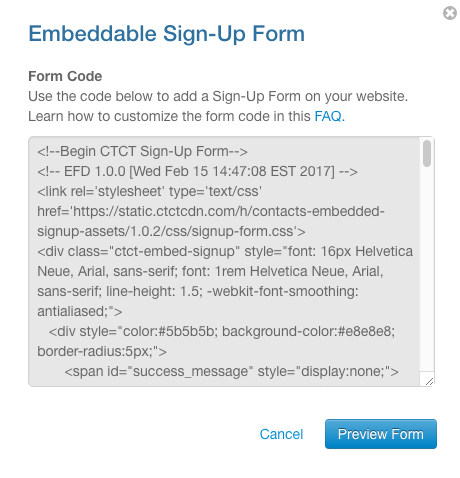


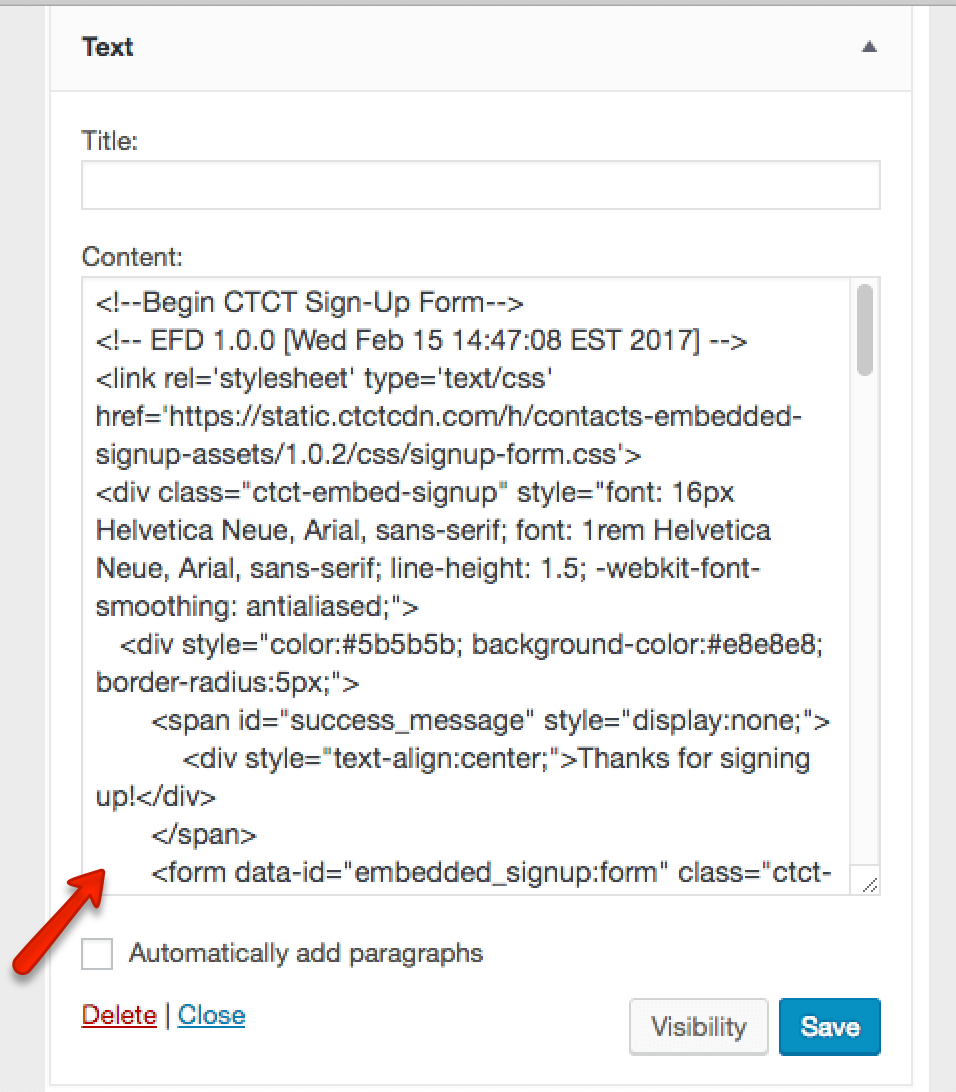
Paste the code given by Constant Contact into the text box and click “Save”.


7. Send WordPress Posts to your Constant Contact Email List
It’s so simple to add your WordPress content into your email campaigns with Constant Contact.
Although Constant Contact doesn’t support automatic sending blog posts to your subscribers, you can easily add your existing post to your email campaign following steps below.
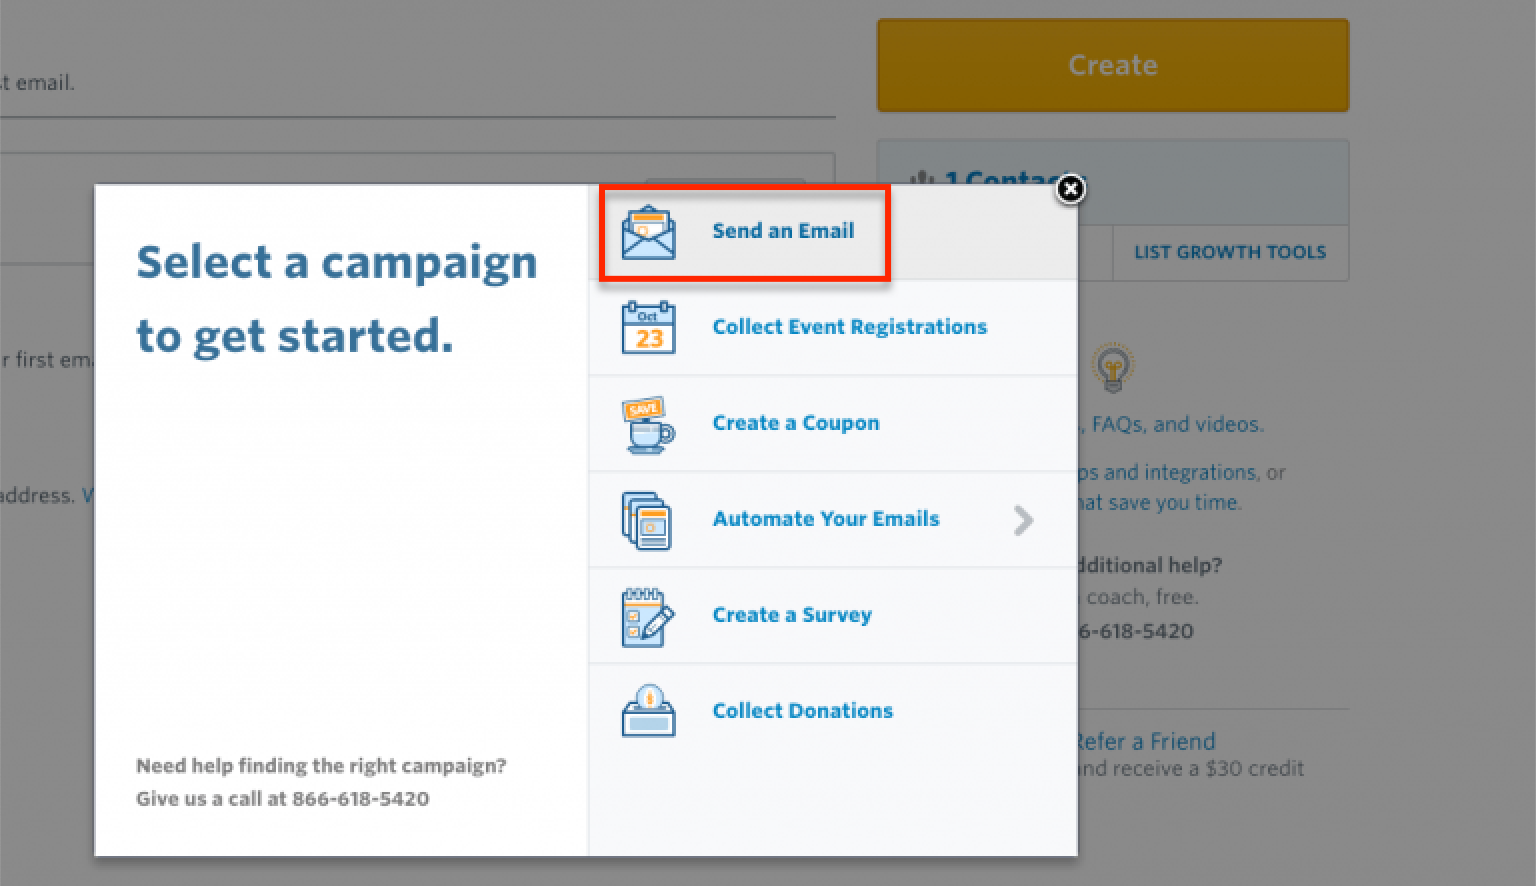
First, go to your Constant Contact dashboard, and select “Campaigns” on the menu bar.
Click “Create” button and select “Send an Email”.
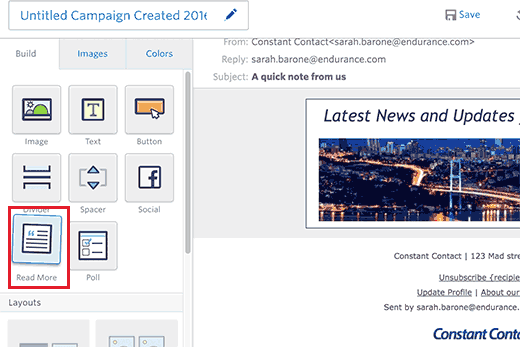
Once you’ve selected the template, you’ll be taken to the email builder screen.

On the left side of your window, you can see a list of available editing option. Drag and drop “Read More” into your email preview on the right side.
Now, click on the “Read More” block on your email design screen to edit it.

Constant Contact will automatically capture an image from your article and a content summary. You can then choose to add it to your email by clicking “Insert” button.
Repeat the process above if you want to add more WordPress content into your email.
Once you’re done, click continue.
Lastly, you can either choose to send the email right away or schedule for a later date. Constant Contact will send your email to your subscribers.
Over to You
Are you using Constant Contact as part of your email marketing strategy? If so, how do you like it? If not, sign up today! It is totally amazing.
Do you have any problem or question following this tutorial to start your email marketing with Constant Contact? Feel free to comment below
I live and breath making an income online.
I’ll be sharing more of ideas and guides soon. Stay tuned.
If you haven’t already, sign up here to receive my emails and a free magazine subscription.
Read More:
- 5 Proven Ways to Monetize a Blog That Generate Under 1,000 Visitors a Day (#3 is my favorite)
- Why You Should Start an Email List
- 12 Must Have Plugins With a New WordPress Site
- How to Monetize Your Blog with Affiliate Marketing
Note – I am a Constant Contact affiliate. If you make a purchase through this or any of the links on this post I’ll earn a small commission at no extra cost to you. But this doesn’t influence my recommendation. Thank you all for your support!