


This is an ultimate guide to ConvertKit Email Automation for beginners. Follow this step-by-step tutorial and screenshots to signup for a ConvertKit account and learn how to create your Email Marketing Strategy.

Wondering how to build a system that will generate a 4400%ROI ?
Want to get the best return for every single dollar spent in marketing?
Then you should start building an email list.
According to expert marketers, email marketing continually outperforms other marketing channels and generates a high conversion rate. For each $1 spent, it regenerates $44 in return.
Before you jump in and start implementing this strategy, you’ll need an email automation tool.
I recommend ConvertKit. I use ConvertKit to manage my email automation system and I love them so much! ConvertKit just simplifies the process and makes email list building so much easier. And it’s designed by a blogger Nathan Barry for bloggers.
As a reader of this site, you can get a 100% free forever plan with Convertkit.
Sign up for a free ConvertKit account and start growing your audience without spending a dime!
Related:
- Why You Should Start Building an Email List
- MailChimp vs Convertkit: Which Email Marketing Tool is better?
What Is ConvertKit?
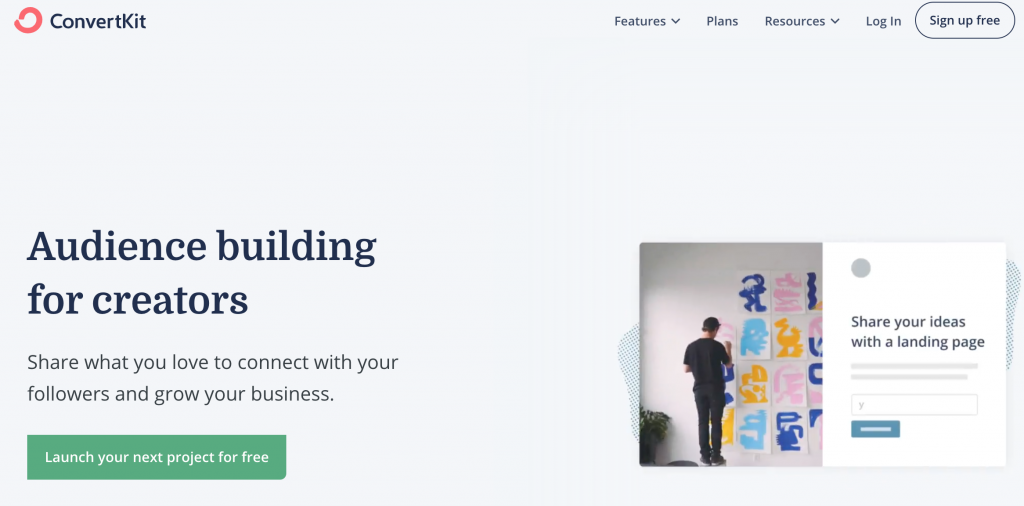

ConvertKit is one of the most popular email marketing platforms for bloggers. It supports landing pages, email automation, content upgrades and more. It’s more like a cross between MailChimp and Infusionsoft, except that it’s so much easy to use and more affordable.
Before getting started with ConvertKit, let’s understand some of the main terms used to describe their features:
Understanding ConvertKit Glossary:
Different email service providers use different terminology to describe their features. So it’s crucial to understand the main terms used in ConvertKit:
- Form: This is how a subscriber joins your mailing list. Enter a name and email address in the form and they’re subscribed! You can embed forms within a blog post, your websites, or used as a pop-up.
- Landing Page: Just like a form, but with more rooms for design and content.
- Sequence: A series of emails sent automatically based on the subscription date. On other platforms: Known as Automations on MailChimp, follow-up sequences on Aweber, campaigns on Infusionsoft and commonly referred as autoresponders on other tools.
- Broadcast: A one-time email sent to a selected group of subscribers (or to all your subscribers). MailChimp calls them campaigns.
- Subscriber: Those who manually opt-in by giving you their email address to receive updates. Each subscriber has a single profile. This means when you add data and tags, it’ll all go to one profile. Unlike MailChimp, having this subscriber feature will prevent you from having the same subscriber duplicated across the lists.
- Tag: A little bit of metadata added to subscribers profile to track their activity or preferences. For instance, you can use tag to keep track of purchases, know what interests your subscribers (eg. Self-publishing vs blogging) and see what get them engaging with your content. You can add an unlimited number of tags to each subscriber.
- Segment: A saved selection of any combination of Tags, Sequences, and Forms. Segment makes it very easy to access when you want to send a broadcast or check the total number of subscribers. You can manage your subscribers easily and you’ll never send an email to the same person twice.
Step by Step Guide to Getting Started with ConvertKit
1. Sign up for a ConvertKit account
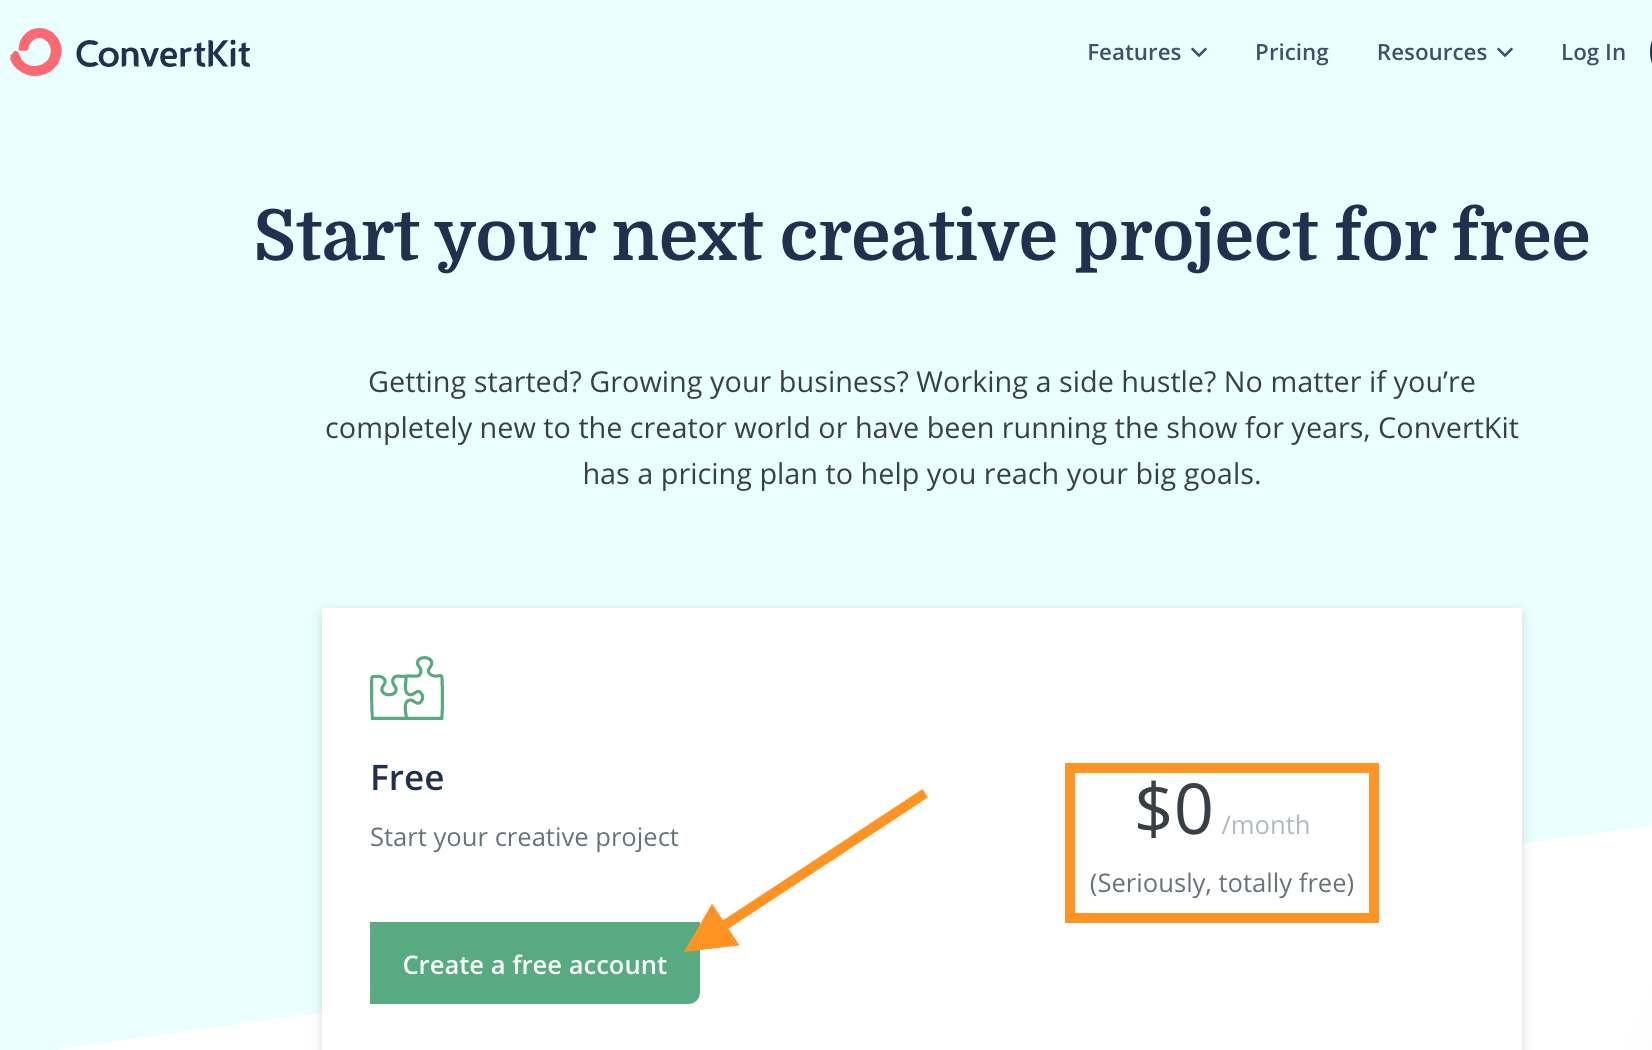

The Free plan includes:
- Unlimited landing pages
- Unlimited, customizable CTAs & signup forms
- 30+ premium landing page templates
- Unlimited traffic
- Customizable domain setup
- Mobile responsive designs
- Manage up to 1000 subscribers
- Unlimited Email broadcasts
- Subscriber tagging
- Seamless Unsplash integration
- Creator community
ConvertKit Free Plan allows you to send up to 1,000 emails per month, which is a fantastic way of starting out.
Once your new site and audience has traction, you can upgrade to their paid plan which is extremely affordable and easy to use compared to other popular email service providers in the market.
ConvertKit prices its services based on the number of subscribers that you have. Basic plan starts with $29 per month for up to 1000 subscribers and goes up from there. Plus, you’ll get unlimited emails for all the plans.
After choosing your plan and creating an account, you’ll need to wait for an approval from ConvertKit. They’ll approve accounts manually to make sure you’re a real person, have a website URL and you’re creating valuable content.
In the meantime of waiting for the approval, you can continue to the account setup but you won’t be able to send out anything yet.


2. Set up your account details
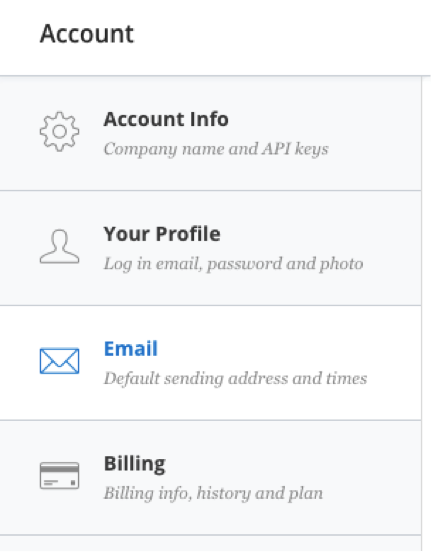

One important thing here is to enter a real address where you can receive physical mail. Make sure you’re complying with the anti-spam laws so don’t provide a fake address. If you don’t have a physical office, you can use a P.O. Box, get a virtual office, or UPS Box (this option will be more expensive)
3. Creating a Form
After setting up your account, you’ll need to create a form to capture your audience’s contact information. You need their email addresses to send them emails later.
To start creating a form, click “Forms” in the top menu bar. Next, click “ Create Form” at the upper right corner.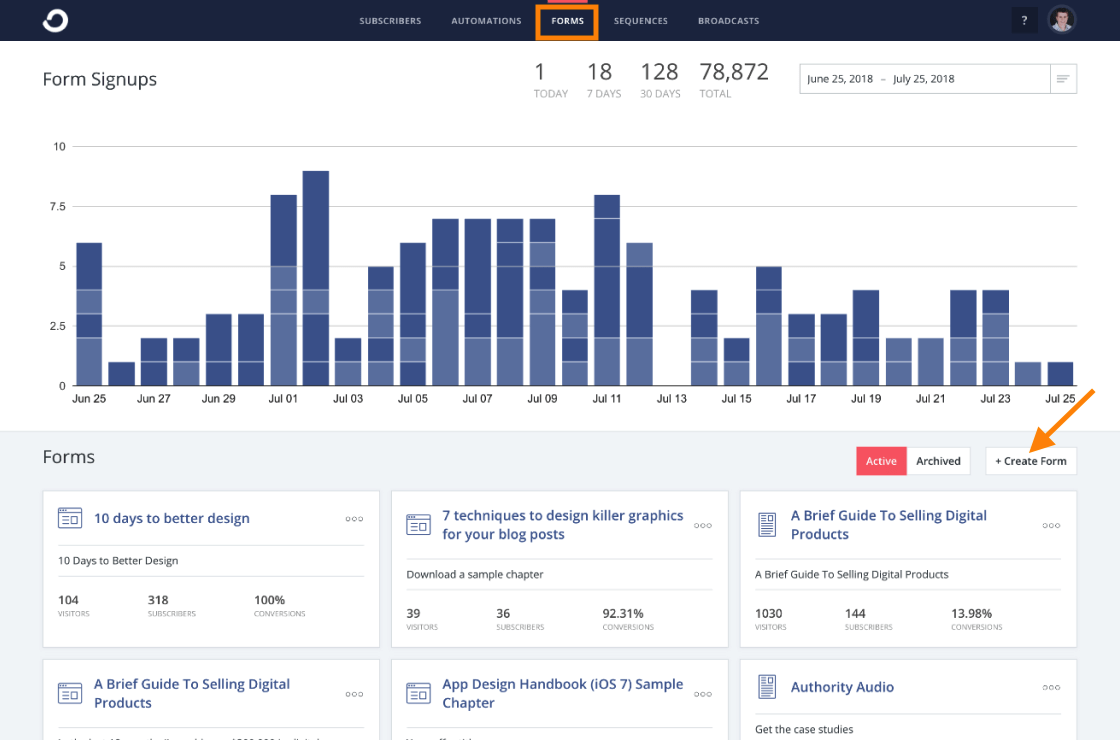

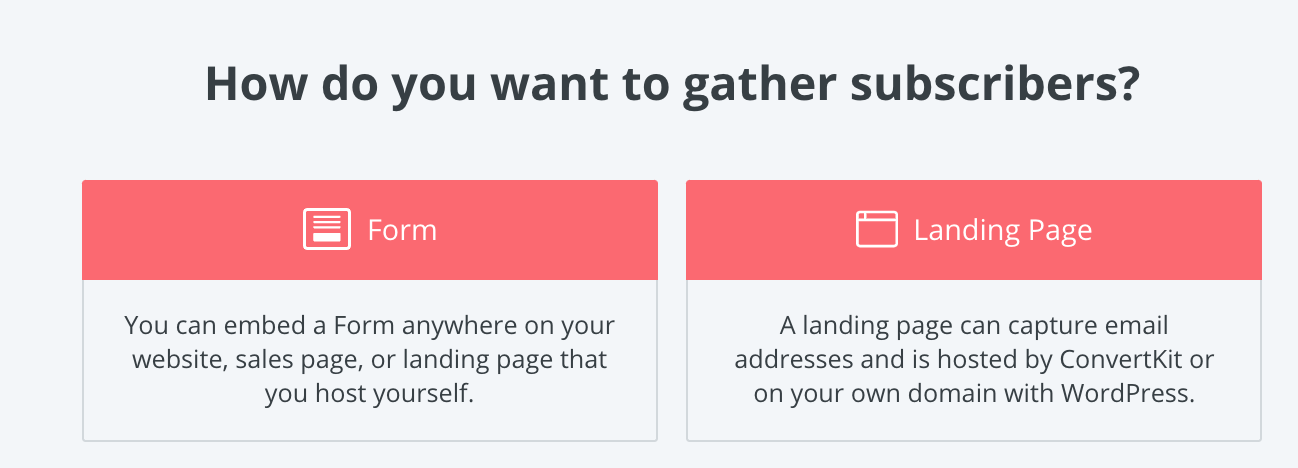
You have two options to choose from, creating a landing page or a simple form. Both are very easy to create. You don’t have to be a tech-savvy to use it.

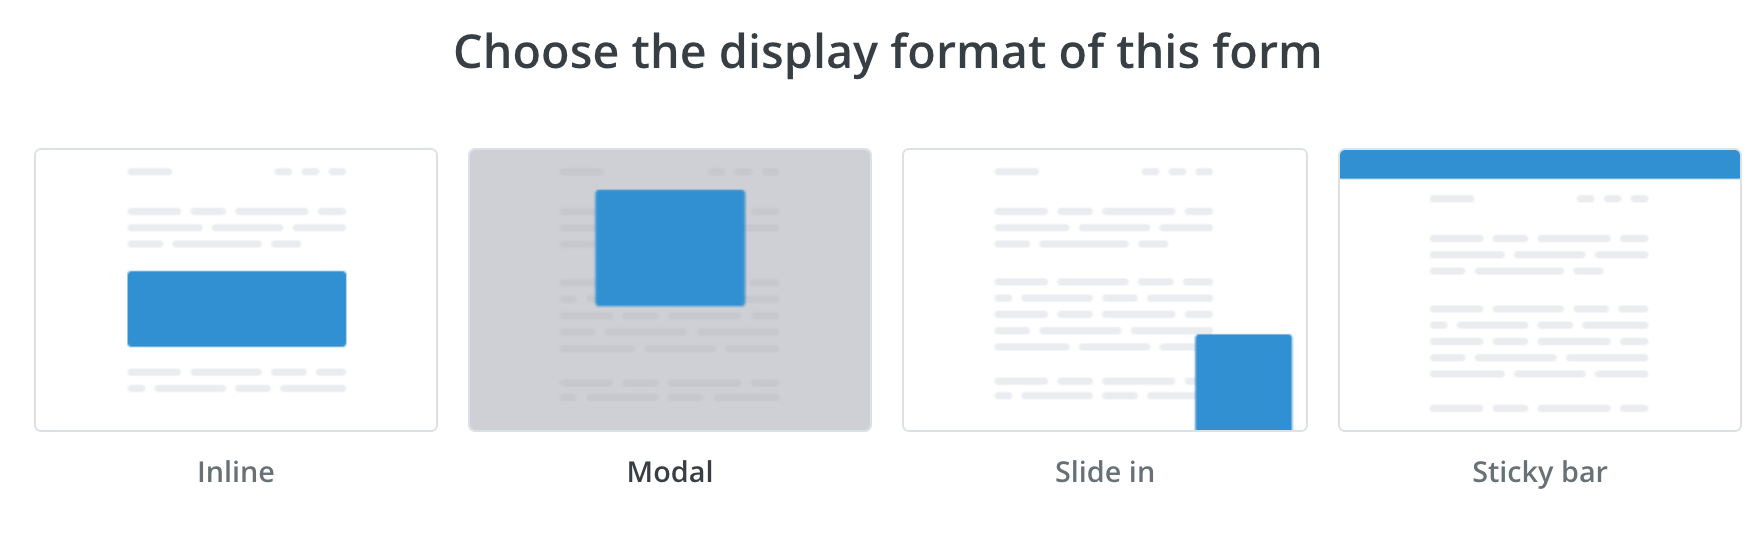

Choose the display format of your form that you want to use. Currently, ConvertKit offers 4 simple default form styles: Inline, Modal, Slide in and Sticky bar.
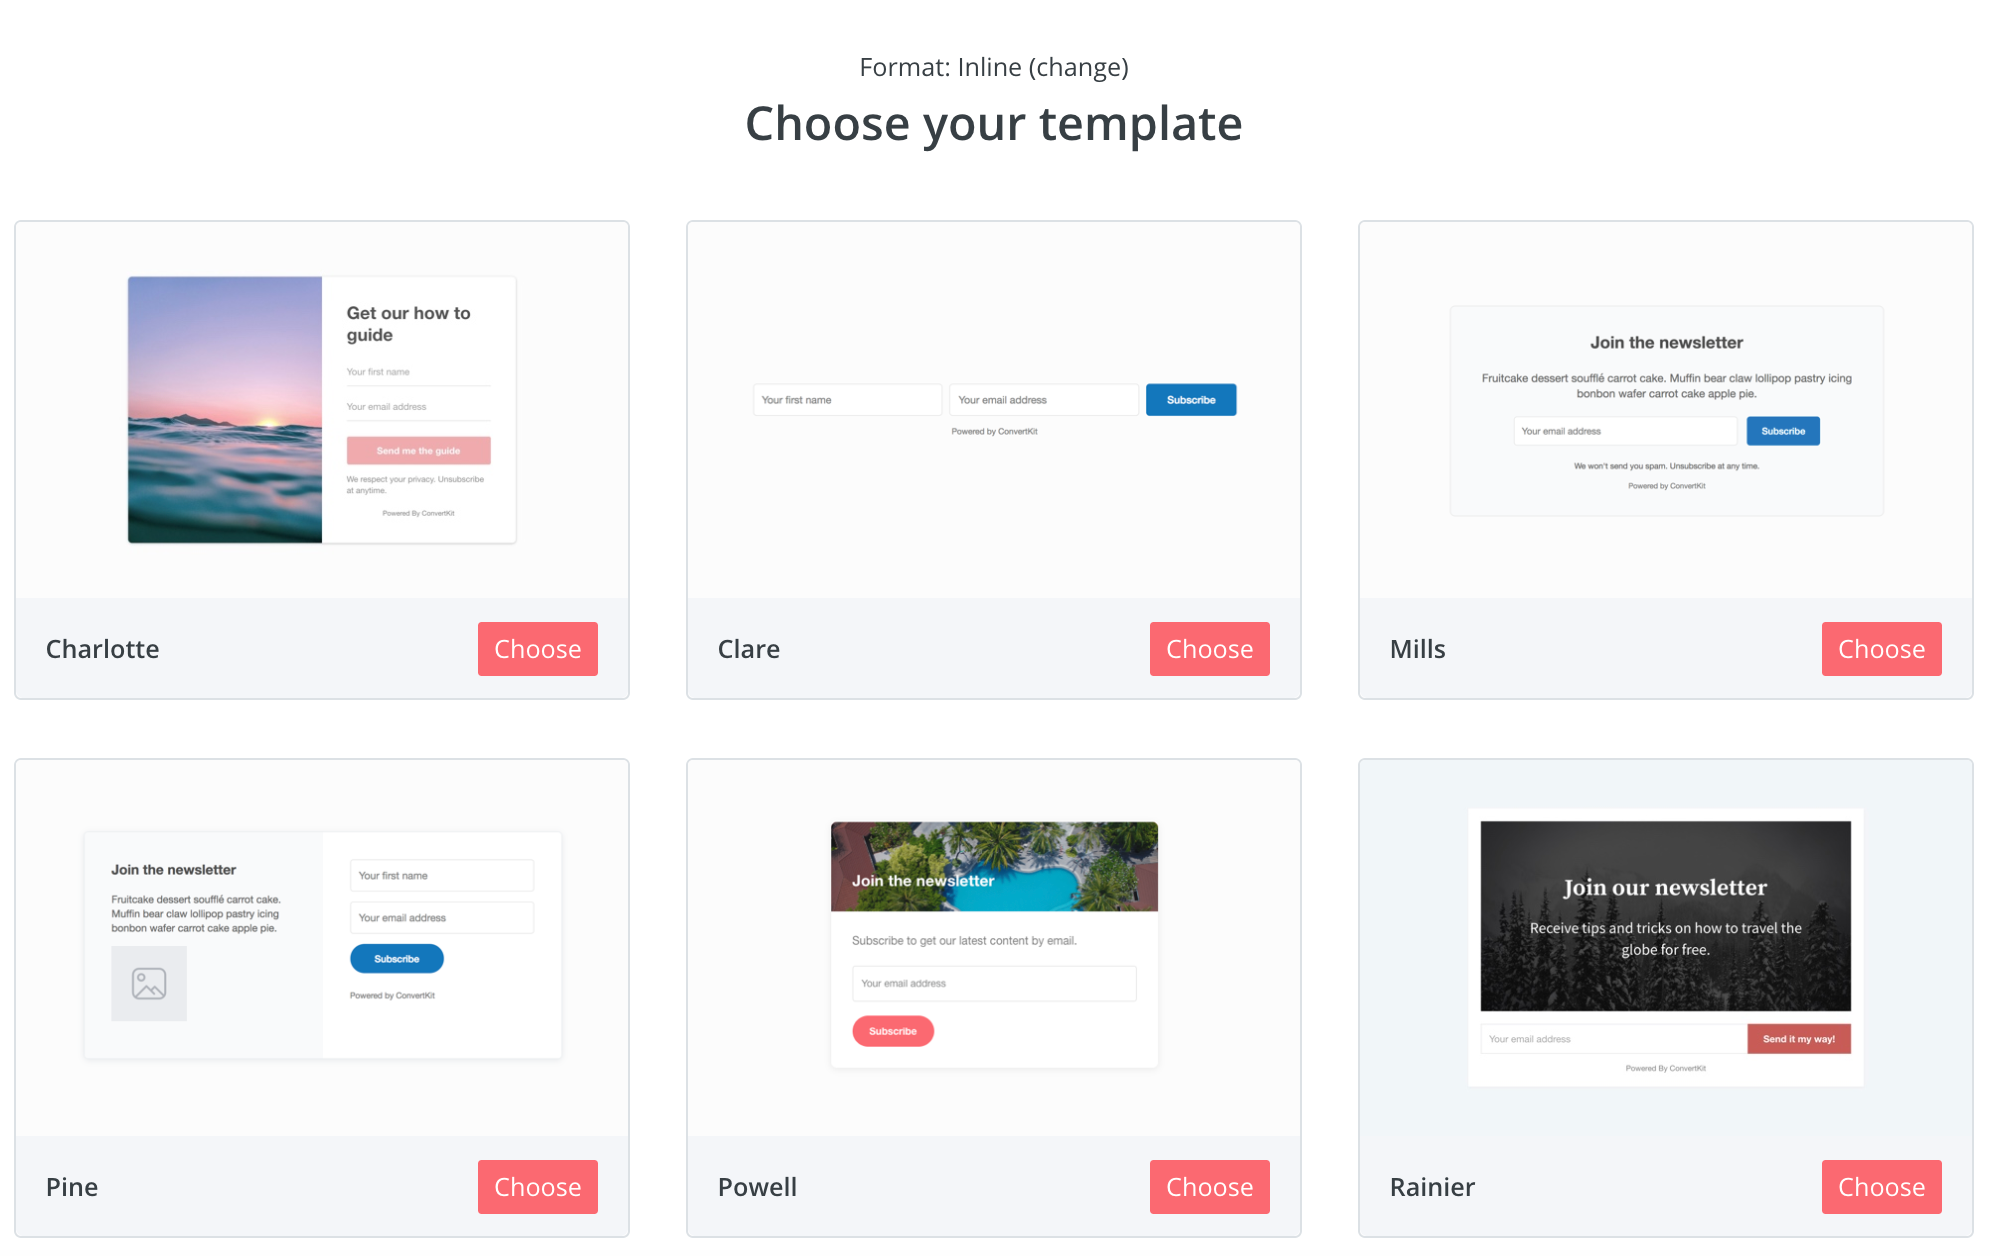
Next, choose one from the pre-made templates. All the templates are fully customizable so you can change anything in it.

To edit your ConvertKit form, simply click on the part that you want to change. You can also customize your styles by clicking on the “Magical wand” icon in the left menu bar. You’ll see the options to change the color of your text, accent, and button.
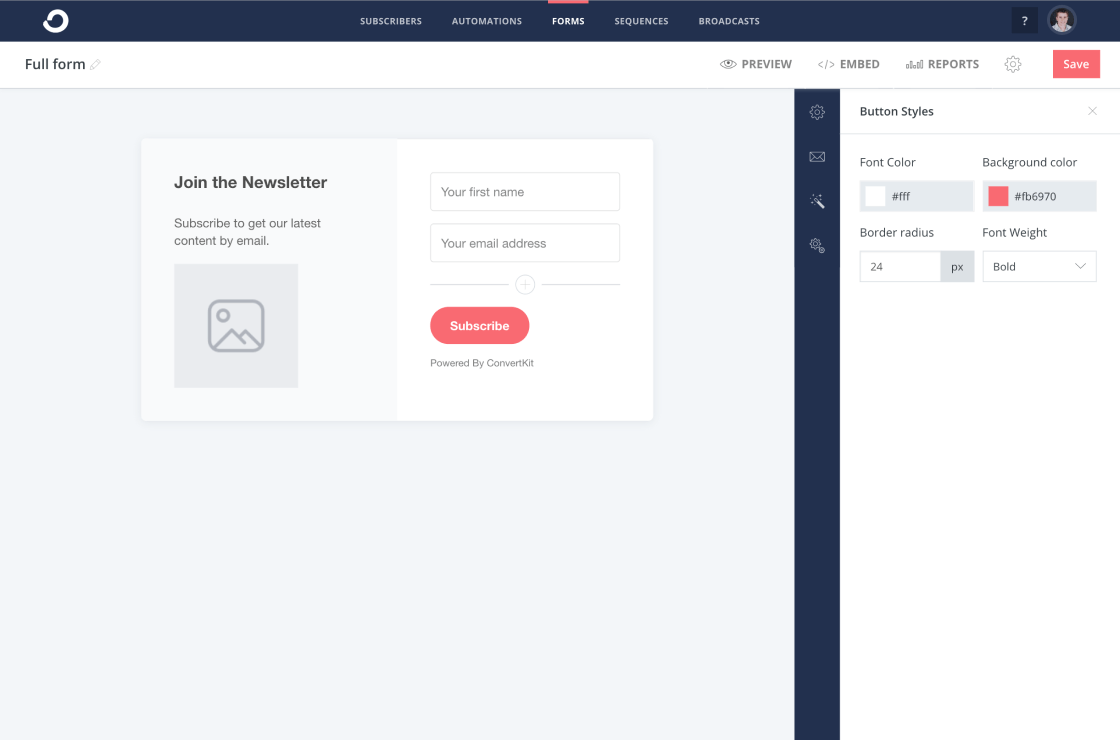

If you want to do more customization with your form, you’ll need to have some knowledge of HTML or CSS. You can learn more at ConvertKit Knowledge Base
After you’ve done creating your form, click “Save”
Then, click “Settings”

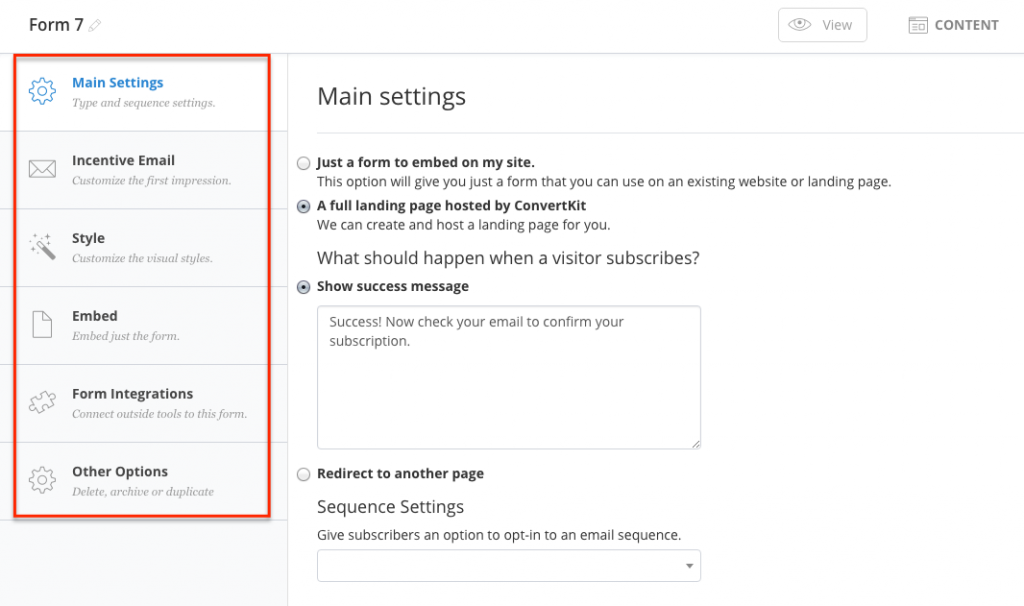
(i) In the Main Settings, you can decide what you want to do with your new subscriber. You can set up a thank you message or redirect them to a thank you page via a link. You can also place your subscriber on a sequence (automation) I will talk about this later in the post.
(ii) In the Incentive Email section, I recommend you using the double-opt email. You can grow your mailing list faster by sending a single email opt-in. But you need a double opt-in to generate high-quality emails. Because your new subscribers have to click a confirmation link in their email before they’re added to your email list.
If you offer a freebie to your new subscriber to sign up for your list, you can change the text on “Confirm” button to Download your Ebook or Course etc. For example, upload your free ebook pdf file in ConvertKit. When someone clicks on the link to claim the free ebook, they will automatically confirm the email. I think this is a more attractive way than simply putting “Confirm your subscription”.
To keep it professional, you should let your subscribers know that they will also confirm their email address by clicking on the link. And you’re given permission to contact them later.
If you don’t have incentives to offer, you can add a URL to send them to a thank-you page or your homepage.
(iii) In the Style section, you can change your form style to other template design if you feel that the current form design isn’t what you want. Want to do more customization? No problem, you can add custom CSS in this section.
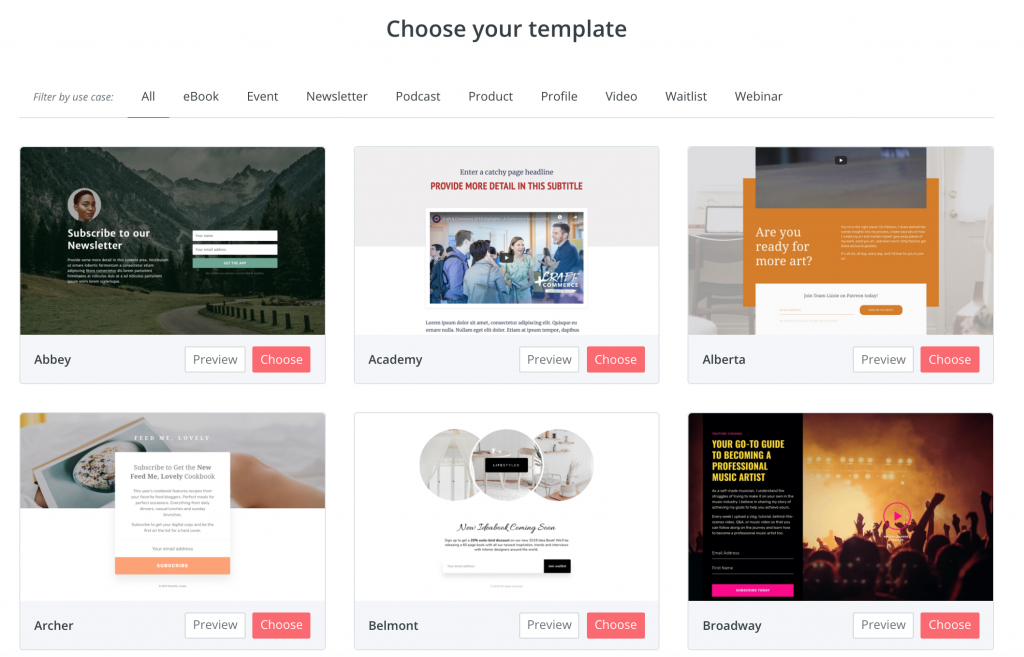
Landing Page
Compared to a form, you have more opportunities for content and design with creating a landing page.
ConvertKit has a great selection of landing pages templates, which are organized by use case.
Choose the template that you think most suitable and relevant to your potential visitors

4. Add form to your website
As an example, I created this form with ConvertKit:
To add a form to your WordPress website, the easiest way is by pasting the embed code of the form into a “text” widget in the header section of your website.
You can also download and install ConvertKit WordPress plugin so that you can easily embed your forms on your WordPress site. You’ll need to activate and set it up with API key ( you can find it in your Account Settings). Then, use the form shortcode to embed it directly into a page or post that you want.
This is how I created the Richard Branson Website.
5. Tags and Segments
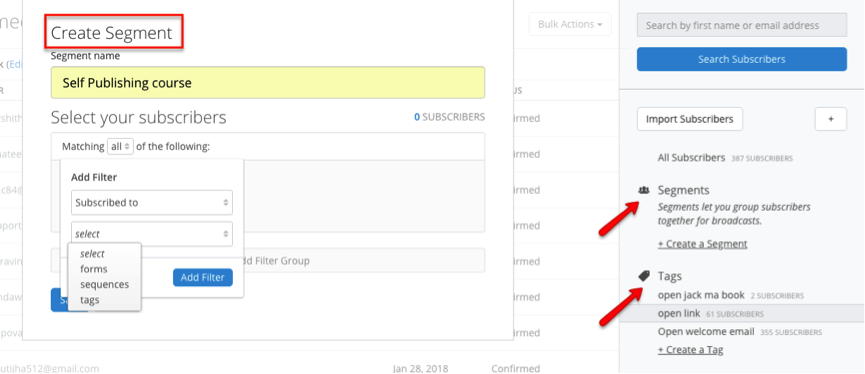

For example, you can add a tag to subscribers when they click on a link, buy a product, sign-up a form, complete a course etc.
Additionally, Segment allows you to divide your subscribers by creating different groups for them. You can group your audience by forms that they’ve opt-in, tags or launch sequence.
6. Sequences
A sequence is a series of emails sent automatically when someone signs up to that sequence.
As an example, if someone subscribes to my free Self-publishing email course, they’ll receive a series of emails over the 20 days with 14 emails. Usually, you’ll want to send out your emails one or more days apart.


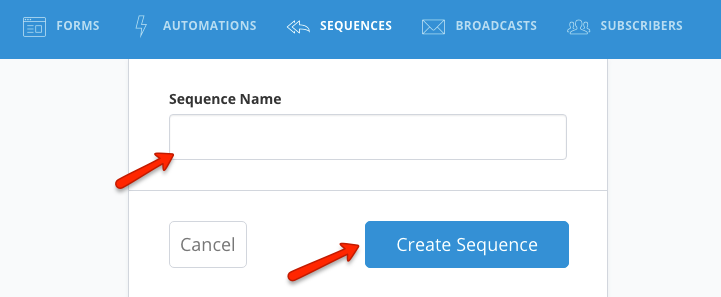
2. Name your Sequence and click “Create Sequence”.

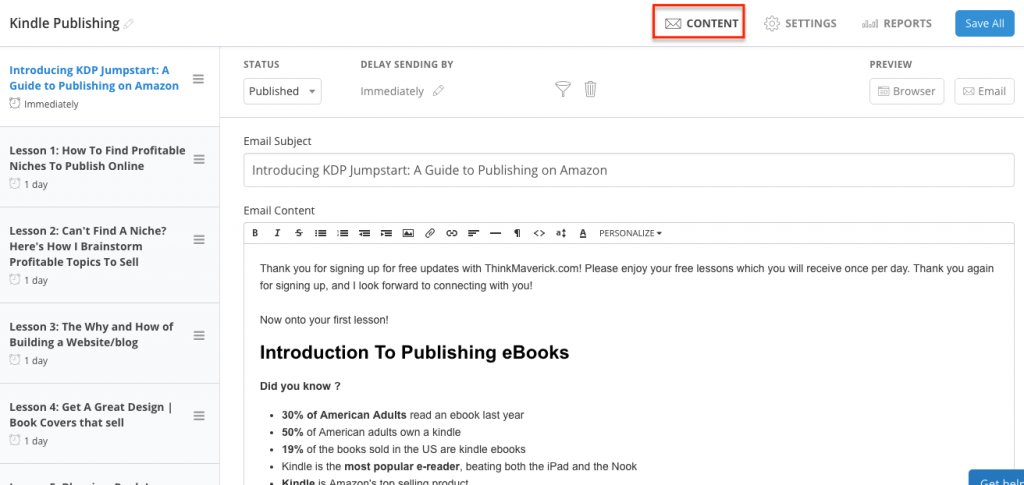
3. Next, you’ll need to enter your email content for the Sequence. Here’s a screenshot of my Kindle publishing email course.

What’s the best part? After you’ve set up the email content, you’ll want them to be delivered automatically! You can do this by creating an automation rule in ConvertKit. We’ll talk about how this Automation works in this post. Keep reading…
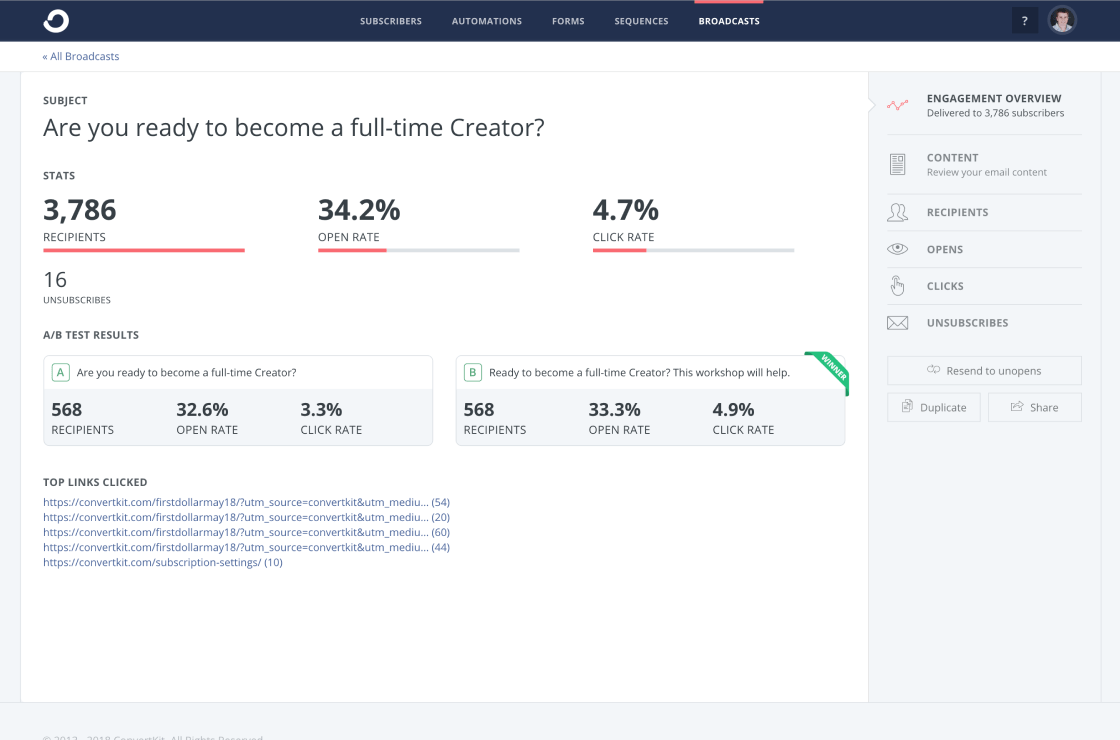
7. Broadcasts
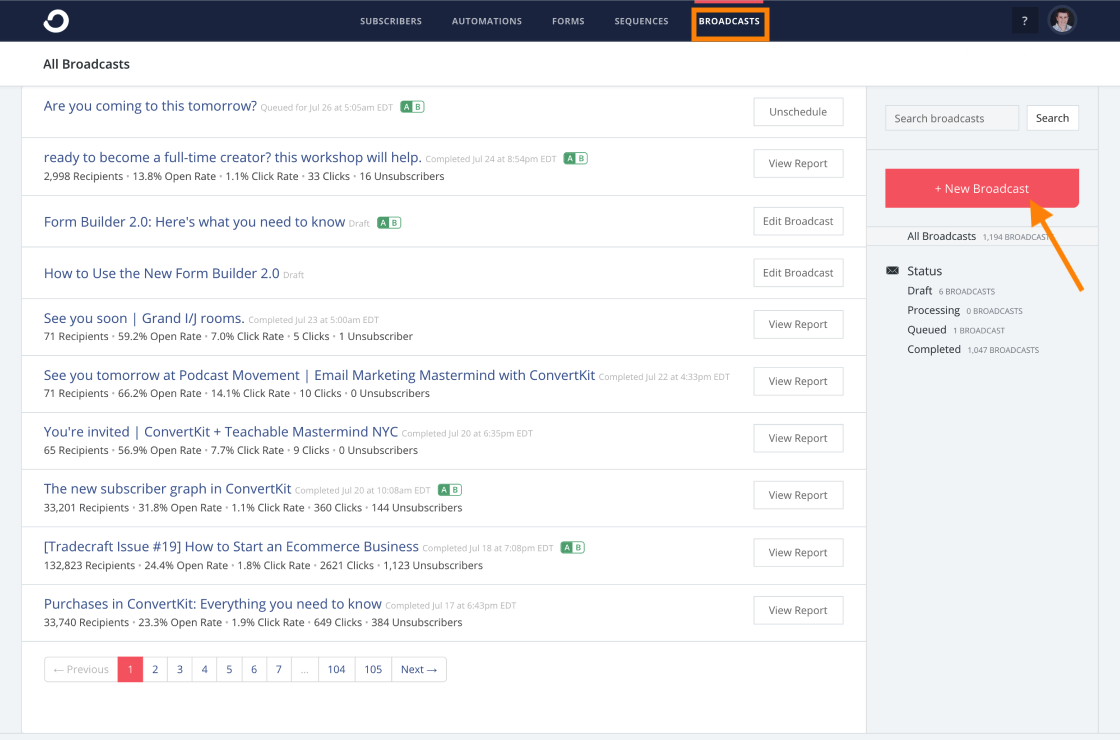

To start sending your first email, click “Broadcast” button at the top menu bar click ‘+ New Broadcast’.
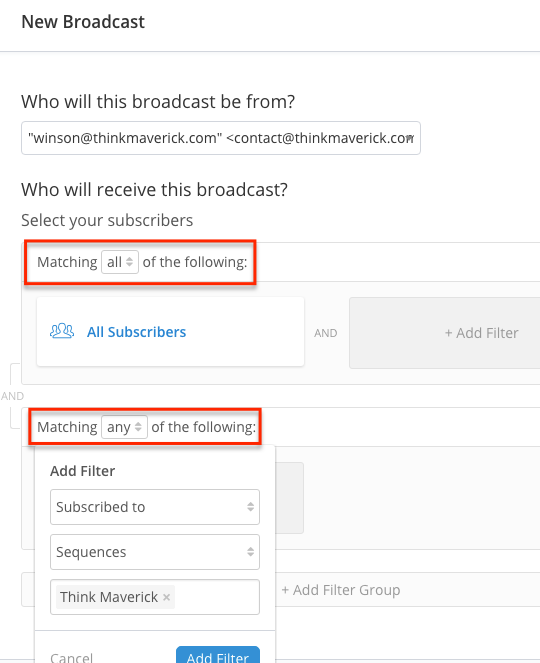
You can choose who will receive the broadcast. Simply select the group of people that you want to send by using filters.

You can add images and links, change font size and colors. There’s an option to do A/B test with your email subject. By entering two different email titles, you can run a test and see which email subject performs better.

Next, preview your email. This is the time where you’ll check your links, making sure that they’re all working well. After you’ve done checking and correcting, click “Next Step”.
You can send out your broadcast immediately or schedule it at a later date.
8. Automation


To create an automation rule for your list, you’ll see 2 columns: Trigger ( When this event happens) and Action (what will happen next)
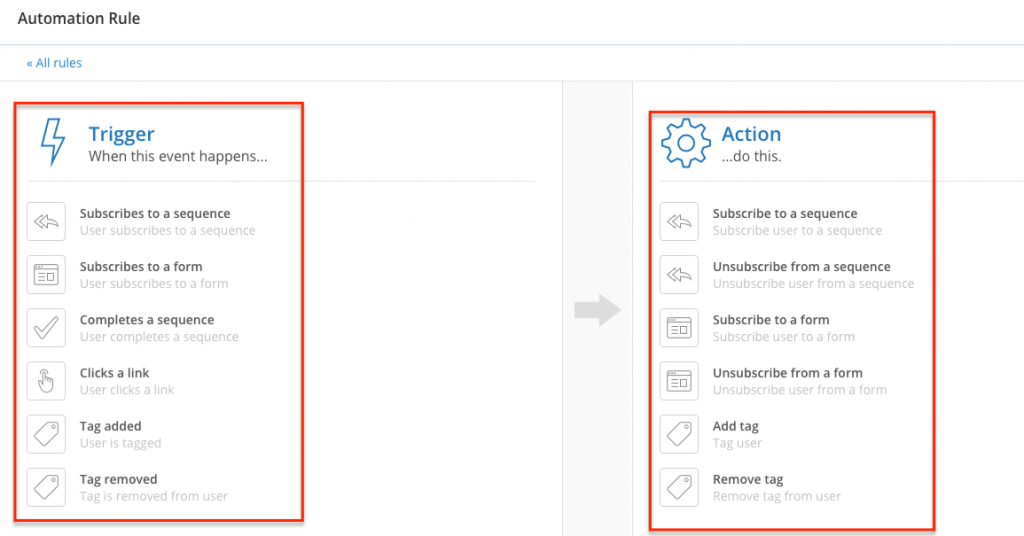

They are many different things you can do with automation rules, for example:
- Add a tag to someone as “interested in z” when they click on a link
- Start an email course when someone joins the form
- Untag someone who has purchased a product in the launch and add them to post-purchase funnel
Sending a welcome series using automation
One of the first things you want to do with ConvertKit Automation is setting a “Welcome” Series for those who’ve signed up for your opt-in forms.
- Create a sequence. You’ll need to prepare and write your welcome emails which will be delivered to all your new subscribers.
- Create a form to capture new subscribers.
- Create an automation rule. When someone signs up that form (Trigger), they’ll be added to the “welcome” sequence (Action) automatically.
- Optional: you can also add a tag to those new subscribers.
At the upper right corner, you can see options to set up an RSS Feed and Integrations too. Depends on your business needs, you might need to integrate ConvertKit with a shopping cart, payment portals, lead capture webinar services and more. You can learn more here.


Are you ready to get started with ConvertKit?
Click here to sign up a free Convertkit account
Note: This is an affiliate link, which means I earn a small commission if you sign up through this or any of the links on this post, with no extra costs for you. I use ConvertKit for my own business, which is why I’m happily an affiliate! Thank you all for your support!
Do you have any problem or question following this tutorial to start your email marketing with ConvertKit? Feel free to comment below
I live and breathe making an income online.
I’ll be sharing more ideas and guides soon. Stay tuned.
If you haven’t already, sign up here to receive my emails.
Read More: