 If you have a website, chances are you will be faced with form spams, bots and fake submissions.
Every website needs an online form, but it’s also an open invitation for spambots.
However much we hate, unfortunately, it’s something that all website owners have to deal with at some point.
I’ve been there. Wasting precious time combing through contact form submissions just to determine whether those forms have been submitted by a real person or by a spambot…
I understand how frustrating, annoying and stressful it can be.
Luckily, there are some relatively easy ways to stop spam form submissions, without making your site difficult for visitors to access.
In this article, I’m going to show you how to create a spam-free contact form with WPForms- in the easiest possible way.
By the end of this piece, you’ll know exactly how to add reCAPTCHA to your WordPress forms, how to build spam-free forms without using CAPTCHA and how to get a free bonus anti-spam to protect your website, once and for all, no matter which solution you use.
WPForms is the best Contact Form Builder plugin for your WordPress site.
What is reCAPTCHA? CAPTCHA vs reCAPTCHA
reCAPTCHA is a free service provided by Google to protects your website from spam and abuse.
Before I get to the main part, I think I need to start a bit further in the past.
Back in the day, one of the most effective ways of preventing bot spam was through CAPTCHAs.
CAPTCHA(Completely Automated Public Turing Test To Tell Computers and Humans Apart) is basically an anti-spam tool to see if you’re a human or not.
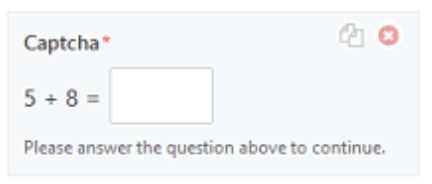
CAPTCHA usually asks you to complete a simple math equation like addition, subtraction, or multiplication.
In addition to that, CAPTCHA can also require users to enter specific text into a box.
The idea behind CAPTCHA is to generate simple tests that only human could pass, while making it as hard as possible for spambots to fill in your forms.
But it wasn’t a perfect solution by any means.
People didn’t like having to answer complicated captcha when completing a form. It can be an extra step in the process that frustrates your users and may hurt form conversion rates.
Not only that, some users may find it difficult to answer math questions, type a phrase or text, especially for those have dyslexia, low vision and other disabilities.
With CAPTCHA, you’re sacrificing some user experience for security.
That’s where reCAPTCHA comes in.
Google has acquired reCAPTCHA in 2009. Since then, they quickly began to improve it and introduced the reCAPTCHA v2.
reCAPTCHA is a tool similar to CAPTCHA, helping to protect websites from bots except that it’s so much easier for users. At present, reCAPTCHA v2 is the most popular version of spam catching for forms.
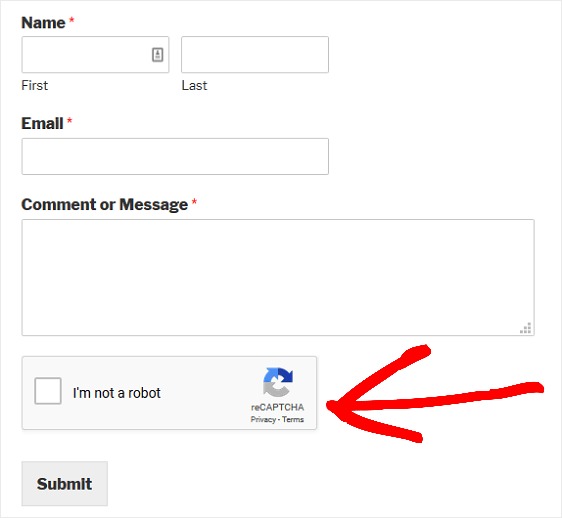
Instead of entering words or numbers, users just need to mark a checkbox “I’m not a robot” and the system will automatically recognize that this is not a robot.
That’s right, with just one click the tool can immediately tell humans and bots apart.
Here’re two main benefits of using reCAPTCHA:
- Fight spam form submissions – protect your site from automated spam bots with an extra layer of security.
- Easy to use – With reCAPTCHA, all the users need to do is clicking on the checkbox to prove that they’re human when filling out a form.
Choosing the Type of reCAPTCHA
In this guide, we’ll focus on the two main types of reCAPTCHA available for your WordPress forms:
1. Checkbox reCAPTCHA v2
Users must check a box to confirm they are human when submitting a form.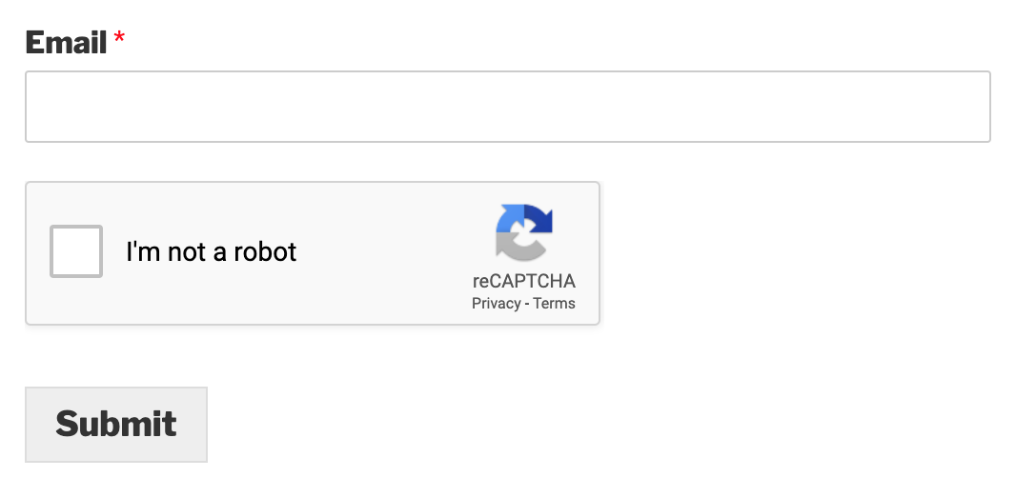
2. Invisible reCAPTCHA vs
As its name suggests, users won’t see a box or any extra field within your form.
No extra action is required from your users when they submit a form.
When you look closer at the form, you will see a small badge on the lower right corner of the screen which is linked to Google’s terms of service and privacy policy.
Now that we’ve covered one of the most powerful anti-spam tools, we can dive straight into the meat and potatoes of this article.
To stop spam form submissions, you can either choose to add reCAPTCHA v2’s interactive checkboxes or invisible reCAPTCHA to your WordPress forms.
In this article, I will show you how to add both reCAPTCHA v2 to your forms, you can decide which is suitable for your site.
How to Build A Spam-Free Forms with WPForms
WPForms, the most beginner-friendly WordPress form plugin, just makes the process of adding reCAPTCHA checkbox to your forms super easy.
You can now create your own spam-free smart web form without writing a single line of code.
Once you complete the setup process by following steps below, then everything is fully automated.
The plugin will do the hard work for you so you no longer have to manually sift through your contact form submissions to weed out fake users. That way, you can focus more on your core business and generate more quality leads.
Allocate 5-10minutes to set the form properly. The steps below may seem a little bit longer, but using WPForms’ Spam Protection is actually easier than you think.
Without further ado, let’s get started:
Step 1: Create a Simple Contact Form in WordPress
First of all, you’ll need to install and active WPForms plugin on your WordPress site.
If you need help, check out this article on how to install a WordPress plugin.
Once WPForms is installed, you’ll see the WPForms’ setup wizard and the option to take the WPForms Challenge.
To create your first contact form, click “Start the WPForms Challenge” to get started.
Next, you’ll be taken to the WPForms form builder.
Don’t worry, WPForms is very user-friendly. It will guide you through the whole process of creating your first form, start from naming a form to adding form fields and customizing the appearance and function of your form.
You can create different types of web forms for different purposes such as donation form, order form, survey form, user registration form and more.
In this example, we’re going to create a simple contact form, so click “Simple Contact Form” as shown in screenshot below:
Next, you can add as many required fields as you like to your form, simply drag and drop the elements to your form editor and click “Save”.
For detailed instructions on creating a simple form, you can check out this official guides.
Step 2: Configure reCAPTCHA Settings
Once you’re contact form is ready, you’ll need to add the reCAPTCHA checkbox or invisible reCAPTCHA to your form.
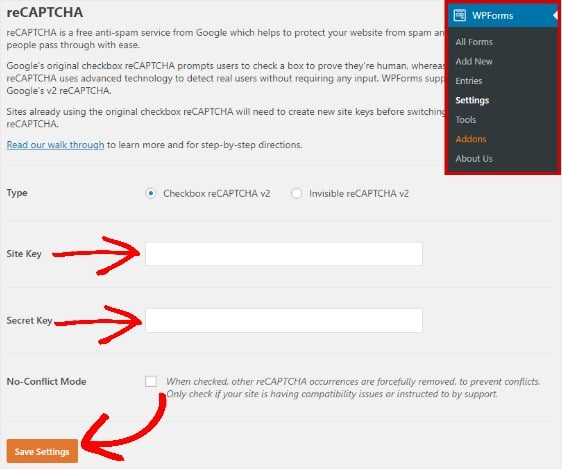
Go to “WPForms” > “Settings”. Search for reCAPTCHA tab and click on it.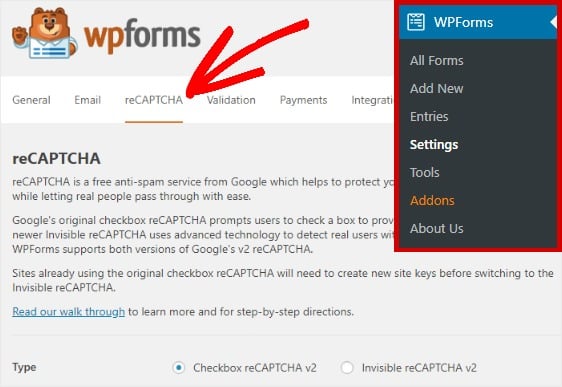
Like I mentioned earlier, there are two types of reCAPTCHA that you can use: reCAPTCHA v2 and Invisible reCAPTCHAv2.
- If you want to use reCAPTCHA v2’s interactive checkboxes, follow steps in Solution 1.
- If you choose Invisible reCAPTCHAv2, then take the following steps under Solution 2.
SOLUTION #1: Add reCAPTCHA to Your Contact Forms
For the first solution, we’re going to select “Checkbox reCAPTCHA v2”.
While reCAPTCHA is free, you’ll need a site key and secret to use it.
To generate your keys, go to Google’s reCAPTCHA setup page.
Then, click “Admin console” at the top right corner to continue.
Log in to your Google account and you’ll be taken to a page where you can register your website for reCAPTCHA.
If you have already registered a site for reCAPTCHA before, you’ll come to a different screen. Simply click “+” to register a new site and type in the name of your website.
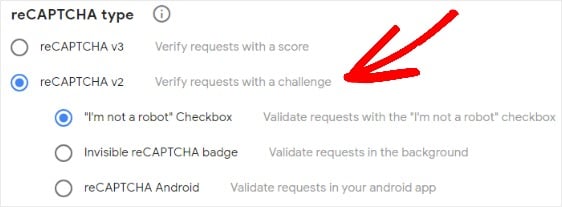
Simply select the type of reCAPTCHA you’d like to add to your site. In this example, we choose “reCAPTCHA v2″ and “I’m not a robot” Checkbox.
Next, add the domain of your website, that’s yourdomain.com and click “Save”.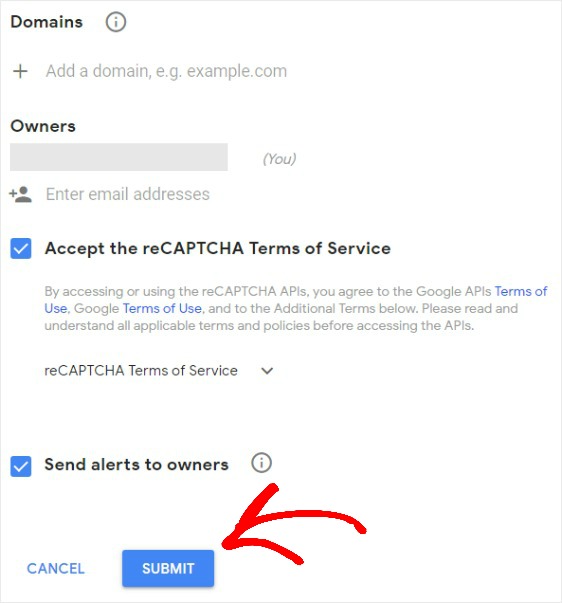
After that, you’ll get a unique site key and secret key for your website.
Copy your site and secret key. Then, go to “WPForms”>”Settings” and paste the keys respectively under the reCAPTCHA settings.
Don’t forget to save all your changes.
SOLUTION #2: Add an Invisible ReCAPTCHA Checkbox to Your Forms
If you want to make it even easier for your users to fill out your form, in which users can enter a form as usual without needing to check any box, then add Invisible Recaptcha Checkbox to your WordPress forms is the best solution for you.
WPForms allow you to build a spam-free form without CAPTCHA using the second option “Invisible Recaptcha Checkbox”.
Choose “Invisible reCAPTCHA v2”.
reCAPTCHA is free but you’ll need a site key and secret to use it.
To generate your keys, go to Google’s reCAPTCHA setup page.
Then, click “Admin console” at the top right corner to continue.
Log in to your Google account and you’ll be taken to a page where you can register your website for reCAPTCHA.
If you have already registered a site for reCAPTCHA before, you’ll come to a different screen. Simply click “+” to register a new site and type in the name of your website.
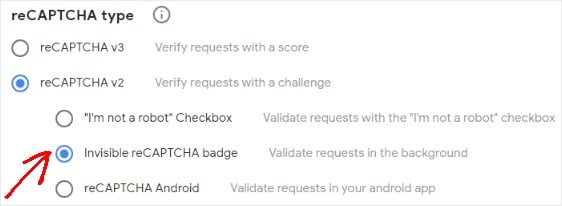
Simply select the type of reCAPTCHA you’d like to add to your site. In this example, we choose “Invisible reCAPTCHA badge” Checkbox.
Next, add the domain of your website, that’s yourdomain.com and click “Save”.
After that, you’ll get a unique site key and secret key for your website.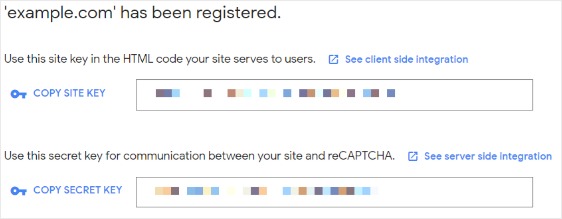
Copy your site and secret key. Then, go to “WPForms”>”Settings”.
Make sure you’re selecting “Invisible reCAPTCHA v2″ as your Type and paste the keys respectively under the reCAPTCHA settings.
Don’t forget to save all your changes.
Step 3: Enable reCAPTCHA Checkbox or Invisible reCAPTCHA on Your Contact Form
Whether you’re using reCAPTCHA checkbox or Invisible reCAPTCHA, follow the same step 3 to add the reCAPTCHA to the WordPress form.
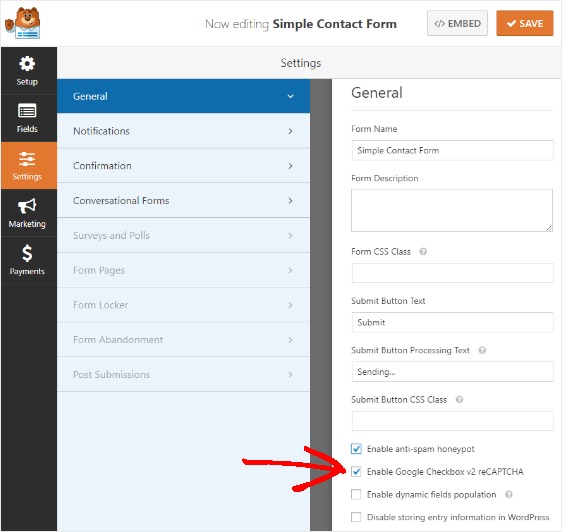
To do that, go to “Settings” > “General”. On your form editor, check the box next to “Enable Google Checkbox v2 reCAPTCHA” and click “Save”.
Now you’re ready to add your contact form with Google reCAPTCHA to your blog or website.
Step 4: Add Contact Form to Your Website/Blog
With WPForms, you can add your contact forms anywhere on your site including pages, posts, sidebar widgets etc
Usually, you’ll want to add the form to your page or blog post.
So let’s create a new page or post on your WordPress. Click “Add WPForms” and select the form you want to embed from the dropdown.
Your form will appear on your page or post once you click “Publish” button.
That’s it. You’ve successfully create a contact form with reCAPTCHA Checkbox on your WordPress site.
Now every time a person filling out a form on your blog or website, Google will automatically detect whether it’s a human or a spam bot trying to submit a fake form.
BONUS: Enabling Anti-Spam Honeypot
 For added security, WPForms also offers a free tool called honeypot that helps to secure your web forms without CAPTCHA.
Honeypot is a hidden field added on all your forms that’s visible to a spambot but not your users.
A spambot will fill out this honeypot field and the form will be rejected as spam.
Since this honeypot is a hidden field, users can never see it and will never enter this fill.
The best part?
By default, this honeypot setting is turned on for all forms on your website, regardless of whether your enable Google reCAPTCHA or Invisible CAPTCHA.
In case you want to see whether it’s activated on your site, go to “Setting”>”General”.
Near the bottom of your form editor, you can see the option “Enable anti-spam honeypot” is enabled for you.
Conclusion
There you go! Now you know how to protect your site from spam submission by using Google Checkbox reCAPTCHA and Invisible reCAPTCHA.
Plus, you will get a the free security tool, anti-spam honey for free with WPForms.
It’s really that simple.
- If you’re using reCAPTCHA v2 , your users will need to check the box “I’m not a robot”.
- If you’re choosing Invisible reCAPTCHA, your users will not see any captcha and will just submit their form as they normally do without any extra action.
So what are you waiting for? Get WPForms for free, implement reCAPTCHA on your online forms and start generating quality leads!
If you’re looking for advanced features such as Conversational Forms, Signature Forms, Payment Forms, you can upgrade to their Pro version.
Use this link to get 50% OFF on WPForms
Here are few things that you can easily do with WPForms plugin:
- Create forms with electronic signatures with WPForms
- Create order forms with online payments with WPForms
- Create conversational forms with WPForms
- Create Stripe payment forms with WPForms
Pro Tip: Use MonsterInsights plugin to track your form performance. Simply activate its Forms Tracking addon, it will help you better understand your audience and optimize your form for maximum conversions.
Do you have any question about adding reCAPTCHA to your WordPress forms? Tell me in the comments!
Also read:
- 12 Best Free WordPress Plugins Every Blog Needs
- How to Blog Yourself into Popularity Plain and Simple…
- I’m Sick of My Emails Going to Spam – Are You?
Last but not least, if this post was of any help to you, please share it on Facebook, Pinterest and Twitter.
A quick share from you would seriously help the growth of this blog.
Thank you so much!
I live and breathe making an income online.
I’ll be sharing more ideas and guides soon. Stay tuned.
If you haven’t already, sign up here to receive my emails.

